Dark Cloud
Platform: 

Dark Cloud [By rpgclassics.com]
- Norune Village and Divine Beast Cave
- Matataki Village and Wise Owl Forest
- Queens and Shipwreck
- Muska Lacka and the Sun & Moon Temple
- Yellow Drops and the Moon Sea
- Dark Heaven Castle and the Gallery of Time
- Demon Shaft
Norune Village and Divine Beast Cave
 |
 |
 |
||
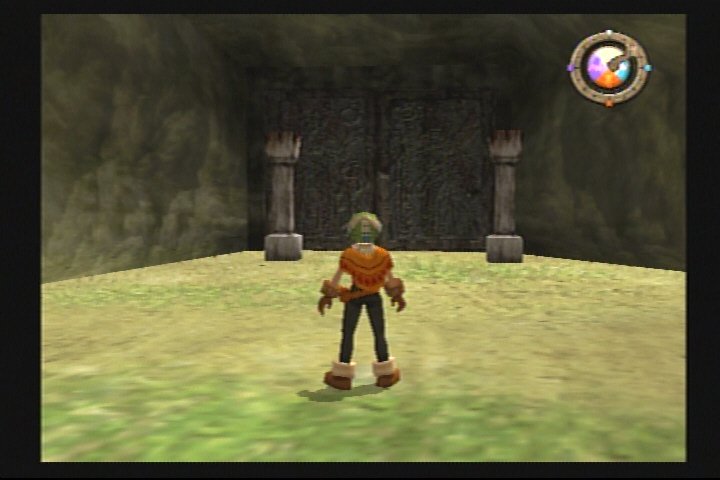
| The Divine Beast Cave is in the corner of the Norune Village lot, opposite the town entrance. If you press the Select button, you will enter Georama mode, and can move Toan quickly to the cave entrance. Approach the cave doors. When you see the ! appear, press the □ button to open the item menu, and select the Cave Key to open the doors. | ||||
| B1: As you enter, you will be greeted by the Fairy King. He will tell you that you must find the gate key to advance to the next floor. It will be carried by a monster, but you won't know which one. When all monsters on the floor have been defeated, the gate key will have been dropped, and you can go on to the next floor. | ||||
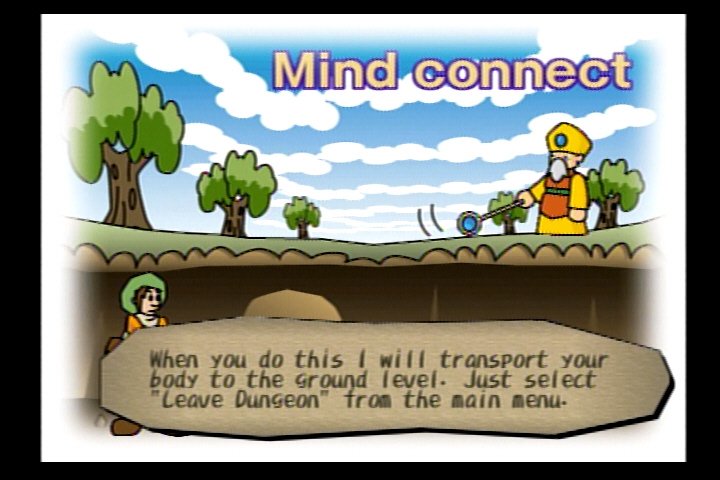 |
You can also Mind Connect with the Fairy King to leave the dungeon when all enemies have been defeated. If you need to leave when monsters still remain, they will block the Mind Connect, and you will have to use an Escape Powder. If you have no Escape Powder, you will lose half your money by escaping. The best way to leave is by using the gate key, because it will allow you access to the next floor, while the other methods will require you to repeat the floor. You cannot advance without the gate key. In the Divine Beast Cave, the gate key is Dran's Crest. | 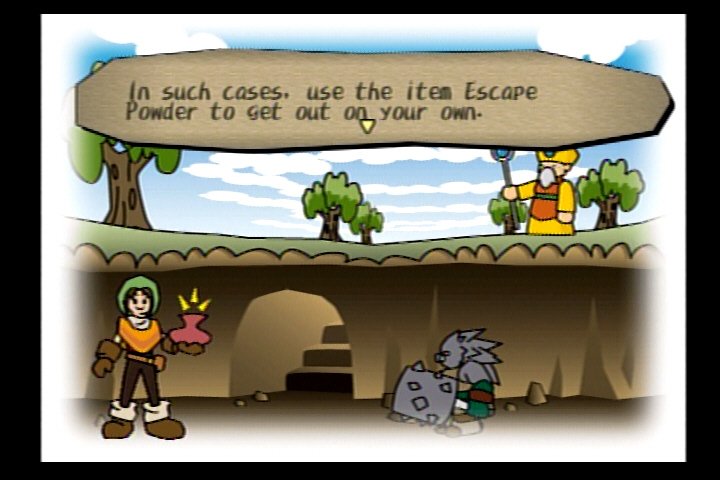 |
||
| The Fairy King will also explain weapon use. As a weapon is used, its durability, or WHp (Weapon Hit Points) will decrease. If the WHp of a weapon reach zero, the weapon will break and disappear. The only weapons which will not disappear when they break are the ones that each character starts with. All other weapons will disappear when their WHp reach zero, so it is important to keep an eye on your weapon, and repair it whenever its WHp get low. |  |
Weapons can be repaired with Repair Powder, which is inexpensive, and will fully refill any weapon's WHp, regardless of its level. Auto Repair Powder can be placed in a quick item slot, and will be used automatically to repair a broken weapon, preventing its disappearance. However, it is quite expensive and should be kept equipped in case of emergency only. As you use a weapon, it absorbs power from the enemies it defeats. When it reaches full strength, it can change into another, more powerful, weapon. | ||
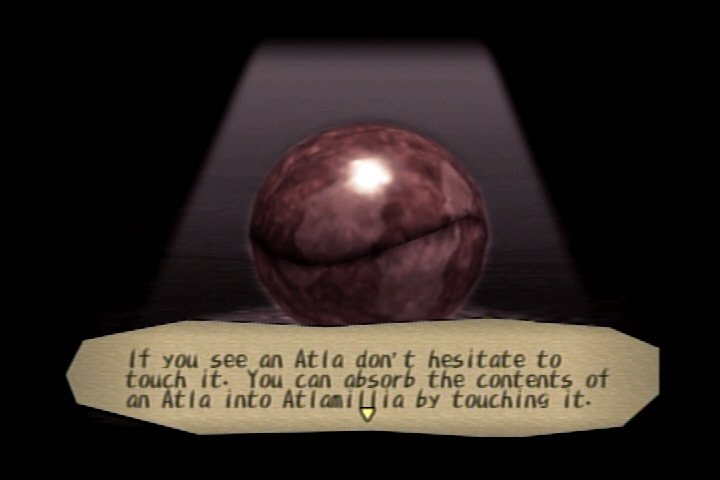 |
The Fairy King will inform you that the atla can be found here in the cave. You must touch each one, which will open it. The contents will then be absorbed by the atlamillia. Only Toan can open atla. | 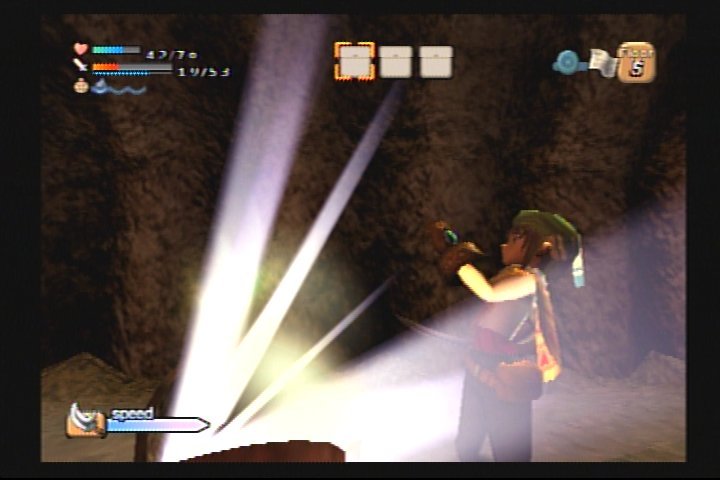 |
||
| Progress through the floor, attacking enemies and opening chests. Once you have defeated the enemy holding the gate key, you will be free to leave. However, it is best to defeat all the enemies and open all the chests if you are able to do so. Also, you must open all the atla if you don't want to repeat the floor. When you are ready, use the gate key at the exit (marked on the map by a yellow square) and press X at the top of the stairs to descend. You will be given the option to leave the dungeon or continue. It is generally best to leave the dungeon between floors, as this will allow you to restock, work in georama mode, and save the game. If you ever have to leave a floor before completing it, the number of atla still remaining on the floor will be shown when you return. | ||||
| When you are back outside, you will see the Fairy King again. He will explain how to use the parts from the atla to rebuild the village. Press the Select button to enter georama mode, and see if you have any components that can be placed in whatever buildings you may already have. You can also use georama mode as a shortcut to the mayor's house, since you can move your cursor to place Toan directly there, rather than walking all the way. Speak to the mayor, and he will supply you with more necessary items. Make sure you are full on water, health, and WHp. If you are not, use the necessary items, and then speak to the mayor again. As long as you do not have any in inventory, he will give you water, bread, repair powder, an antidote potion, and escape powder. You will have to depend on his bounty until you are able to restore the Gaffer's shop, which should not be done until Pike has been placed in the georama. When you are ready to proceed, save the game and reenter the Divine Beast Cave. | ||||
| B2: On B2, Toan will be surprised by a cat, who appears to be equally surprised by him. The cat runs away, but you will see her again. Complete this floor in the same manner as the first, opening atla, defeating enemies, and opening chests. Be aware that certain enemies, such as metal or rock ones, will rapidly deplete your WHp, so keep on eye on that. Upon obtaining the gate key, you are free to leave the floor. Leave the dungeon, save, and restock. You can work in georama mode if you wish, or wait until you have collected more parts. | 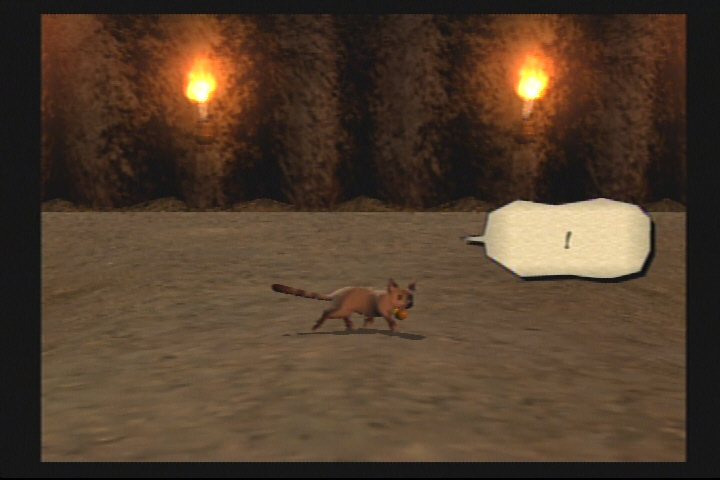 |
|||
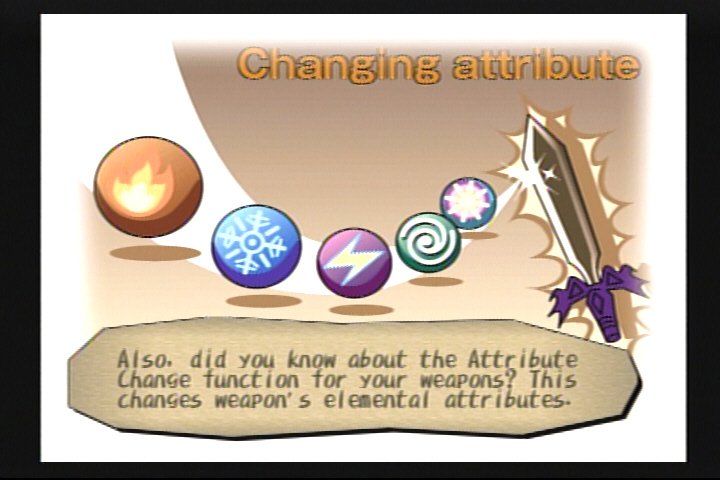 |
B3: On the third floor, the Fairy King will be waiting again. He will explain locking on to enemies and guarding, as well as how to change weapon attributes. You can lock on with the ○ button; pressing L1 while locked on will switch you to another enemy. To guard, use the R1 button, which will provide Toan with some protection from enemy attacks. Weapon attributes can be changed by entering the weapon menu and using the Attribute or Customize command. You will sometimes wish to change a weapon's elemental attribute to one which is more effective against the enemies you are fighting. For instance, in the Sun and Moon Temple (later in the game), Holy is an excellent attribute to use, because many of the monsters inhabiting its floors are undead. | |||
| B4: Upon entering B4, you will be met by three Skeleton Soldiers. Defeat them, and another will appear. The Fairy King will explain that this one is much stronger, and you must duel him. In a duel, a series of symbols, indicating buttons on the controller, will move across the screen from right to left, and you must press the correct button as the matching symbol passes across a light blue bar near the left side of the screen. Even if you win the duel, your timing will determine the results. If you manage to press each button while its symbol is within the blue bar, you will see OK! on the screen, but if you press the button precisely in the center of the bar, you will see COOL! (To do this, you must actually press the button just before it reaches the center, to allow for a slight delay.) | 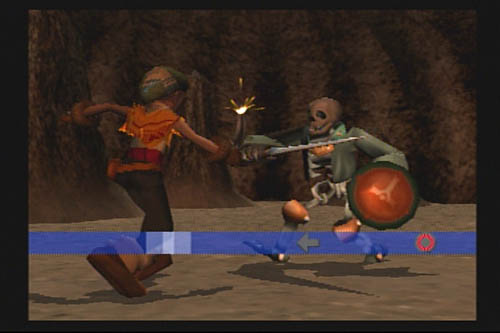 |
|||
| If all your button presses result in a COOL! rating, you will receive something extra after the duel - a random jewel from the Terra Fairies. If you miss any of the buttons, you will lose the duel and have to repeat it. After the duel is over, open the two chests to obtain a Powerup Powder and Dran's Crest. You can now exit the floor. | ||||
| B5: What a surprise! The Fairy King is waiting for you again ... this time to explain the Charge Attack. To perform a charge attack, hold down the X button, and then release it after the character begins to flash. (Toan's initial charge attack is the Jump Slash.) The Fairy King will then explain the use of attachments. Enter the weapon menu and select Customize. This will allow you to place attachments, which can add to the attack, elemental, and monster-specific stats of the weapon. When a weapon is upgraded, any equipped attachments will be absorbed into the weapon. The first time a weapon is upgraded, it becomes a +1. The number increases with each subsequent upgrade. Once a weapon reaches +5, you can perform a Status Break on it. This will turn the weapon into a Synth Sphere - an attachment containing 60% of the weapon's attributes. The exception to this is a character's original weapon. Performing a status break on an original weapon will produce a synth sphere, but the weapon will not disappear. Instead, it will return to its original state, losing the + levels it had gained. This can be a quick way to level up other weapons, but be certain that you will never need a weapon again before considering the Status Break option. | ||||
| B6: Your feline friend reappears on the sixth floor. She will start to run away, stop, turn around and look at Toan, and then run away in earnest. Obviously this cat is significant in some way. | ||||
| B7: The Fairy King is ready to explain Back Floors. These are optional areas accessed with special items, and they contain stronger enemies and more valuable treasure chests. The Divine Beast Cave back floor key is Tram Oil. If you use it at the large red question mark on the map, you will be able to jump in the old mine car and travel to the back floor. (You will return by the same method.) Be careful of the enemies, as they are tougher versions of the ones you have been fighting, or enemies from floors you have not reached yet. Treasure chests in back floors sometimes contain jewels, which makes them very profitable. I would recommend completing a floor entirely before entering its back floor, or, at the very least, obtaining the gate key first. A floor's enemies, and sometimes its treasure chests, will respawn after you return from the back floor. If you have already completed the floor, it will not be necessary to defeat any of the new enemies, as you will already have the gate key. Furthermore, any treasure chests which appear on a main floor after completing its back floor will contain Mimics, so you should take this into consideration before opening any of them. | ||||
 |
The Fairy King also wishes to tell you about Limited Zones. These are floors which place certain restrictions on you. Some will allow you to use only a particular character, some will make your characters grow thirsty much more quickly, and some will reduce the Abs of the equipped weapon with each enemy defeated. These floors will prevent your changing weapons, as well. That makes them a good place to use any attack items that you might have available, since enemies defeated with items don't affect a weapon's Abs gauge. If you save before entering an Abs-reducing Limited Zone, you can restore your saved game and change weapons before entering. If you equip a weapon with nothing in its Abs gauge, the Limited Zone will make no difference in its status. This floor is an Abs-reducing Limited Zone, so keep that in mind when attacking. | |||
| B8: The mysterious man seen in the opening movie is waiting on B8. He asks Toan for the atlamillia, but is, of course, refused. He informs Toan that a boy like him is no match for the Dark Genie, and is then possessed by some evil force. (The red eyes are a dead giveaway.) It is time for another duel. Toan sees his little kitty friend cowering behind him, and is then attacked by the crazed stranger. Toan falls without fighting back or dodging, and his attacker ridicules him, but then realizes that Toan stood his ground solely to protect the cat. The strange man suggests that one day the cat can return the favor. He then gives Toan a Changing Potion and departs. A lightning bolt seals the cat in an atla, which Toan must open. Mind Connect to the Fairy King to leave the floor. | 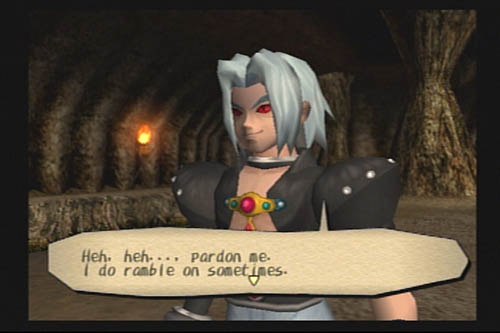 |
|||
| After finishing the eighth floor, you must spend some time working in Georama Mode. Place pieces in the identifiable slots in the available building parts, and then place the buildings in the georama. For the parts that show up as question marks, you will have to talk to the villagers. After placing a building, exit to Walking Mode and talk to any residents of the building. Ask them how to rebuild Norune, and what they would like in their homes. This will tell you both where to put the building in the georama, and what pieces should go in the previously unidentified slots. After completing a building in Georama Mode, enter the building in Walking Mode. You will witness an event and receive a reward of some kind. | ||||
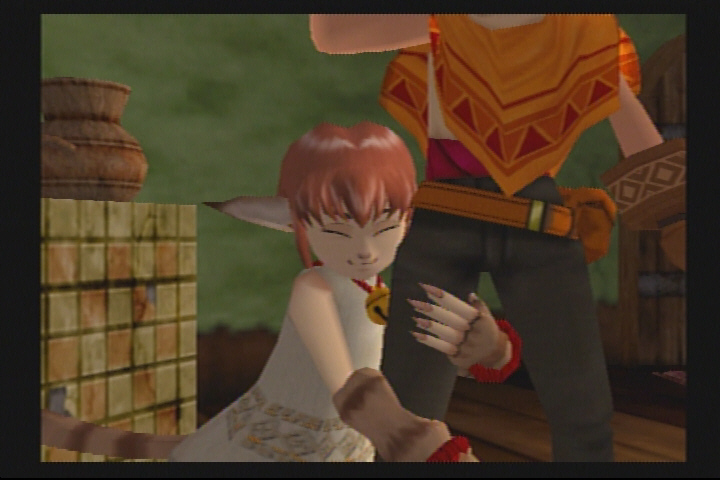 |
The first building you should complete is Toan's house. You will have to place the house and speak to Toan's mother, Renee, to be able to complete it. After you have all the necessary pieces in the house, including the cat, enter the house and see an event. The cat is waiting inside the house, and jumps into Toan's arms as he walks in. You must name the cat (whose default name is Xiao). Afterwards, you will automatically exit the house. Reenter to find the cat on Toan's bed. When you see the exclamation point, use the square button and select the Changing Potion. The cat will turn into a human, and will join your party. Toan's mom asks about his new friend. | |||
| Toan then finds himself in darkness with the Fairy King before him. The Fairy King explains about using allies, which can only be done in dungeons. Switch to an ally with the Select button, or use the menu and choose Allies. Xiao can jump across gaps that Toan cannot get across, so she will be very important in your dungeon crawling. | ||||
| Back to B8: Switch to Xiao to jump the gap, and open the chest to obtain Dran's Crest. Leave the floor. | ||||
| Most of the remaining floors are unremarkable, but B11 is a Limited Zone requiring the use of Xiao only. After completing B14, return to the village to finish restoring it. There is a clock in the upper right corner of the screen which you should notice. Each day is divided into four segments, which are designated on the clock as four different colored sections. The time of day will sometimes determine where you will find the villagers or what item you receive in a georama event, so you will need to take note of the time. | ||||
| Important: Place Paige's House, with Pike in it, before placing the Gaffer's Buggy. If you do not, Gaffer will put up his own sign and injure himself in the process. As a result, his inventory will be greatly reduced. | ||||
| Important: Witness the event in Claude's House in the morning, or you will not receive an item which will be needed in the next village. (If you enter Claude's house in the afternoon, he will be sleeping. If you enter it at night, well . . . did you ever play Final Fantasy VII? Remember the disturbing room at the Honeybee Inn in the Wall Market? This isn't much better. If you enter Claude's house at night, he will be bathing. When he sees you, he will . . . er . . . invite you to join him. And give you some soap. And cheese. Please avoid this at all costs.) | ||||
| Identify the rest of the pieces needed for the georama parts, and place the buildings according the villagers' wishes. After you have viewed the events in each home, you should enter Georama Mode and check the georama analysis. If you have placed all the parts in accordance with the requests of the villagers, you should be at 87%. It is impossible to achieve 100% before defeating the boss, because part of the Hag's request is to see that Dran is safe. | 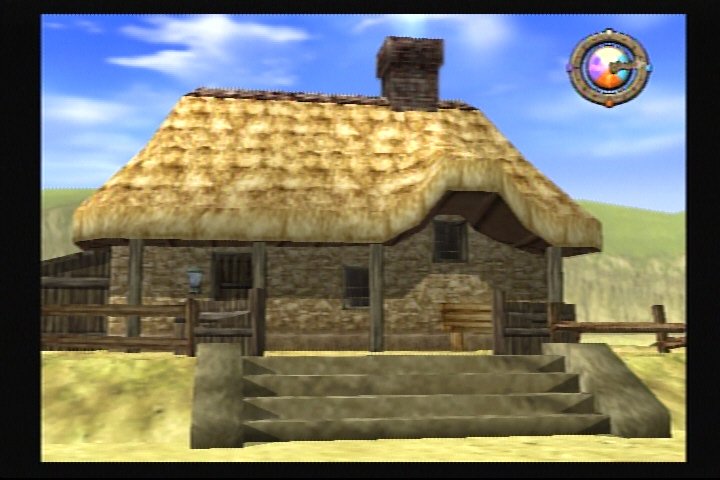 |
|||
| As you place the buildings, you will notice chests in various locations, These are Miracle Treasure Chests, and they appear as you access new floors of the Divine Beast Cave. You can open them as they appear, or wait and open them after the village has been restored. They can contain items and attachments, which will save you quite a bit of money, as well as some items that can't be bought anywhere in the game. These include character-specific items which increase defense, Gourds, which fully quench thirst and increase a character's thirst meter by 1, and Fruits of Eden, which completely restore HP and increase a character's max HP by 10. | ||||
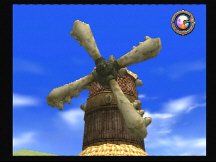 |
After completing the village, enter Dran's Windmill and open the chest containing the Horned Key. Go to the Hag's House and store any items you won't need immediately, and then go the Gaffer's Buggy and buy as many bombs as you can. Equip them as quick slot items. Save the game, and return to the Divine Beast Cave. On B15, use the Horned Key to open the door to the final chamber. | |||
| Boss Battle: Divine Beast Dran HP: 200 |
I generally use Xiao for the entire battle. Target Dran and shoot at him. When you hit him, he will flash red and land for a few seconds. As soon as he lands, run up behind him and throw a couple of bombs at him. Then run for the side of the room. If he blasts you while you are in the main part of the room, his attack can hit the floor and cause a large portion of it to fall away. If you fall through a hole in the floor, you will sustain significant damage. Once Dran is in flight again, repeat the process. Keep doing this until he has been defeated. It is important to remember to stay to the side when you aren't attacking, and to keep your quick slots filled with bombs. |  |
||
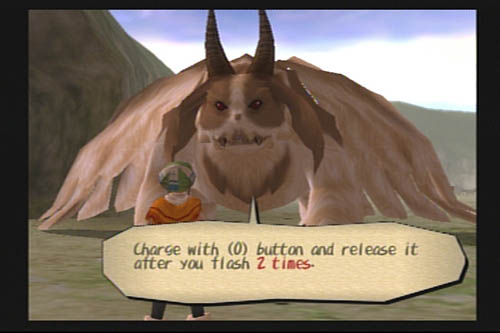 |
If you are unable to afford bombs, the battle will be considerably longer. Shoot at Dran with the slingshot, then switch to Toan after you hit him. Run up behind him and attack with Toan's sword, then run to the side. The procedure is similar to that you use with the bombs, but it will take quite a while to defeat Dran this way. After the battle, Dran will no longer be under the Genie's control. He wants to know what has happened, and is very apologetic. He offers to give Toan a ride back to the village, so Toan climbs on Dran's back. After landing in the village, Dran will reward Toan with the Windmill Slash special attack. This is much appreciated, even though Dran does tell you to use the ○ button instead of the X button for the charge attack. Oh, well, Dran's had a hard day. | |||
| If there is any part of the village you have not completed, do so now. Once everything is placed and the villagers are 100% satisfied, a scene will occur which shows a panoramic view of the village. Then Dran will return with another gift for Toan - a world map. This map will allow you to teleport instantly to any area that is marked on it. Matataki Village, the next area you must restore, will be available from this map. | 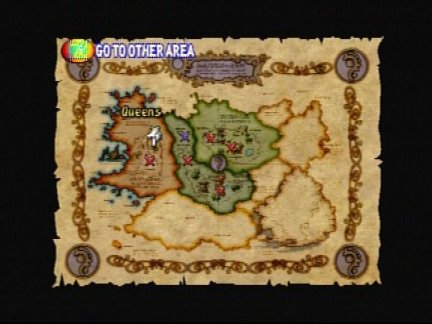 |
|||
| After finding all the Miracle Treasure chests, visit the Hag and store any items you don't have room to keep in inventory, and then save the game, open the world map, and teleport to Matataki Village. | ||||
Norune Village Georama
| Georama Part | Georama Pieces | Event Item/Occurrence |
| My House | Keg, Chimney, Upstairs Storage, Renee, Llama, Stray Cat | Xiao acquired |
| Macho's House | Fence, Lamp, Annex Room, Barbell, Macho, Komacho | Stone Breaker |
| Laura's House | Fence, Lamp, Cabin, Tricycle, Auntie Laura, Gina | Dran's Feather |
| Paige's House | Fence, Lamp, Cabin, Wheels, Pike, Paige | |
| Claude's House | Fence, Lamp, Cabin, Bench, Candy Box, Claude | Candy or Soap and Cheese |
| Hag's House | Fence, Lamp, Cabin, Bench, Jar, Hag | Storage space |
| Alnet's House | Lamp, Cabin, Stairway, Alnet, Carl, Llama | Fishing Rod |
| Gaffer's Buggy | Supplies, Sign, Lamp, Odd Gaffer | Store opens |
| Dran's Windmill | Dran's Blades, Torch, Dran's Horn, Sign | Windmill blades begin turning |
| Small Windmill 1 | Windmill Vanes, Ladder | N/A |
| Small Windmill 2 | Windmill Vanes, Ladder | N/A |
| Small Windmill 3 | Windmill Vanes, Ladder | N/A |
| Pond | N/A | N/A |
| Trees (10) | N/A | N/A |
| Road (25) | N/A | N/A |
| River (20) | N/A | N/A |
| Bridge (5) | N/A | N/A |
| Villager |
Placement Requested |
Georama Pieces Requested |
| Komacho | Not have to go far for good workout (near cave) | Fence, Lamp |
| Macho | Close to where he can fight (near cave) | Annex Room, Barbell |
| Pike | Place close to fishing | Wheel |
| Claude | Where he can smell good food | Candy Box |
| Renee | Have sun shine in and wake her | Chimney, Storage Room |
| Gaffer | To be near houses so he can do some business | Supplies, Sign |
| Paige | N/A | Lamp |
| Laura | Far away from the noise of the mayor's house | Storage Cabin |
| Gina | N/A | Tricycle |
| Hag | In front of Dran's Windmill (and save Dran) | Bench, Jar |
| Carl | N/A | Storage Cabin |
| Alnet | Away from Macho brothers | Lamp |
Sample Norune Village Georama (100%)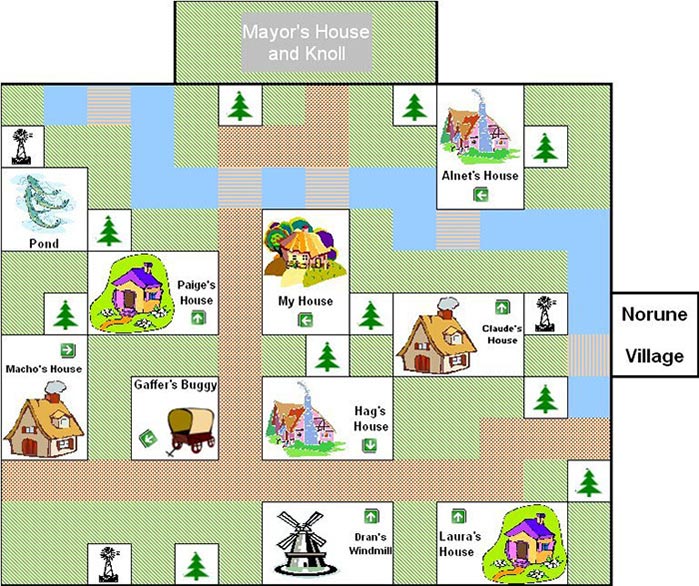
 |
 |
 |
||
| When Toan enters Matataki Village, he will see a strange boy watching him. The boy will then turn and run, and you need to follow him. When you get to his treehouse, he will jump down and blame Toan for the destruction of his village. This is another duel, and if you lose, you must exit the glen and reenter to fight him again. After defeating him, you can change his name, or accept it as Goro. He will drop a Hunter's Earring, which you must pick up. Talk to him again, and then leave the glen. | 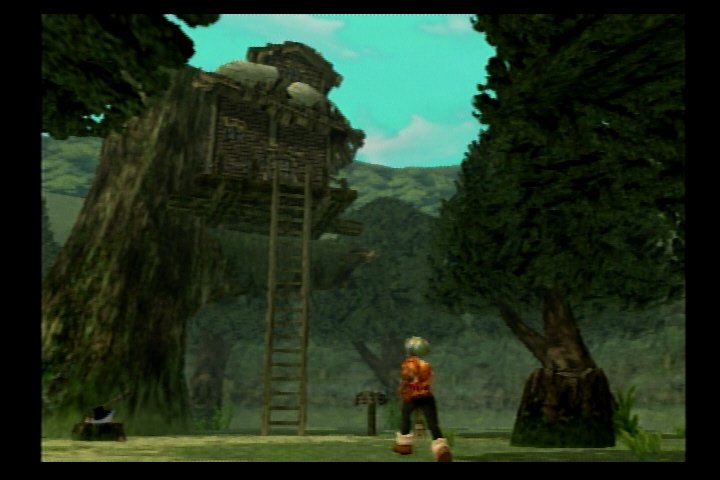 |
|||
| Move to the end of the village opposite the waterfall, and enter the passage there. You will find a withered tree. The Fairy King will appear and explain that the tree, Treant, must have water before he can speak. You must find enough atla in the Wise Owl Forest, this area's dungeon, to restore the river. The Fairy King will clear the way for you to enter the Wise Owl Forest. | ||||
 |
Territory 1: You will discover that the Wise Owl Forest has three possible gate keys, rather than just one. The Wise Owl might want a Red Berry, or a Pointy Chestnut, or maybe a Shiny Stone. You can try the gate keys as you find them, or wait until you get all three before trying to leave the floor. As before, you should find and open all atla before leaving a floor, and you will have the option to continue on or to exit the dungeon after leaving a floor. Again, I would recommend leaving the floor and saving before continuing. You will not be able to buy supplies in Matataki until you have restored Mr. Mustache's shop, so it will be necessary to return to Norune Village and buy what you need from the Gaffer for the time being. | |||
| Territory 2: This is an Abs-reducing Limited Zone. | ||||
| Territory 4: This is a limited zone requiring the use of Xiao. Since Toan cannot enter this floor, there are no atla to be retrieved. Just fight as many enemies as you must to get a gate key, then take it to the owl and see if it is the right one. If not, keep trying till you get a key which will allow you to leave. Of course, if Xiao has a powerful weapon, like the Bandit Slingshot, you may want to do the entire floor to gain experience and items. | ||||
| After completing B8, you will need to work in georama mode. Restore Cacao's house, and speak to him. He will tell you about Fudoh (Goro's father), sing you a song, and give you an Odd Tone Flute. You will need this to bring the Killer Snake out into the open. Then place the river parts so that the riverbed runs from the waterfall to the entrance to Treant's domain. Once it is complete, two little gnomes will run out and open the dam, allowing water to flow through the village. You can now go speak to Treant, but you will not be able to understand him unless you equip the Hunter's Earring. Once you have done so, speak to Treant. He will bestow on you, by way of a giant sneeze, the Serpent Sword. This weapon cannot break until it has served its purpose, which is to defeat the Killer Snake. Equip the Serpent Sword, and enter B9 of the Wise Owl Forest. | 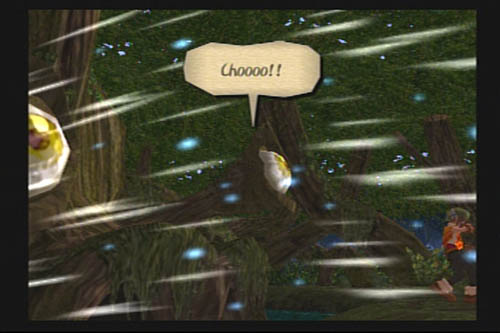 |
|||
| Territory 9: When you enter the floor, you will have to duel two werewolves. After defeating them, approach the cave opening. Press the □ key, and use the Odd Tone Flute to attract the Killer Snake. When he emerges, you must fight another duel. If you fail to defeat him, you will have to repeat the battle until you win. After he falls, you will get the Bone Pendant, and the Serpent Sword, having fulfilled its purpose, and is now a breakable, evolvable weapon like any other | ||||
| Take the Bone Pendant to Goro. Inside it is a message from his father, Fudoh. Goro learns the truth about his father's disappearance, and must accept that he has been wrong about the villagers. He is now free of his bitterness, and ready to rejoin society. He joins your party with renewed hope. | ||||
| Back at B9, use Goro to open the floor-based switch which blocks your path. There will be many more switches of this type throughout the game, and Goro is the only one who can open them. Proceed to B10, and continue with your dungeon exploration and atla-gathering. | ||||
| Territory 10: This is an Abs-reducing Limited Zone. | ||||
| Territory 12: This is a Limited Zone which forces you to use Goro. Just try to get through it and find the gate key as fast as you can. I would recommend taking each key to the owl as you find it, so that you don't have to stay on this floor any longer than necessary. Goro is using a weak weapon, and the enemies here are rather tough, so you won't want to stay here long. Use attack items if you have them. The gate keys tend to be held by difficult enemies (like Earth Diggers), so bombs are a big help here. | ||||
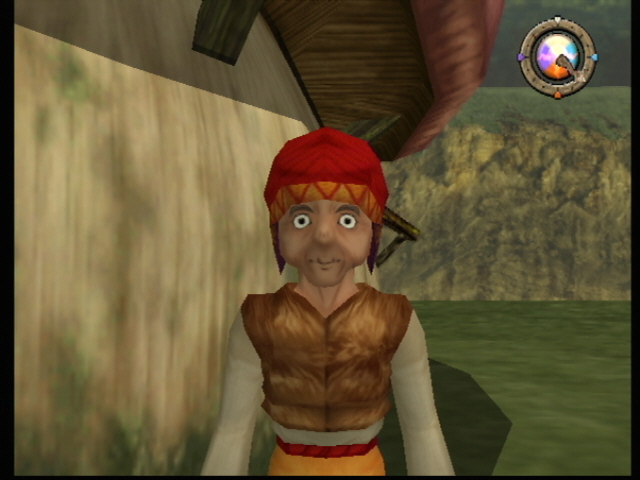 |
Apparently it's true that if you live together long enough, you start to look alike. | 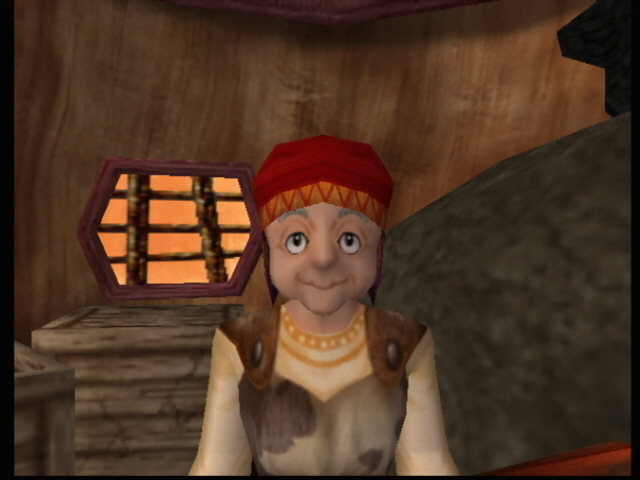 |
||
| Territory 15: This is an Abs-reducing Limited Zone - another good place to use attack items, if you have them. | ||||
| After Territory 16, you should return to Matataki Village and complete the georama. In the event at the Mushroom House, you will receive the Moon Grass Seed, which you must have to get access to the boss in the Wise Owl Forest. You will also need a Sun Dew to fertilize the Moon Grass Seed. If you have used all your Sun Dews to unlock back floors in the forest, be sure to get the one out of the chest in the Mushroom House. Don't forget to view all the scenes and open the Miracle Treasure Chests as you go. Couscous will store items, weapons, and attachments for you if you are short on space. When you have completed the georama and achieved 100% in the evaluation, there will be a scene with Treant. As a reward for making the villagers happy, Treant will give Toan a Powerup Powder. Goro will run up and ask where his reward is. Treant, delighted to see Goro showing his spirit once again, gives him a Battle Ax. Equip it at once - you're about to need it. | ||||
| Territory 17: Use the Moon Grass Seed at the !, and a plant will grow. Use the Sun Dew, and it will become large enough to walk up. This provides access to the area where the boss, Master Utan, is waiting. | ||||
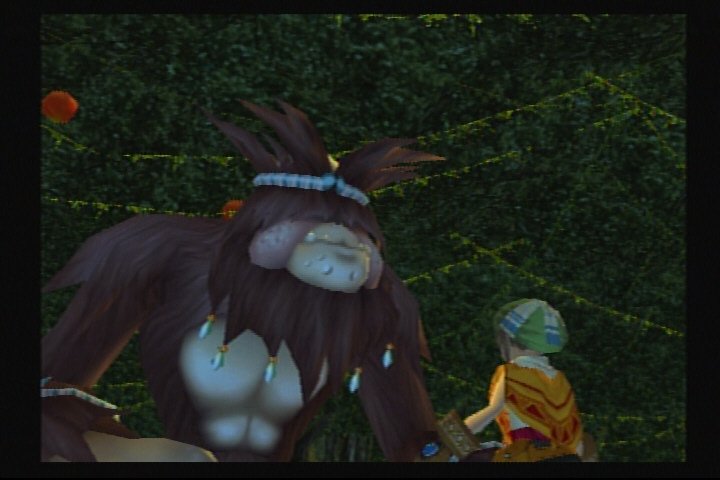 |
Boss Battle: Master Utan HP: 375 |
You need to use Goro in this battle. Consider giving him a stamina potion. Run up to Master Utan and attack him with Goro's axe, then run. Try to avoid Utan's spitting attacks, because they can do great damage. Stay on the move, and try to stay fairly close to the boss, because the spitting attacks seem to occur more often when Goro is farther away. After Utan has relaxed his guard from the last attack, hit him again. When you have repeated that procedure several times, Master Utan will fall. Speak to him, and ask for help getting to Brownboo Village. He will remove a large boulder blocking your way, and then sit down and fall asleep. | ||
| Brownboo Village: This is the home of the Moon People who live on Blue Terra, and is quite a pretty place. Walk into the the village, and go counterclockwise around the circular pathway until you automatically come to a stop. One of the Moon People, none of whom tend to like humans, will drop a rock on your head. Once you have convinced them that you mean no harm, and are trying to put an end to great evil, they agree to work with you. The Moon People were the ones responsible for sealing the Dark Genie away all those many years ago, but they are no longer able to perform such a task. They suggest that the Moon People still living on the moon may be able to, however. But first, you must help them retrieve the Moon Orb. It allows them to control the Moon Ship, which is to be your means of traveling to the moon. It seems to have been included, entirely by accident, in a shipment of fruit that was taken to Queens. The Moon People will mark Queens on your map, giving you the means to access your next destination. | 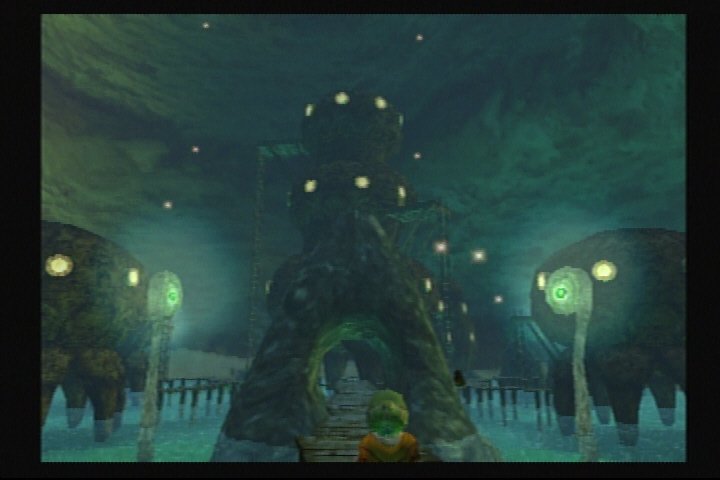 |
|||
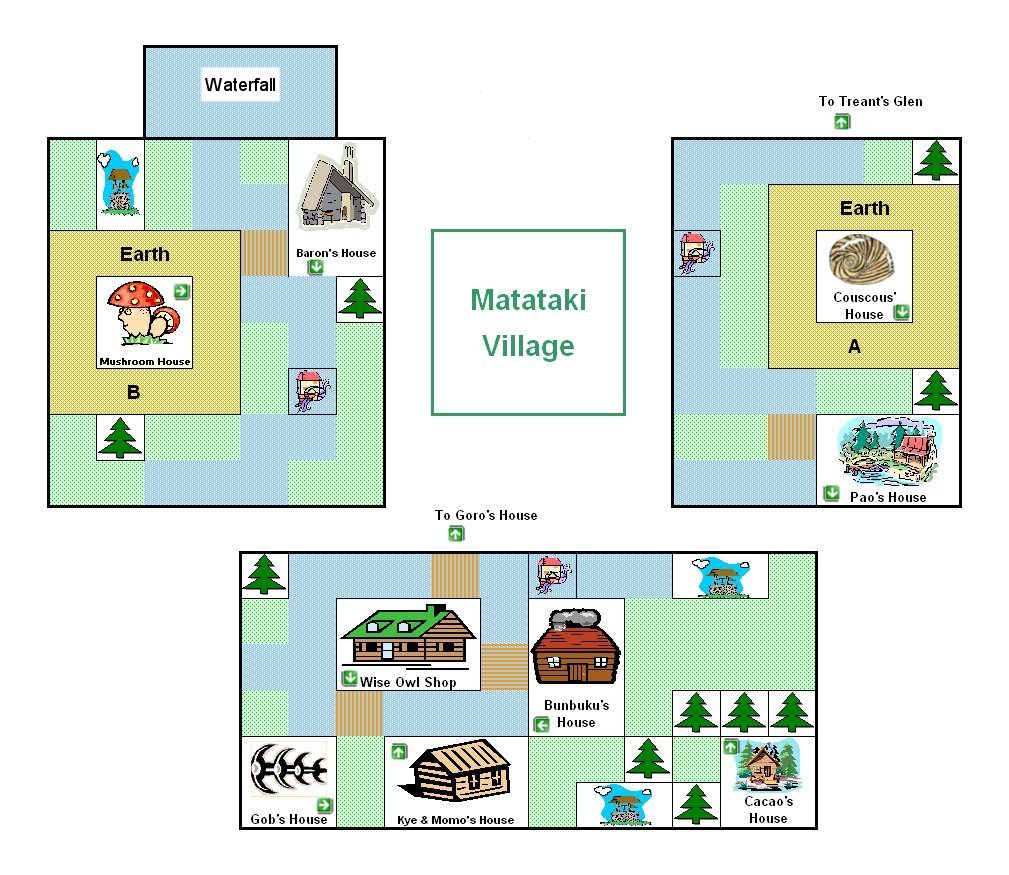
Matataki Village Georama
| Georama Part | Georama Pieces | Event Item/Occurrence |
| Baron's House | Torch, Sign, Roof, Branch, Ancient Baron | Baron tells story of Fudoh, gives Gourd |
| Wise Owl Shop | Torch, Sign, Entrance, Wise Owl Entrance, Mr. Mustache | Shop opens, offers to sell Wise Owl Sword |
| Pao's House | Torch, Sign, Stairway, Laundry, Pao | Pao cooks meal, gives hint about Moon People, gives Toan Fruit of Eden |
| Bunbuku's House | Torch, Sign, Stairway, Cabin, Bunbuku, Kululu | Bunbuku needs Candy, gives Toan Ointment Leaf |
| Mushroom House | Torch, Sign, Second Floor, Balcony, Ro, Annie | Invite Toan to see view, give Moon Grass Seed |
| Kye & Momo's House | Torch, Sign, Stairway, Cabin, Kye, Momo | Kye makes scene on roof, Momo gives Plant Buster |
| Cacao's House | Torch, Sign, Stairway, Laundry, Cabin, Cacao | Tells story of Fudoh, gives Toan Odd Tone Flute |
| Gob's House | Torch, Sign, Bone, Tree, Gob | Gob cooks meal, gives Toan Frozen Tuna |
| Couscous' House | Torch, Sign, Grass, Couscous | Offers storage space, gives Toan Candy or Fire/Ice or Turtle Shell |
| Wells 1, 2, and 3 | Torch, Stairway, Roof, Bucket | N/A |
| Watermills 1, 2, and 3 | Torch, Water Wheel | N/A |
| Bridge (5) | N/A | N/A |
| River (40) | N/A | N/A |
| Trees (10) | N/A | N/A |
| Villager |
Placement Requested |
Georama Pieces Requested |
| Baron | to be very close to the water | Roof |
| Mr. Mustache | water all around shop | Wise Owl Entrance, Sign |
| Bunbuku | near watermill | Cabin |
| Kululu | N/A | Torch |
| Cacao | lots of trees close to house | Cabin |
| Pao | to be near Peanut Pond | Laundry |
| Annie | high, breezy place with good view | Second Floor |
| Ro | good view | Balcony |
| Couscous | high place | Grass |
| Kye | "Memories at the Bar" (ignore him) | Torch |
| Momo | to be close to Mr. Mustache's store | Sign |
| Gob | to be close to Momo's house | Bone, Tree |
Sample Matataki Village Georama (100%)
 |
 |
 |
||
| When Toan enters Queens, a seaside merchant town, he sees that it is empty, just as Norune and Matataki were. Walk down to the other end of town, and exit to the dock area. Toan is greeted by Rando, who thought he was the only person left in the world. Toan tells his story, and says that he is searching for the Moon Orb. Rando is very angry that the Dark Genie has been released, and says it is possible that the Moon Orb has been stored in the Shipwreck - an undersea storage facility used by the merchants of this town. Rando shows Toan how to use the one-man submarine to reach the Shipwreck. Before making your way there, however, stop in at Rando's shop and stock up on needed supplies. | 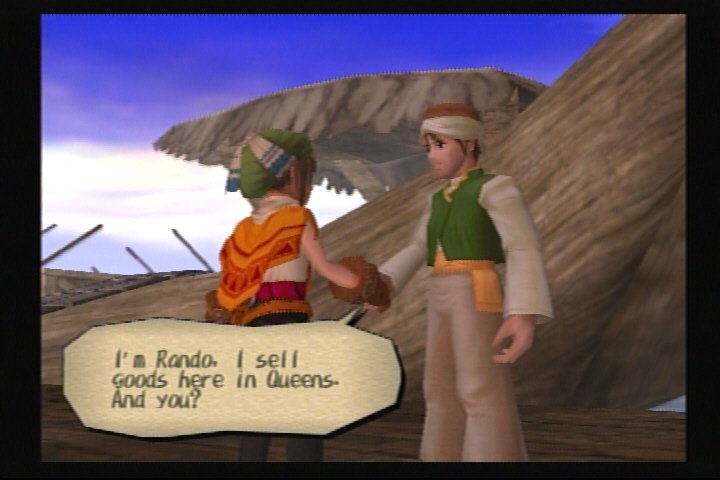 |
|||
| When you are ready, take the submarine to the Shipwreck. Approach the large hook and ride it to Layer 1 of the new dungeon. | ||||
| Layer 5: This is a Limited Zone requiring the use of Xiao. A ranged attack is better with most of the these enemies, anyway, so she is a good choice on any floor if she has a good weapon. | Layer 6: This is an extreme-thirst Limited Zone. You will need lots of water to get through it. | Layer 8: Another Abs-reducing Limited Zone. | ||
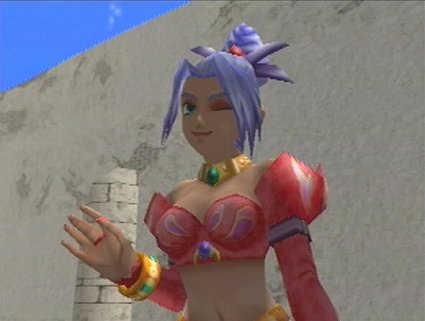 |
After Layer 8, take some time to work on the Queens georama. You will need to restore King's house before proceeding. After completing it, view the event there. King, a gangster by choice and suspicious by nature, believes that Toan will attempt to take advantage of him because he has restored King's home. King decides to "reward" Toan with an item he wants to get rid of, anyway. King presents Toan with a lamp, which Toan almost immediately, albeit accidentally, drops. The other men are horrified, because they know what is coming. A feisty and beautiful genie by the name of Ruby emerges from the lamp, wanting to know what King wants. After an amusing scene fraught with peril for King, Ruby determines that Toan is the one who called her forth. They have a talk, and Toan tells Ruby about the Dark Genie and the events that have taken place thus far. Ruby decides Toan is a noble fellow taking on an almost impossible task, and offers to join him in his quest. You will never regret taking her along. | |||
| Important: Do not view the event at Jack's without Ruby in your party. He will give you nothing if she is not present, but will come up with two weapons for you if Ruby is hovering over him. To say he is afraid of Ruby is like saying the ocean is big. Take advantage of this. | ||||
| Layer 9: You will be greeted here by a Captain, a Corcea, and a Pirate's Chariot. You must defeat them before proceeding. Open the chest to get the gate key, and then use Ruby to open the gem-based door lock. Examine the gem to determine that it is red. This indicates that you need to use fire to activate it. Fortunately, Ruby has a weapon with the fire attribute. Switch to first person view, move the camera so that you are focused on the gem, and press X to attack it. The gem-based locks will always be opened in this way, but you will have to examine each one to determine its color, which will tell you what element you need to activate it. | 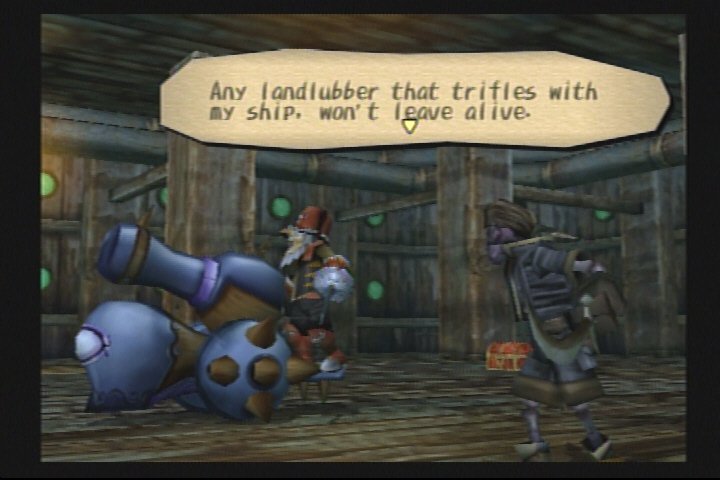 |
|||
| Layer 10: Another thirsty Limited Zone. | Layer 12: A Limited Zone for Ruby only. That doesn't hurt at all, though. | |||
| Layer 13: A thirst-causing Limited Zone. Again. Take lots of water - you can't count on finding a pool. | ||||
| Layer 14: An Abs-reducing Limited Zone. | Layer 15: An Abs-reducing Limited Zone. | |||
| Layer 17: This is the final deck of the Shipwreck, and you will need to do it twice. The first time, play through as usual, collecting all the atla. Notice that there is no exit at the yellow square? It is just a music box. Hmmm. Leave the dungeon by mind-connecting or using an escape powder. | ||||
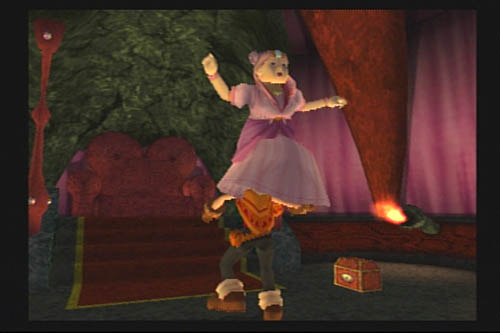 |
It's time to complete Queens. Finish the georama, fulfilling the townspeople's requests. You will have to finish the sheriff's office before you can complete Joker's place. When the sheriff's office has been restored, he will give you a Search Warrant. It is the only way the Joker will let you in. View the events, collect items from the chests, and store items at Basker's shop, if necessary. Basker will give you Foundation in return for the Ointment Leaf you got from Bunbuku. You will need this in Muska Lacka. Yaya will offer to tell your fortune. (Okay, maybe taking a bath with Claude wouldn't have been so bad, after all. But who knew this was in store for you?) She will show you the location of the Moon Orb, and you will find that the fruit merchant has it. Apparently the Moon People were right about what happened to it. You can also ask her to show you the Dark Genie. Go talk to Lana, but you will find that she no longer has the Moon Orb. She gave it to someone... | |||
| Once you have reached 100% on the georama, Sheriff Wilder will reward you with the Macho Sword. He said it was originally a gift for his nephew in Norune Village, but his nephew had returned it, saying a man should fight with his hands. Wait a minute .... Macho Sword! Yes, there he is, right on the hilt! Go talk to Phil at the cathedral, and he will tell you a sad love story, and suggest that you consult the fortuneteller again. As much as you may dread it, it has to be done. This time, she will show you the man whom the queen loved 100 years ago. What?! Is that Rando? He doesn't look that old... Go to his shop. There is nobody there, but there is something glittering on the counter. Pick it up to find it is the Music Box Key. Ah, now you can complete Layer 17. | ||||
| Go see the Joker and buy as many fire gems as you can hold and/or afford. You're going to need them. Equip them as quick slot items. Also buy some Throbbing Cherries from Lana. | ||||
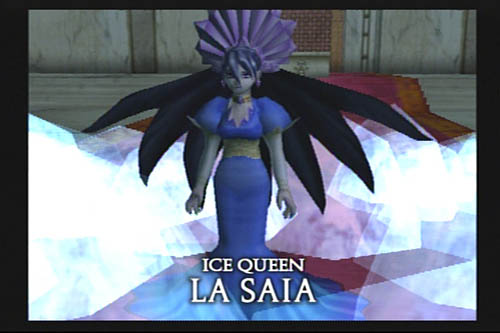
| Boss Battle: Ice Queen La Saia HP: 400 |
 |
|||
| It is the beloved young queen from 100 years before, who loved a commoner with such tragic results. The easiest way to defeat her is to constantly throw fire gems at her. If she happens to freeze a character, quickly use a Throbbing Cherry to remove the status condition. The fire gems do great damage, so the battle shouldn't take too long. If you don't have fire gems, be ready to spend some time at this. Use weapons with the fire attribute active, and have Throbbing Cherries and food available. Some revive powder and repair powder won't come amiss, either. After La Saia falls, Rando will appear. So it was him... He greets his long-lost love, and it is revealed that he has stayed alive by means of a sphere which grants immortality. (Remember that the Joker was looking for this?) Eternal life without his love was worse than death, however, and he drops the sphere, letting it shatter as he and La Saia agree to go back 100 years and try it again. He apologizes to Toan, admitting that he used the boy to get to La Saia, and then he hands over the Moon Orb. Congratulations - you can now return to Brownboo Village. | ||||
| Brownboo Village: Return the Moon Orb to the Moon People, and they will attempt to activate the Moon Ship. A shaft of light will travel up through the night, arcing through the sky to the far-off desert where the Moon Ship is kept. Unfortunately, nothing happens. The Moon People conclude that something is out of order at the Sun & Moon Temple, the Moon Ship's resting place. While this is being discussed, Goro runs in and suggests, in effect, that everybody stop talking about it and just go there and do something about it. Theo, one of the Moon People, is told to accompany you on your journey. A new entry is made on your map, and off you go. | ||||
Queens Georama
| Georama Part | Georama Pieces | Event Item/Occurrence |
| Ruty's Store | Pushcart, Pushcart, Pushcart, Ruty | Opens shop, gives Flapping Fish and Ice |
| Suzy's Store | Keg, Urn, Pushcart, Lamp, Suzy | Can change store name, receive Premium Water, shop opens |
| Lana's Store | Pushcart, Pushcart, Pushcart, Lana | Gooey Peach, additional scene after fortunetelling,shop opens |
| Jack's Store | Chimney, Sunshade, Sign, Lamp, Annex Room, Jack | If Ruby present, gives Big Bucks Hammer and Platinum Ring; shop opens |
| Joker's House | Chimney, Sunshade, Sign, Lamp, Joker | Tells about Life Sphere, opens shop |
| Divining House | Snake, Sign, Yaya | Tells fortune twice, later tells fortune again |
| Cathedral | Hat-Shaped Roof, Torch, Mark, Phil | Tells story of La Saia, gives Holy |
| Basker's Store | Chimney, Sunshade, Sign, Second Floor, Lamp, Basker | Trade Ointment Leaf for Foundation; can store items here |
| King's Hideout | Sunshade, Car, Lamp, Jake, Stew, King | Ruby acquired |
| Sheriff's Office | Prison, Prison, Bicycle, Sign, Sam, Wilder | Sheriff tells about Joker, gives Search Warrant |
| Fountain | Water's Surface, Pillar, Spout | N/A |
| Leaning Tower | Tower 2nd Floor, Tower 3rd Floor | N/A |
| Trees (10) | N/A | N/A |
| Road (30) | N/A | N/A |
| Villager |
Placement Requested |
Georama Pieces Requested |
| King | Road for car | Car |
| Stew | N/A | Lamp |
| Jake | N/A | Sunshade |
| Lana | Close to King's to keep an eye on Jake | Pushcart |
| Wilder | Close to King's to keep an eye on his activities | Prison |
| Sam | N/A | Bicycle |
| Jack | Near watery | Sunshade, Chimney |
| Joker | Far away from Wilder | N/A |
| Ruty | Close to port | Pushcart |
| Suzy | Close to fountain | Keg, Urn |
| Yaya | Snake wants to see rising sun | Snake |
| Phil | Close to Leaning Tower, facing ocean | Emblem (Mark) |
| Basker | Put in high place | Second Floor |
Sample Queens Georama (100%)

 |
 |
 |
||
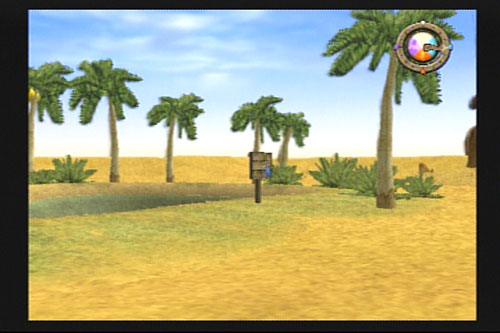
| (Yes, it really is Muska Lacka. But you'll find this game is full of mistranslations and spelling inconsistencies.) | ||||
| As you arrive, you are stopped by a voice in front of the Sun & Moon Temple. It is Ungaga, a desert warrior who has lost faith in his own strength. When his village was destroyed, he was unable to do anything to stop it. He has lost his beloved, and his hope. Theo stops to talk to Ungaga, urging that you go on without him. Enter the temple, and plan to use a weapon with the Holy attribute active, because many of the monsters waiting for you are undead. To progress from one floor to the next, find the King's Slate. Don't forget to collect all the atla on each floor. | ||||
| Level 5: Goro alone can fight here. Try to make it fast. | ||||
| After Level 8, exit the temple and enter Muska Lacka. Do what work you can in Georama Mode. If you are able to complete Brooke's home, you can shop here. If not, you must return to a previous area to get supplies. |
||||
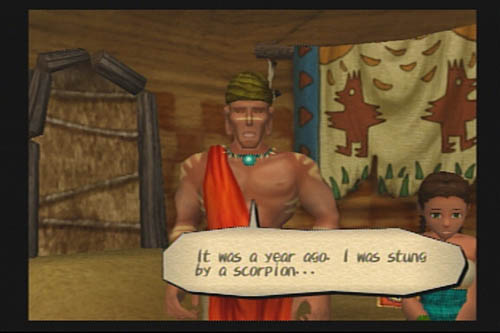 |
The 3 Sisters' House must be finished before you can do Level 9 of the temple. After it is completed, there will be a scene with Ungaga. You will learn something of his history, and why he has chosen Mikara, who is considered homely, over her beautiful eldest sister. Well, I can tell you why. Her sister's a witch! In any case, Ungaga has come to accept that the destruction of the village could not have been prevented, and finding his beloved alive has given him renewed energy and hope. He joins the party in its quest to destroy the Dark Genie. | |||
| Level 9: There are two very large fellows here that must be defeated before you go any farther. After their demise, use Ungaga's charge attack to remove the Black Wind blocking your progress. It's the only thing that can clear it away. | Level 11: An extreme-thirst Limited Zone. | Level 13: This floor is for Ungaga only. While he can be a very strong fighter, he won't have a good enough weapon yet, so just do what you have to do and get out. | ||
| After completing Level 17, go back to Muska Lacka and finish the georama. View the events in each building, receiving the Sun Sword from Gosuke and the Buster Sword from Enga. When you see the event at the chief's house, she will be doubtful of your ability, and your reasons for wanting the Moon Ship. Then Ungaga will enter, vouching for you and your purpose. The chief acquiesces, and tells you that you have to go through the king's chamber to reach the Moon Ship. To do so, you will have to have the Sun Signet and Moon Signet. You must get them from Enga and Zabo. Return to their houses after speaking with the chief. | 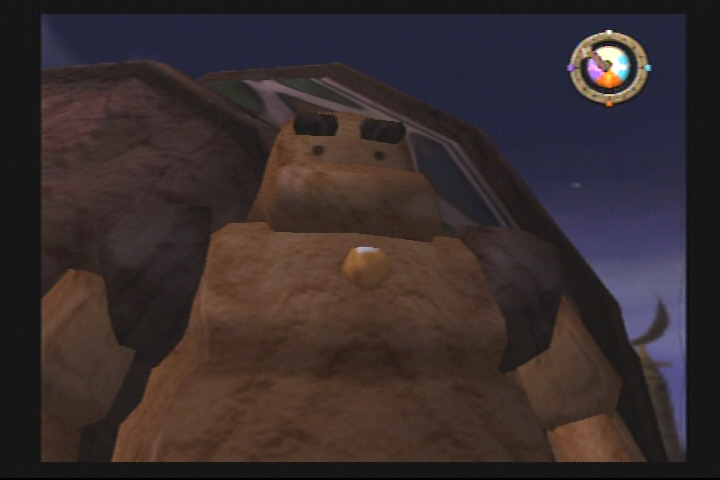 |
|||
| After the village is complete, everyone is happy (except Toto, who has lost his best friend), and the scenes have been watched, open the Miracle Treasure Chests. Use what you need to, and store what you don't. You are ready to take on the King's Curse. | ||||
 |
Boss Battle: King's Curse HP: 1000 |
It's time to fight an angry smoke man and a coffin. The coffin is protected by Black Wind in the form of a man, so Ungaga is your guy here. Equip the Mirage he was given, and use his charge attack to remove the Black Wind. Once it is gone, the coffin is temporarily vulnerable. I just kept using the charge attack, never releasing it after the wind was cleared. It is pretty effective, but chews up the WHp. If you would rather not do this, just attack the coffin while the Black Wind is gone. When it returns, use the charge attack to clear it again, and repeat the process. Try not to let this guy hit you too much, because he hurts. After you defeat him, a passageway will be revealed. You can now enter the room which houses the Moon Ship. Finally. |
||
| Apparently the defeat of the King's Curse has caused this area to start caving in on itself. You must get past a duel which, instead of defeating an enemy, will allow your progress up the crumbling walkway leading to the ship. After getting clear and entering the ship, you are ready to go. The chief and Zabo run up to the temple, and see the ship taking off. |  |
|||
Muska Lacka Georama
| Georama Part | Georama Pieces | Event Item/Occurrence |
| Chief's House | Mini Totem Pole, Cabin, Cabin, Chief Bonka | Chief refuses request, then accepts Ungaga's evaluation of your character; tells you where to find signets; mentions man Toan resembles |
| Jibubu's House | Mini Totem Pole, Cabin, Hay, Stairway, Jibubu | Gives Fruit of Eden; return later for another scene in which Jibubu complains about Ungaga's status; trade him Foundation for Clay Doll |
| Zabo's House | Mini Totem Pole, Roof, Odds & Ends, Hay, Zabo | Gives you Moon Signet after you speak to chief; gives Double Impact |
| 3 Sisters' House | Mini Totem Pole, Cabin, Odds & Ends, Nagita, Devia, Mikara | Ungaga will appear and speak to sisters, then join party |
| Brooke's House | Mini Totem Pole, Cabin, Hay, Brooke | Tells Toan about father, gives Attack + 3, shop opens |
| Enga's House | Mini Totem Pole, Stairway, Stairway Roof, Odds & Ends, Roof, Enga | Gives you Sun Signet after you speak to chief; gives Buster Sword; will let you store items here |
| Prisoner Cabin | Mini Totem Pole, Stairway, Sign, Gron | Prisoner ridicules Ungaga, and is then terrified by him |
| Toto's House | Mini Totem Pole, Handle, Odds & Ends, Toto, Gosuke | Gosuke says his mission is over, says goodbye to Toto, then gives Sun Sword kept inside him, and dies |
| Totem Pole A | Totem Pole 2nd Head, Totem Pole 3rd Head | N/A |
| Totem Pole B | Totem Pole 2nd Head, Totem Pole 3rd Head | N/A |
| Totem Pole C | Totem Pole 2nd Head, Totem Pole 3rd Head | N/A |
| Oasis | Tree, Tree, Tree | N/A |
| Trees (10) | N/A | N/A |
| Road (25) | N/A | N/A |
| Villager |
Placement Requested |
Georama Pieces Requested |
| Chief Bonka | Close to temple entrance, all houses facing each other | N/A |
| Jibubu | Observe pole guardian custom | Hay, Mini Totem |
| Zabo | Observe pole guardian custom | Roof, Mini Totem |
| Nagita | Close to oasis | Odds & Ends |
| Devia | Close to oasis, observe pole guardian custom | Cabin |
| Mikara | Close to oasis, observe pole guardian custom | Mini Totem |
| Brooke | Observe pole guardian custom | Cabin |
| Enga | Observe pole guardian custom | Roof, Mini Totem |
| Gron | Wants to see sun rise | Sign |
| Toto | Observe pole guardian custom | Mini Totem |
| Gosuke | N/A | Handle |
Sample Muska Lacka Georama (100%)
(Note: You must turn the totem poles so that the figures on them are facing the houses with the matching mini-totems.)

 |
 |
 |
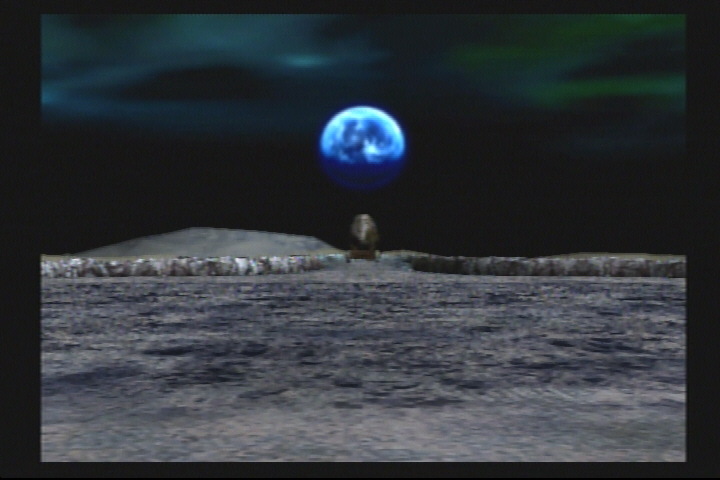
| As the Moon Ship is preparing to land, the Fairy King tells you to stop staring, or everyone will think you are all hicks. |
||
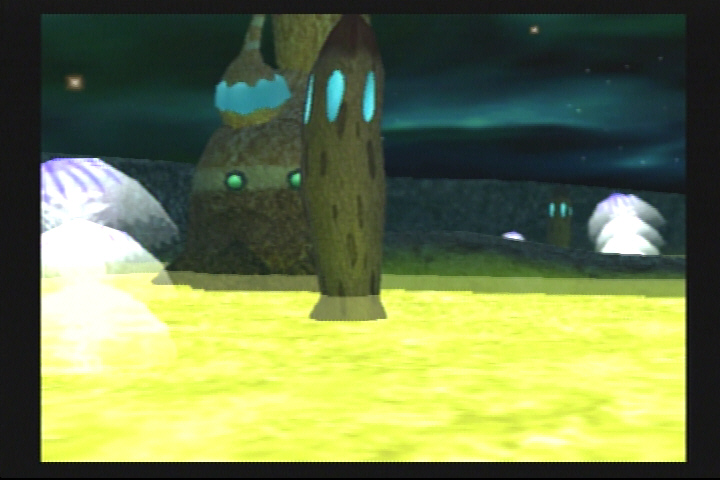 |
When you arrive, you are supposed to taken on a tour by Samba, but before you can start out, he gets a call on his ... cell phone? He had a date, and had forgotten about it. He takes off, and leaves you on your own. (When you find him again, though, he will store items for you.) Go find Marnia, standing inside an archway, and trade him the Clay Doll for the Sun attachment. It is the best attachment in the game, and one of a kind. Be very sure what weapon you want to use it on before doing anything irrevocable. | |
| Outside Ledan's place is a little guy named Jive, who is a weapons expert. To build up the Sun Sword, he says, you must increase the anti-monster attributes evenly, and then increase the elemental attributes to the required level. The Moon Factory is in the middle of town, and is where you will build the Sun Giant. The first time you enter, Ledan will appear. He will talk to you about the sealing technique, and discuss the boss with you. The boss isn't in right now, as he has entered a contest at the Coliseum. Ledan will take you to the entrance to the Moon Sea. You are ready to tackle your next dungeon. You will now be able to shop at Ledan's house. |  |
|
| In this area, the Miracle Treasure Chests will appear both in and around the houses of the town's residents, and inside the Moon Factory. |
||
| Crater No. 2: This is an extreme-thirst Limited Zone. |
||
| Crater No. 3: Another thirsty Limited Zone. | Crater No. 4: Ruby only in this Limited Zone. | Crater No. 7: Another thirsty Limited Zone. |
| Crater No. 8: Here, you will find Osmond, the boss, lying on the ground after having crashed. He flies back to town, and then you talk. He wants to know why Toan is here, and expresses his doubt that the Dark Genie can be sealed again. Revealing his plans to build a Sun Giant, he suggests that perhaps it can be used to defeat the genie. He shows Toan the blueprints, and says that he needs a more powerful magical gem to operate the giant. The Sun Sphere has been put up as a prize at the Coliseum. Toan must enter the competition there and win it. After this conversation, Osmond joins the party. At least, I think that's what he does. "Osmond is now joined the ally." Hmmm. | ||
| Take some time to work in Georama Mode, completing the pieces that you can. When you have done that, head back to the Moon Sea. | ||
| Crater No. 11: This is an Osmond-only Limited Zone. Only kill the enemies that you have to before leaving the floor. Just get that Gun Powder and go. |
||
| After Crater No. 14, go back to the Moon Factory and finish the georama parts. You should be able to complete everything except the Parts CT, which requires the prize from the Coliseum battle. After you do, there will be a cutscene during which you will receive the Admission Ticket. You will have to present it to enter the Coliseum. Go to Ledan's, sell what you don't need, and stock up on Repair Powder, food, and Stamina Drinks. Head to Crater No. 15. | ||
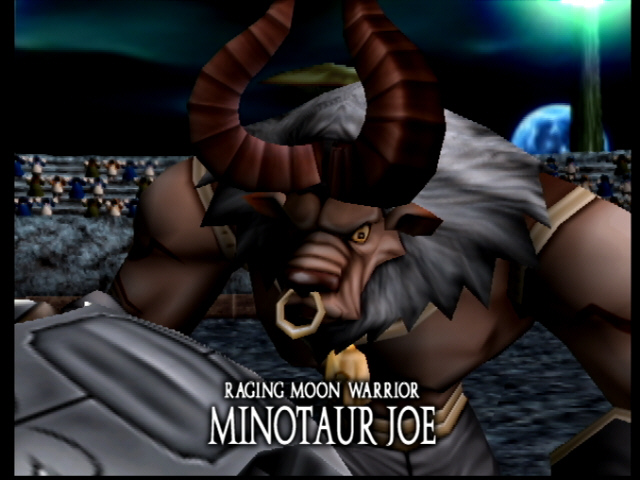 |
Joe is indeed a minotaur. A minotaur with a drinking problem. The bad news is that, after he drinks, he is in a stamina state. The good news is that, while he drinks, he is very vulnerable. Use a tough character with a good weapon, and prepare to attack him while he is swigging his ale. After he finishes, run and stand with a barrel between Joe and you. When he reaches it, he should pick it up and guzzle again. Attack, and repeat the process. When he is defeated, you will be the proud owner of the Sun Sphere. Head back to the Moon Factory. It's time to build a giant. | Boss Battle: Minotaur Joe HP: 2000 |
| Put the Sun Sphere in Parts CT, and your parts will be completed. Assemble them in this way: | ||
 |
 |
|
| After the Sun Giant is complete, and you have reached 100%, return to Walking Mode. You will learn that your planet, Blue Terra, is in danger. You need to go to the Dark Genie's base of operation, the Dark Heaven Castle. Do any shopping you need to do, use Gourds, Fruits of Eden, and any defense-enhancing items you may have, and then tell Osmond you're ready. | ||
| This is a pretty nice scene, so enjoy it. Hey, there's our old red-eyed pal. His name is Seda, and he had planned to take out the Dark Genie himself. Unforunately, he is not the fighter he once was, and does not possess the necessary strength to defeat the evil genie. His hopes are pinned on you. Wait a minute... Simba? The Fairy King's name is Simba? | 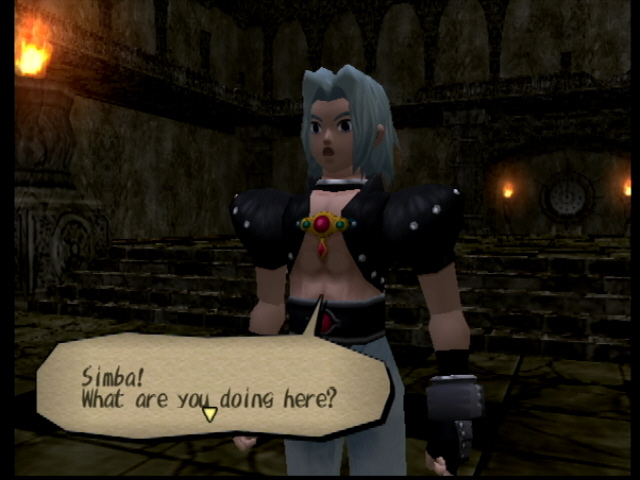 |
|
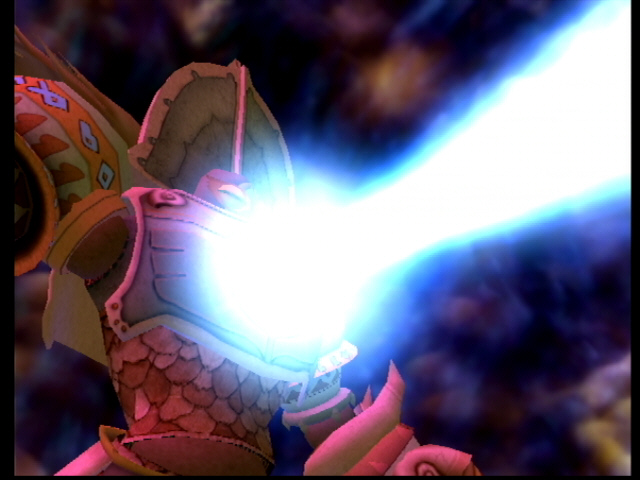 |
In the battle which follows, Osmond fires the cannon from the Sun Giant, and it looks as if the Dark Genie is no more. But you knew it wasn't that easy, didn't you? Apparently, a mouse got into the container which held the genie, and absorbed some of his power, so he took advantage of it, using it as a decoy. Flag, who thought he was in control of the genie, was sadly mistaken, and we learn that his body was just not up to the task of housing a cosmic power. Just when it starts to look hopeless, Dran will rescue you, giving you a ride to the game's final destination - the Dark Heaven Castle. |  |
Moon Factory Georama
| Georama Part | Georama Pieces |
| Parts HD | Crown, Eye |
| Parts AMR | Elephant Emblem, Mammoth Tusk, Finger, Ammonite, Twisted Horn |
| Parts AML | Elephant Emblem, Mammoth Tusk, Finger, Ammonite, Twisted Horn |
| Parts HGR | Big Urn, Eagle Head, Eagle Feather, Amuleo |
| Parts HGL | Big Urn, Eagle Head, Eagle Feather, Gotch |
| Parts HGR2 | Urn |
| Parts HGL2 | Urn |
| Parts CT | Scale, Crest Armor, Sun Sphere |
| Parts WT | Skirt, Skull, Buffalo's Horn |
| Parts TIR | Urn, Tomahon |
| Parts TIL | Urn, Boon |
| Parts FTR | Big Urn, Turtle Shell, Spine of Shell, Nail |
| Parts FTL | Big Urn, Turtle Shell, Spine of Shell, Nail |
| Lookout | Ladder, Second Floor, Ladder |
Moon Factory Georama (100%)


 |
 |
 |
||
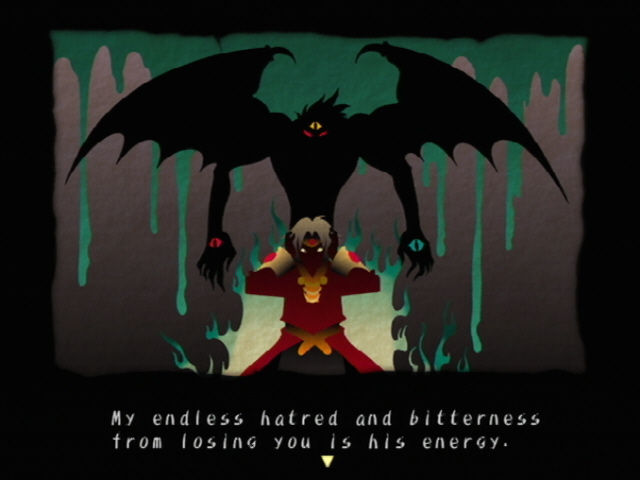
| Seda was the king, and was waging a terrible war with the west. But he was losing that war, and did not know which way to turn. Then he was approached by a mysterious magician in a cloak, offering him a deal. When witch blood is mixed with human blood, a frightful thing is created. (If you recall, a mixture of witch and human blood was one of the requirements for the dancers in the ceremony to unleash the genie at the beginning of the game.) The wizard suggests that Seda make use of this to defeat the west. In desperation, Seda did so, but as a result, the now evil blood in his veins gave birth to the ultimate destructive power - the Dark Genie. Seda did a great deal of research to find a way to counteract what he had done, and came to learn of the Atlamillia, a stone born from the earth once every eon. Upon discovering that it would be born in 400 years, the time in which this game occurs, Seda used the Forbidden Spell to travel through time, intending to get the Atlamillia. He soon realized, however, that he no longer had the strength necessary to use the Atlamillia and defeat the genie, and rested all his hopes in Toan, whom he believed to be the only one who could destroy the genie. | 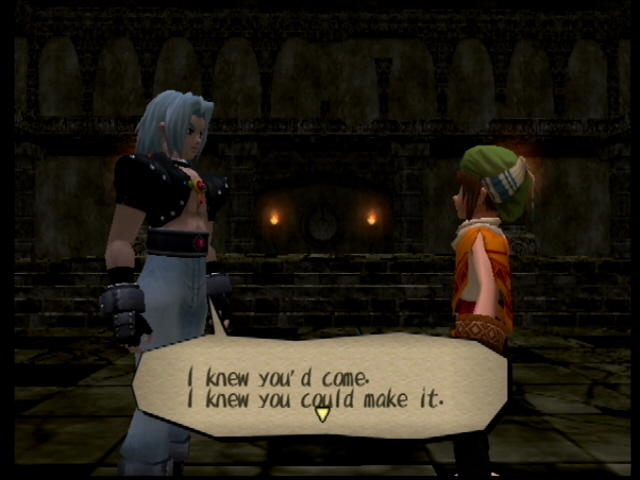 |
|||
 |
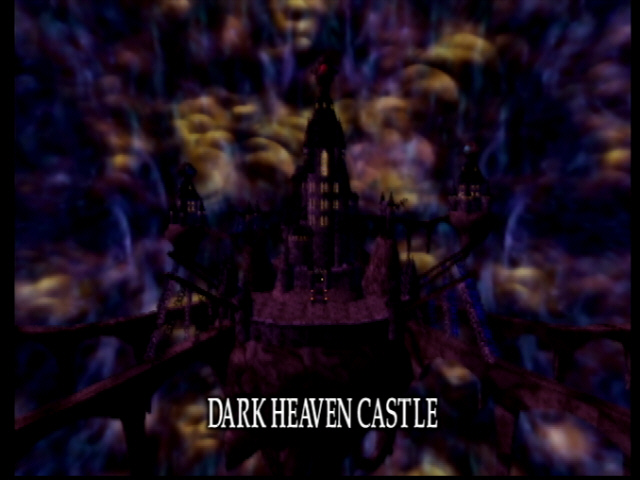
As you enter the castle, Seda has little time left, because the genie's will is growing stronger, threatening to overcome him completely. He tells Toan that, as the genie is not actually a living being, he cannot be killed, so Toan must travel back through time to erase his origin point. In a last act which demonstrates his strength and will, Seda falls on his own sword, releasing a powerful energy stream which opens the door to the Gallery of Time. His last words are his instructions to Toan to travel through the Gallery of Time, following the fragments of his memories which are scattered there. (You can see as you travel back through time that the carpet becomes less and less deteriorated, so you can have an idea of your passage through time by its condition.) | |||
| Once you have begun your exploration of the Gallery of Time, the Fairy King will be standing in the Dark Heaven Castle, waiting to store items and sell Toan items, attachments, and gems. You'd think that, after asking you to save the world, he might be willing to provide you with the necessary supplies at no cost, but, alas, that is not the case. Work your way through the Gallery of Time, collecting the fragments of Seda's memories from the atla. All georama work must be done in the dungeon in this area, so place the pieces as you go. After you complete a section, you can view it then, or choose to see all of the segments after you complete the rest of the dungeon floors. | ||||
| 66 Years Ago: This is a limited zone which reduces Abs. Get the Clock Hands and clear out of there. | 109 Years Ago: This is another Abs-reducing zone. | 225 Years Ago: Yet another Abs-reducing floor. | ||
| 300 Years Ago: This is a Limited Zone which requires the exclusive use of Xiao. | 310 Years Ago: Only Goro is available to you here. Get through with as little fighting as possible. Goro is slow, and most of these enemies are fast. Do you have any bombs? | 322 Years Ago: Ruby is your only option here, but since she is the character of choice, that shouldn't be a problem. | ||
| 340 Years Ago: Ungaga gets a chance to fight on this floor. If you have a strong weapon for him, he should do very well. Otherwise, fight sparingly. | ||||
| 356 Years Ago: You must fight with Osmond here. He is unlikely to have a strong weapon at this point, so stay here only until you can find the Clock Hands. | ||||
| 400 Years Ago: Night of the Incident As you enter the final floor, you will once again see the fragments of Seda's memory. They are presented in order, and tell you the whole story. Seda's father died, making him king. He met Sophia on the night of his coronation, and immediately fell in love with her. However, he had to devote his time and energy to the war on the west. The war went badly and Seda made the deal which mixed black blood with his own, unleashing great power. His army defeated the west, and he returned home, longing to see Sophia again. He had a joyful reunion with her, only to find "she" was not the real Sophia, but an assassin. The real Sophia appeared just in time to save Seda from the impostor, but was killed herself in the process. This tragic event caused the evil blood in Seda's veins, fueled by his anguish and hatred, to give birth to the terrible Dark Genie. Aghast at what he has brought upon the world, Seda determines to find a way to save them all. |
||||
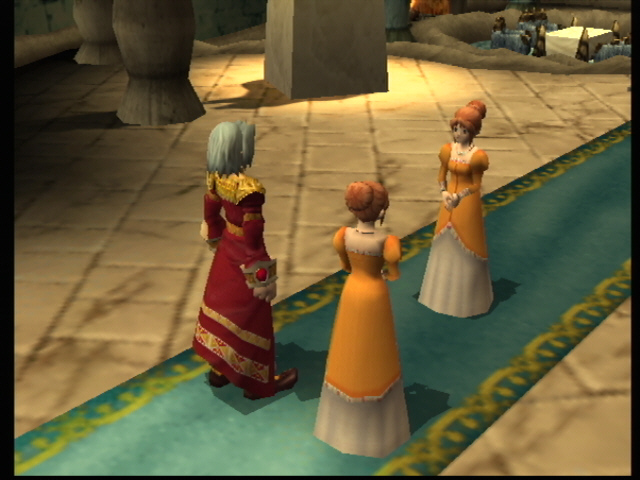 |
Toan arrives just in time to witness the reunion of Seda and "Sophia," the assassin. He hides behind a pillar, watching the events unfold, until he sees that Seda is about to die. He jumps in to foil the assassin, and Sophia does, too. Sophia dies, leaving Seda in anguish. He turns to look at Toan, and accuses him of being another assassin. Toan denies the charge, but Seda pays no heed. The Dark Genie burst forth from him, and you have no alternative but to fight it. | 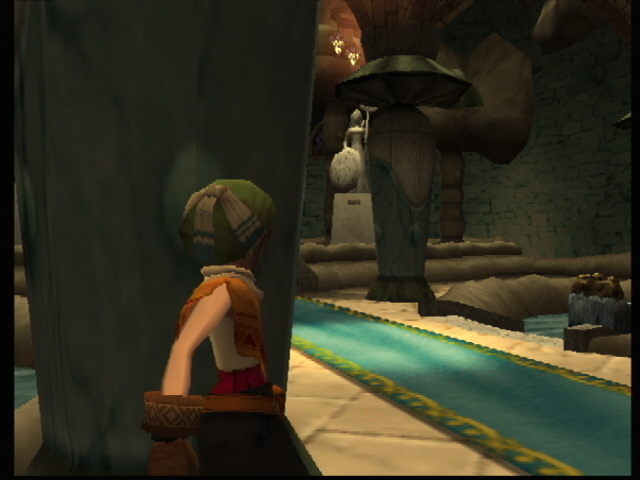 |
||
| Boss Battle: Dark Genie HP: 13,400 |
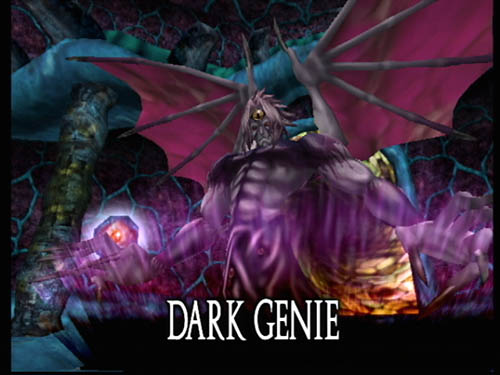 |
Have lots of food, powders, and stamina potions ready. There are three phases to this battle. In the first, two large hands with elemental symbols on them will come up out of the ground. The symbols will change, but whichever symbol is active indicates the only element which can damage the hand. Use Ruby with a strong weapon which has high levels in each elemental attribute. Run around the room, avoiding the Dark Genie's beam attack, and listen and watch for a hand to appear. You must move quickly to hit the hands, because they disappear as quickly as they appear. There is not enough time to target them, so you must quickly turn and shoot an elemental attack of the proper type right at the hand. When both hands have been defeated, the first phase of the battle ends. In the second phase, the genie's head should be attacked by Ruby with a strong Holy attribute active. Run around the room avoiding the beam he shoots, and target the head when you can. He will hit you sometimes - there doesn't seem to be any way to escape all his attacks. Make sure to keep your health high and your weapon repaired. | ||
| After this form is defeated, he will become a giant black beast with a couple of monsters, called Gacious, in attendance. Plan to use stamina potions in this phase. The genie will fire a strong beam, again - you should run away from it. Destroy a couple of minions to make the genie's mouth open, and then attack the gem in the beast's open mouth. Always target that gem when it is available to you. Try to stay away from the feet, and watch the minions, which will respawn. After the gem is no longer a target, begin the cycle again, avoiding the beam and eliminating the minions, then going for the gem in the mouth. Ruby is a good choice here, too, though you can use a short-range fighter if you prefer. When you have done enough damage, the genie will be no more. | ||||
| The genie is gone, but the Fairy King appears to tell Toan that, unless he can eliminate the hatred and despair that gave the creature life, it will not be gone for long. The Atlamillia can perform one more service for mankind, though it will be destroyed in doing so. Toan can use the Atlamillia to call for Sophia's wandering soul. He does so, and Sophia lives once again. Seda is overjoyed, and good triumphs over evil once again. You've done it! Congratulations! | 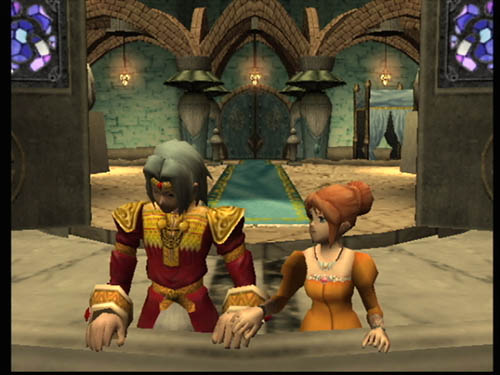 |
|||
 |
After the credits and final movie, a new area will be open on the map. You can now explore the Demon Shaft - 100 floors of meaningless combat in a completely new location! |  |
||
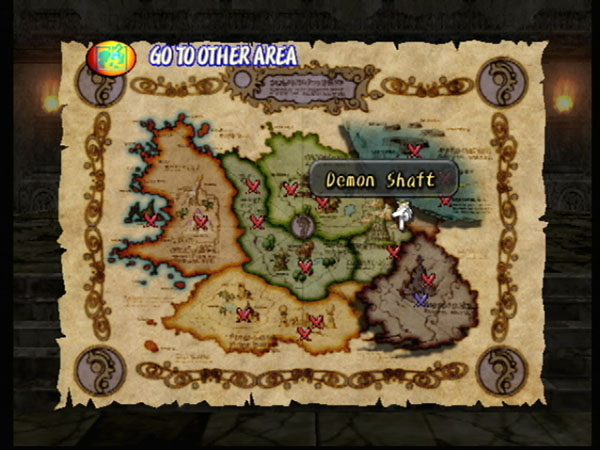 |
||||
Gallery of Time Georama
| Georama Part | Georama Pieces | Event Item/Occurrence |
| Crowning Day | Bed, Father, Crown | Story segment available |
| Night of the Ceremony | Moon, Castle, Torch, Crown, Sophia | Story segment available |
| Reunion in the Storm | Bed, Minister, Sophia, Buggy | Story segment available |
| First Campaign | Horserider, Sword, Wizard, Father, Crown | Story segment available |
| Menace of the West | Wizard, The Broken Sword, Horserider, Castle, Sophia | Story segment available |
| The Deal | Fort, The Broken Sword, Black Robed Man, Bloody Agreement | Story segment available |
| Dark Power | Black Blood, Light, Wizard, Castle, Sophia | Story segment available |
| The Assassin | Castle, Wine, Moon, Sophia, Door, Assassin | Story segment available |
| Must be Protected | Sophia, Knife, Bloody Dress | Story segment available |
| Birth of the Demon | Castle, Dark Cloud, Black Blood | Story segment available |
| Things Lost | Ruined Castle, Grave, The Broken Sword | Story segment available |
| Departure | Sandglass, Prophet, Sword, Book of Curses | Story segment available |
| The Demon Shaft is a 100-level, optional dungeon which will become available after the game ends and you watch all the closing credits and movies. A new area will be marked on the map between the Dark Heaven Castle and Norune Village. The Demon Shaft can be accessed as long as you have a save file in which all other areas are open. There are a few new enemies in the Demon Shaft, but the vast majority are ones that you have fought throughout the game. They are stronger in the Demon Shaft, but otherwise they are essentially the same. I can't provide a bestiary section for the Demon Shaft - not only would it be almost entirely duplicate enemies, but, even with the new enemies, the valid data keeps changing. A monster might have a certain amount of HP on one floor, but later, would have more. Everything keeps changing as you progress through the tower. After every 20 floors, there is what could be called an elemental shift. The monsters change somewhat, the fighting gets a little tougher, and even the color of the floors seems to alter slightly. An enemy weak to ice on the first 20 floors could be weak to fire on the next 20 - you will have to keep on eye on the colors of enemies, and notice how much damage your attacks are doing. After you reach the end of the tower, you will encounter the Black Knight Pendragon. | |||||
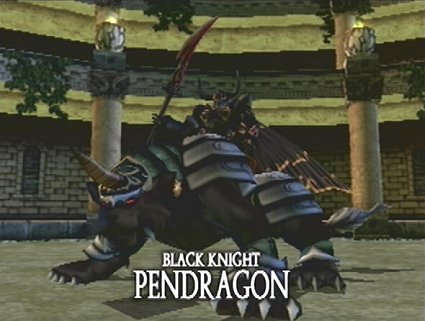 |
Boss: Black Knight Pendragon HP: 40,000 |
||||
| While the Dark Genie battle was three phases, this battle is two phases. In the first phase, he will charge at you. Sidestep this attack, and then use Ruby's charge attack. I don't really recommend short-range fighters here, but it is up to you. He will run into the wall after you dodge his charge, like a dumb character from a cartoon. Use whatever elemental attribute is highest, although I am usually partial to Holy. Don't stay in one spot for too long, and always keep the boss in your sights. Keep repeating the dodge-and-attack process until the Black Knight dismounts. | |||||
| In the second phase, he will send fire blasts your way if you are far enough off. Otherwise, he will use a sword attack at close range. He can also zap in and out (like Witch Hellza, etc.), and is fond of popping up right beside you. You need to keep him targeted, and stay just close enough that he won't disappear. When he lowers his arms, shoot at him with Ruby until he guards again. Make sure to keep a Revive Powder in a quick slot at all times, and an Auto Repair Powder wouldn't be a bad idea, either. After you have done enough damage to him, the knight will fall, and you will be the owner of a Chronicle 2 sword. There is no other way to obtain this weapon, so you can be proud of your achievements. Unfortunately, there is really nothing to do with it except go back to old areas and whack things. Congratulations on beating the game and the optional dungeon. Now go play Dark Cloud 2 as a reward. | |||||


