Dragon Quest 6 [By rpgclassics.com]
The walkthrough will be divided between what I believe are major sections in the game. If you're still having trouble with a paricular dungeon, check the maps section. The game can be divided into 3 main sections: the beginning to the death of Mudo, the revivial of Dhama up until the collection of all the legendary equipment, and the revivial of Zenethia up until the end of the game.
- Horrible Dreams
- A Quiet Mountain Town
- The Bazaar
- A Test and a Glorious Mission
- The Unseen
- Ghosts from the Past
- The Mirror of Ra
- The End of Mudo's Reign
- The Assault on Mudo
- The Shrine at Dhama
- Arcbolt's Monster and a Blue Swordsman
- Dreams of a Perfect World
- The Trials of Holstock
- Flying Beds and Other Strange Things
- Taking Your New Bed for a Spin
- An Illusion of Love
- More Relationship Problems
- Deep Sea Diving 101
- An Underwater Castle and the King of the Sea
- A Magic Carpet Ride
- The Armor of Orgo
- The Shield of Sufida
- The Sword of Ramias
- Fixing the Rusty Sword
- The Helm of Cevas and Our Hero's Real Identity
- Reviving Zenithia
- A Flying Horse and a Tower
- Darkness and Despair
- Masarl's Great Treasue
- Imprisoned
- Masarl's Brother
- The Demon King Himself
- The Bonus Dungeon
Horrible Dreams
|
The game begins with our Hero asleep in a glade with a young woman next to him. |
|
 |
When you awake, she'll ask you how you slept. A large man will come bounding in and declare its time for them to finish the Demon King Mudo once and for all. |
| Head north with them, and the young woman will play a flute summoning a dragon. |  |
 |
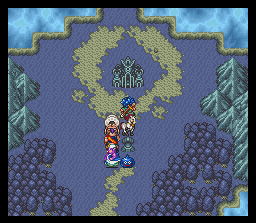
The Dragon takes you down the cliff to the Demon King's Castle. |
| Pretty nice castle, eh? |  |
 |
Once inside, you'll notice there really isn't much going on in here strangely enough. No monsters or anything... Head north and go through the door. |
| Continue heading north through the hallway and go through the door. |  |
 |
The other doors in this huge room are locked. Head north and go up the stairs. |
| The large man with you notices that there's something strange if you've made it this far through Mudo's Castle with no problems. Looks like you have no choice but to continue on though. |  |
 |
Mudo's really very amused that you came. To thank you for coming, he pertifies the party and blows them up, one by one. Pain.... |
| Suddenly, you wake up. Good thing it was just a bad dream. |  |
A Quiet Mountain Town
|
After waking up, look around your house for a Leather Cap, 10 Gold, and an Agility Seed. |
|
 |
You'll learn that the Elder is looking for you. Look around the rest of town to find: Medical Herb x2, 10 Gold, Defense Seed, 3 Gold, and an Antidote Herb. |
| Stop by the Weapon Shop, and you'll notice this beautiful work of art. Sadly, its not for sale. Remember it though... |  |
 |
Go to the Elder's House (northeast part of town), and he'll ask you to deliver the village goods to the Bazaar in Shiena. Accept then buy a Bamboo Spear at the Weapon Shop and leave town. |
|
Fight monsters outside of town until you're able to buy all the best equipment in Lifecod then head down to the mountain pass. Recommended Level: 6 |
 |
 |
On the way down the mountain, you'll run into Rand. He's excited that your sister, Tania, will be the star of the Festival. |
| Now head east and fall down the slope then go through the cave. |  |
 |
Head west and open the 2 chests to get a Medical Herb and a Club. Head west and fall down the pit. |
| Head south and exit that cave. |  |
 |
To get the last chest, head up the ladder and go through the cave and up the stairs. |
| On the way up, get the chest for 20 gold then head south to exit the cave. |  |
 |
Go west across the bridge and fall down the slope. Open the chest for the Wayfarer's Clothes. Go into the cave. |
| Climb up the stairs, and you'll appear back by the graves. |  |
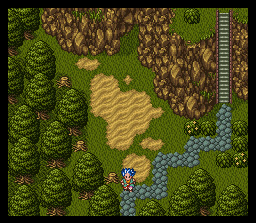 |
Now head through the caves and exit the pass. |
| Head southwest to reach Shiena. |  |
The Bazaar
|
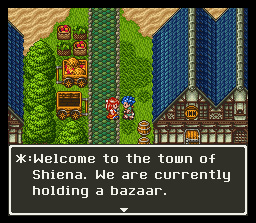
In Shiena, you'll learn of the Bazaar. You'll need to sell the Village Goods there. |
|
 |
Talk to the man in the right counter, and he'll offer to buy your goods for 330 gold. Refuse the offer and talk to his brother on the western counter. |
| He'll up the prices to get you to allow him to buy them. Refuse again and return to Boga. Continue this process and you can get the prices up to 450 from Boga and 480 from Doga. |  |
 |
I generally sell them to Boga though since he's a nice guy and since 30 more gold isn't that much. Now look around town to find a Medical Herb, Scale Shield (Need the Thief's Key), Agility Seed, 5 Gold, Wing of Wyvern (Thief's Key), and 250 Gold (Thief's Key). |
| The Thief's Key can be bought from the old man in the southeastern corner of town for 470 Gold. |  |
 |
You can also buy a Map in town by lowering the price from 2000 Gold to 200 by refusing the offer multiple times. You can also buy 6 Medical Herbs and a Fairy Water for 50 Gold which is a good bargain. |
| Don't buy the last item this old man has for 100 Gold. You'll be ripped off. |  |
 |
The crown maker has gone to the forest to the west to gather some wood. Hmm maybe he didn't notice the wood in his house... Anyways, leave town and head west. Recommended Level: 8 |
| Head west, and... well... there's a gigantic gap in the earth. Walk towards it. |  |
 |
It seems Bilte the Crown Maker has slipped and almost fallen below. Attempt to help him, and you'll fall instead. Lovely. |
| If you check the map, you'll notice you aren't on it. You've also become rather pale. Must be the sun. Head southeast to the town. |  |
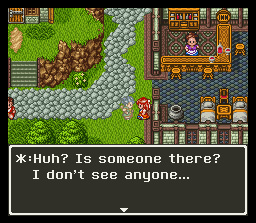 |
Hmm no one can see you. Maybe that fall killed you... eh that's not good. |
| Bwahahaha yes, this is God! | 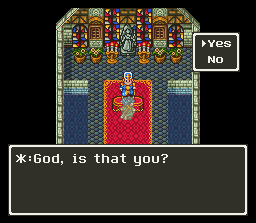 |
 |
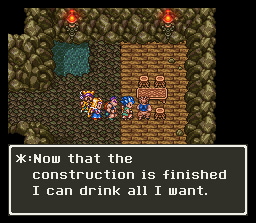
Grab the items in the town which include: a Nut of Life, Beauty Plant, Medical Herb, Tunic, Wooden Hat, 20 Gold, and the first Small Medal. |
| You'll also be able to overhear some interesting conversations like this mirror that can reveal anything... |  |
 |
...and a plot to kidnap a wealthy man's daughter. |
| After talking to the most reliable source in town, the lil 'uns, take your ghostly self north to the well of dreams. |  |
 |
No matter what you've been told about staying away from the pretty lights, examine the well, and you'll be back in the real world. |
| Now that our pale aura thingamabob is gone, it must mean we're back home! Head southeast and back to Shiena. |  |
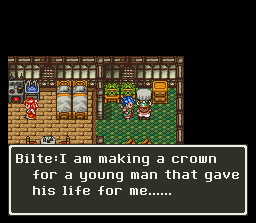 |
Talk to Bilte, and he'll be overjoyed that you're alive. He'll give you the Spirit Crown for free. Now head back to Lifecod. |
| Your friend and mine, the elder will greet you upon your arrival. He'll take the spirit crown and ask if you had any problems. The uncaring man doesn't even respond if you say yes. What kind of an example is he?! Er... anyways, head back to your house and talk to the old woman and take a nap. |  |
 |
After waking up, Rand leads you to see the procession. Tania, the elder, and a torch-holding boy lead the way to the church. |
| After a wonderful ceremony, Tania comes to speak to you, but instead, you get a message from some ghostly woman. There went the good 'ol peaceful village life... And also something about your true identity... hmmm. | 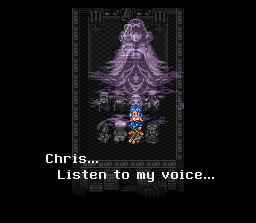 |
 |
Well it seems you aren't the only one that's heard of the Phantom World at least. |
| Um... yeah alright... |  |
 |
Rand hopes to marry Tania, sadly, he fails to score this time. |
| The Elder realizes its time for you to embark on a journey. He gives you a pass to Reidock. Head back to your house to sleep the night away. The next morning, leave Lifecod and head down the mountain. |  |
 |
Now head southeast of Shiena to reach Reidock. |
A Test and a Glorious Mission
|
Recommended Level: 9 Reidock's a nice little over-protective, heavily-guarded town. Show the pass, and you're in. |
|
 |
Make sure to buy all the new equipment, especially a Boomerang. Boomerangs attack all enemies on the screen so they're very nice. Search around town to find an Antidote Herb, Medical Herb, and a Tunic. Check the well also if you feel up to a fight. |
| In the well, you'll find a little demon guarding a treasure chest. Time to remove the demon. | 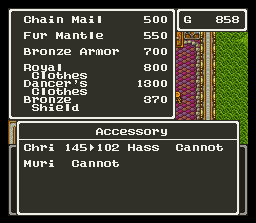 |
 |
The Dark Hobbit isn't too hard. Cast Sap on him twice, and he should fall easily. If your HP happens to fall below 30, cast Heal or use a Medical Herb. |
| Afterwords, talk to the woman standing by the well and give her the Antique Ring back. She'll give you a Strength Seed for your troubles. |  |
 |
Well, you might as well become a soldier and destroy Mudo. Sounds fun, eh? He'll tell you to meet back once the Church Bell chimes. |
| Go into the church, and you'll see the big guy from your dreams. Interesting... |  |
 |
After leaving the church, the bells will ring. Report back to the caslte and go inside. |
| General Soldi will tell you that to become soldiers, you must retrieve an item he placed in the Tower of Trials to the south. That'll be the next stop. |  |
 |
Gotta love that tower music. Enter the tower. |
| Go up the stairs in the northeast corner. Don't step on any of the spikes unless you're into pain. |  |
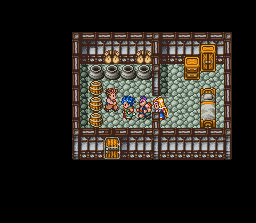 |
Walk south and grab the treasure chest for a Wing of the Wyvern. Now head back to the stairs going up. |
| On the next floor, you'll have to challenge one of the guards. |  |
 |
Tower Guard: |
| After beating them, grab the chest for 130 Gold and go through the door on the left. |  |
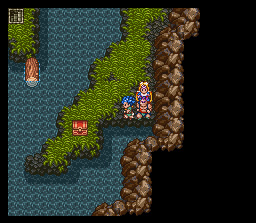 |
Go around the path and head through the door and up the stairs. Ignore what the big guy tells you about something you might want downstairs; he's just trying to mess you up. |
| To get through this room. Step on the arrows next to the 1 then on the one next on the 2, and you'll reach the stairs. |  |
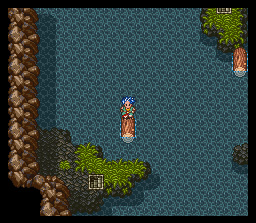 |
Head south and through the door. |
| Jump off the ledge, and you'll meet Hassan. He thinks he's met you before... how strange since he was the guy in your dream. He'll leave through the door to the north after talking to you. |  |
 |
The next section has an area with 3 doors. The door on the left leads to stairs that allow you to continue; the middle door leads to spikes; and the door on the right leads to some stairs that take you to a room with a Small Medal and a Gold Ring. Don't go back to the castle though! Now go back to the first room and take the door on the left. |
| Go south and open the chest for a Medical Herb then take the stairs on the right and go south through the next room. |  |
 |
You'll meet good 'ol Nelson at the top. He offers to let you go back to town to rest up if you want. If you're ready, agree to fight him now. |
| Nelson: Nelson is similar to the Tower Guard you fought earlier. Cast Sap on him twice then pound on him. He'll use Sweepkick which can trip you and cause you to lose your turn. If you HP reaches 20, cast Heal or use a Medical Herb. |
 |
 |
After beating him, follow him inside and open the chest for the Broken Heart. Now report back to General Soldi in Reidock. |
| Soldi will take the Broken Heart (awww +15 Def/ +10 Style is nice...) and welcome you to the Royal Soldiers. Now you can loot... er borrow stuff from the castle. You'll find a Small Medal in the castle kitchen. |  |
 |
Talk to the old man in the courtyard and agree to find a horse to pull the wagon. Now leave Reidock. |
| Hassan will meet up with you after you leave Reidock. Accept his help, and he'll join the party. Now get Hassan up to level 10 around town and make sure to buy him some new equipment. |  |
 |
Recommended Level: 10 Now head west past Reidock to this forest. Go in there to attempt to capture the horse. |
| Whenever you get near the horse, it runs away. |  |
 |
After chasing it in a complete circle, Hassan devises a plot to capture the horse by surrounding it and forcing it to run into the dead end. |
| The plan works, and you capture the horse which Hassan names Falshion. |  |
 |
Head to Reidock and tell the soldier guarding the gate that you don't understand why you can't bring the horse into the castle, and he'll pretend he never saw you and let you in. Talk to the |
| General Soldi will be amazed that you captured the horse. He'll tell Hassan that Hassan has now become a royal soldier and wants both of you to meet the King. |  |
 |
...The King wants the Mirror of Ra. |
| He tells you and Hassan to search for the Mirror of Ra and opens the northeastern gate. He also gives you the wagon. Make sure to nab the Silver Tiara from the King's bedroom dresser. |  |
 |
Head northeast and go through the gate. Now begin heading east. |
| While heading east, you can find a Church. Inside the Church is one of the soldeirs that the King met with. Get a Fairy Water and a Beauty Plant from the Church then Save and leave. |  |
| Now head southwest and go through the space between the mountains. Visit the house and talk to the man there. Also grab the Antidote Herb and the Wooden Hat there. |  |
 |
Agree to help the man in exchange for information. He'll ask you to help build an extension to his house. Hassan will be furious and leave. |
| When you go out to attempt to do it, the old man seems clueless. Hassan then suddenly starts working on it and builds a nice new extension. |  |
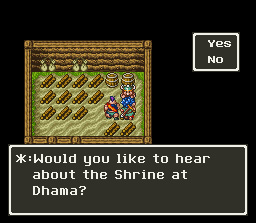 |
The old man hasn't heard of the Mirror of Ra, but he does know about the Shrine at Dhama which is east of the river. He tells you to enter the secret passage where the desert is surrounded by forest. |
| Now head east and search the grassy spot. |  |
 |
Head south through the first room then head south down the first tunnel for a chest with a Bronze Shield. Head back up and then head east past the next tunnel and go down the stairs. |
| Head south and then go up the stairs. |  |
 |
Head past the first north and both southern tunnels. Take the second north tunnel for a chest with 270 Gold. Then head east and go up the stairs to exit. |
| Head east to reach the huge hole... maybe the Shrine is down there so head towards it and jump down! |  |
The Unseen
|
Arg not again! Well it looks like the Shrine is here... |
|
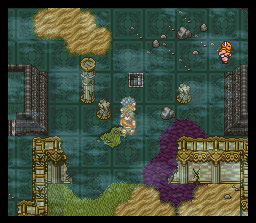 |
Eh... looks like this place isn't in the best of shape. |
| Head downstairs to find the nifty Magic Map which shows terrain in places you've been. |  |
 |
Leave the ruined shrine and head west to the town. |
| You'll find plenty of items in town: a Bamboo Spear, Medical Herb, Iron Claw, a Small Medal, Beauty Plant, and a Fur Hood. | 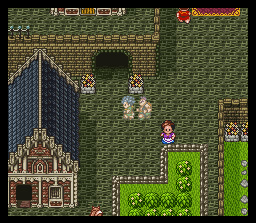 |
 |
You'll hear about Hassan form his parents in one of the houses. How strange... |
| An old woman seems to know some things about the Mirror of Ra like it only reflects the truth... hmm. |  |
 |
There seems to be a bit of a controversy about the mayor's maid and his son getting married... |
| ...and one person seems to want to stop it. |  |
 |
You can find Joseph and Sandy by the port. Sandy doesn't want to get married though... |
| Yes, once again, I God am talking. Bwahahahahaha... err... |  |
 |
Return to the mayor's house and talk to Sandy. |
| After she goes upstairs, try to leave and Amanda will come in and do something that's most likely heinous and evil. |  |
 |
Ah! Don't eat the dinner Pero! |
| Sadly, looks like that coniving Amanda has poisoned poor Pero. The Priest heals Pero though. |  |
 |
The mayor blames Sandy for everything... |
| Little does the mayor know that it was Amanda the scheming woman that planned the whole plot! |  |
 |
She feels so sorry that her next line is "But Joseph is all mine..." Evil! |
| Head to the port and talk to the girl there. She can help you become visible? Sounds good to me... But then no one will think God is speaking to them anymore... aww nutbunnies. Meet her outside of town. |  |
 |
Muriel will lead you to her house. |
| Pretty interesting place... |  |
 |
Hey she found us! Well anyways, Granmaz is a fortue teller that can see ghostly, invisible people like yourself. She'll tell you to rest the night. The next morning, grab the Nut of Magic and the Star Fragment from the drawers. |
| Yes! Wait no! She'll explain that to become visible, you must go through a cave full of spirits... fun. Accept Muriel's help, and you'll get 10 Medical Herbs, and Muriel will walk behind you instead of joining you. |  |
 |
Examine the well if you're looking for a fight. Remember to cast Sap to make the battle easier. |
| Head south to the Cave of Dream-Seeing. |  |
 |
First head south down the tunnel to get a chest with a Wing of the Wyvern in it. Next head back north and take the western tunnel to reach the stairs going down. |
| Head south down the tunnel. First go southeast and get a chest with a Defense Seed in it. Then head to the far west for a chest for 230 Gold. Finally, head south and go down the stairs. | 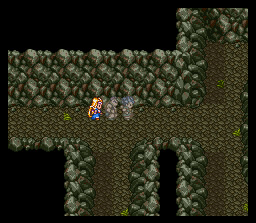 |
 |
Follow the cavern path along- it's very straightforward. Don't forget to get the chest with the Bronze Knife in it. |
| Occasionally you might run into some Metal Slimes. Kill them first- they can net you 1300 Exp! However, they have very high speed and defense and tend to run away so you'll need to kill them quickly. |  |
 |
Recommended Level: 13 Before heading down the stairs, grab the chest with the Fur Mantle inside. |
| Downstairs, you'll see a demon gathering the nectar you need. He'll attack you to preserve his precious nectar. |  |
 |
Bloody Paw: |
| Grab some of the liquid from the urn and head back to Granmaz's house. |  |
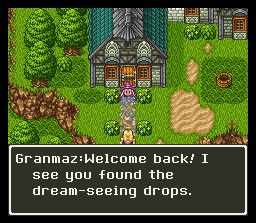 |
Granmaz is glad to see that you found the drops. You'll rest the night. |
| The next day, Granmaz will use the drops to make you visible! Muriel then will join the group. I recommend you get her and the rest of the group up to level 14 in the Dream-Seeing Cave. Also, go to the Casino in San Marino. You can grab the nice equipment there if you play Poker for a while. |  |
 |
When you're ready to leave San Marino, head to the port and buy a ticket to Reidock. Board the ferry, and it'll take you across the sea towards Reidock. |
| Head west then a bit north to reach Reidock. |  |
Ghosts from the Past
|
Arg not again! Well it looks like the Shrine is here... |
|
 |
Alot of the people here mention that the city is falling apart: the prince is missing, and the queen and king are asleep. Some people even think you're the prince... strange... |
| Hmm... you can buy some Royal Clothes at the armor shop. Since many people seem to think that you're the prince, why not buy some and wear them. Also, make sure to look around town and pick up a Poisoned Knife, Fairy Water, Medical Herb, and a Small Medal. |  |
 |
Head to the castle gates and talk to the guard. He'll let you in the castle since you're the prince. General Tom will meet you inside the caslt and welcome you back. |
| Talk to everyone in the castle then talk to the guard that is blocking the stairs. General Tom will make him move for you. Now go into the throne room. Make sure to grab the Silk Robe that's in the throne room. |  |
 |
The queen will mumble something about a mirror in her sleep- perhaps she's talking about the Mirror of Ra? |
| When you try to leave, Geban corners you. He doesn't believe you're the prince and asks the name of your younger sister to prove that you aren't the prince. None of the choices are right so it doesn't matter what you say. You'll be thrown out of the castle by the soldiers. Also, it seems General Tom is to be executed for his lack of discretion... |  |
 |
Nothing else to do here, so head northwest then southeast from the sign to the town of Amoru. |
| This town if famous for its waterfall. Check around town to find a Wing of the Wyvern, Water of Amoru x2, Fairy Water, and a Small Medal. |  |
 |
If you try to stay at the Inn, you'll learn that all of the rooms are full and that you can stay at the church. Talk to everyone in town then head to the church. The priest will let stay in Gina's room downstairs since she is up. |
| Gina mentions that all she ever has are nightmares when she sleeps in the bed. Well, looks like its your turn. |  |
 |
Sleep in the bed, and you'll awaken in a similar room- but Gina's not there and the man that is has no clue where you came from. Hmm... Make sure to get the Small Medal from the pot! |
| When you leave the church, the waterfall suddenly turns to blood! There can be only one source- the cave to the north. Before you go, get the Usamimi Band, Water of Amoru, and 50 Gold. Now leave town. |  |
 |
Head north to the Amoru Waterfall Cave. |
| Inside, you'll find Gina trying to clean the blood off her sword. It seems she killed Iria... hmm. Head down the stairs. |  |
 |
Head south then west across the bridge and down the stairs. Open the chest for a Nut of Magic and go back up the stairs. |
| Now head north then west past the stairs. Go southwest for a chest with a Beauty Plant then back north and west to go down the stairs. Head all the way south for a chest with a Small Medal then head back towards the stairs. Head northeast and take the log down to the chest with a Bladed Boomerang. Go up the stairs to reach another chest with 410 Gold in it. Take the log down and return using the same stairs. |  |
 |
Return and take the second log down and then step on the next log and head to the stairs. Go down them. |
| On this floor, you'll find an Iron Claw in the northeastern corner and a Sage Stone in the northwestern corner. In the middle-northern section, you'll find the stairs. |  |
 |
Head north, and you'll see a man engaging a demon in battle. Head in to help him. |
| Horror Beast: The Horror Beast can be quite difficult if you get unluck. Have the Hero cast Sap twice then begin to attack. Hassan should use Berserk every round. Muriel should cast Upper on everyone then begin attacking. The beast's Confusion Dance can confuse everyone in the party making the battle much more difficult. You'll get 330 Exp and 250 Gold for killing it. |
 |
 |
After opening the box, Gina attack Iria instead... oops. Iria wants you to take him to the surface- accept and head back to Gina. |
| Aww... happy reunion time! Gina is very surprised to see Iria still alive. She also took the Mirror Key from Iria. Now they plan to get the Mirror of Ra... |  |
 |
As thanks for your help, Iria gives you the Speed Ring. Now head back to Amoru. |
| The color from the water is gone- your mission has been completed. Return to the church and sleep in the bed to return. |  |
 |
Gina is suprised to see you again. She noticed that after you went to sleep, she couldn't find you anywhere. She does mention you were in her dreams though. |
| Suddenly, an old man walks in and recognizes Gina. Could it be...? |  |
 |
Iria has returned. Now that he and Gina are united, Gina doesn't need the Mirror Key anymore so she gives it to you. Now leave Amoru and head to the Mirror Tower. |
| Head northwest of Reidock to reach the Mirror Tower. |  |
The Mirror of Ra
|
Now with the Mirror Key, you can enter the tower. Head all the way around ignoring the first staircase and go down the second to get a Half Plate. |
|
 |
Check the last mirror panel twice to notice a door... |
| Suddenly, 3 Posion Zombies attack. Grar. Have the Hero attack with the Boomerang while Hassan uses Berserk. Muriel should cast Antidote to remove any poison, heal if necessary, and cast Bang if no one needs to be healed. |  |
 |
Now head north past the broken mirror and head right past the stairs. Get the chest with 200 Gold inside then return and go up the stairs. |
| Now head south and enter the right tower. The left tower is currently locked. |  |
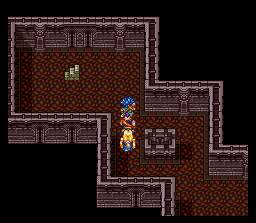 |
Head north past the first staircase and head up the second one. |
| Head southeast and up the next staircase. |  |
 |
Head south and open the chest for a Strength Seed. Head down the second staircase. Head southwest and up the next stair case. |
| Head north through the chamber and up the stairs. |  |
 |
Now head southeast, and you'll encounter a ghostly girl. Talk to her, and you'll learn she too is invisible to nearly everyone and that she's here to grab the Mirror of Ra. Accept her request to join your party, and she'll follow you. Now head southwest and go up the staircase. |
| Before heading up the next staircase, head north and flip the switch. It'll open the left tower. Now head up the staircase. |  |
 |
On the next floor, you'll notice part of the tower is suspended by energy. Head down either the northern or southern staircase. |
| You'll notice a large purple sphere reflected in the mirror. Move the sphere outside of the mirror's reflection range, and it'll shatter. |  |
 |
The energy suspension of part of the tower is removed. Now do the same process on the other staircase. Now head to the bottom of the right tower and enter the left one. Head north past the first staircase like you did in the last tower. |
| Head southwest and up the stairs. Head south again past the stairs to net a chest with an Agility Seed in it. Head back north and go down the staircase. | 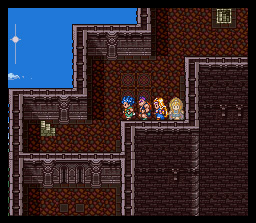 |
 |
Head southeast and go up the stairs. Head north in the next floor and up the stairs. |
| Head southwest then check the reflection in the mirror. Search where the stairs should be to find them. Head up those stairs. On the next floor, head up the stairs. Ignore the switch- it just locks the right tower. |  |
 |
You'll reach the top of the tower. Head down both staircases and shatter the purple orbs again. |
| The middle part of the tower will now fall down. Jump off the southern side of the tower and up into the new entrance. |  |
 |
Inside, you'll find the Mirror of Ra. Barbara is overjoyed that she can see herself in it. |
| Muriel and Hassan both realize that by using the Dream-Seeing Drops, Barbara will most likely become visible. | 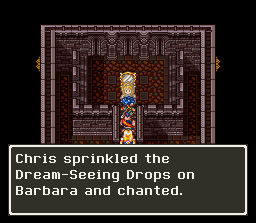 |
 |
After becoming visible and realizing she has no where to really go, Barbara joins the party. Now head back to the Shrine of Dhama. Examine the well and head back to Reidock. Before going there, you can take place in a little sidequest. |
| Once back in Reidock, enter the castle. |  |
 |
Talk to Soldi upstairs, and he'll be overjoyed that you've brought the Mirror of Ra. Follow him upstairs to talk to the King. |
| The King seems surprised that you found the Mirror of Ra. With this, Mudo cannot disappear during battle anymore. The King says to meet in the 2nd floor planning room tonight and dismisses you. |  |
 |
Hassan becomes tired of waiting and starts to wonder where the King is. Soldi comes downstairs and tells you that you're meeting in the King's Chambers so head up there. |
| The King appears to be in some sort of pain and mumbles about another Reidock... | 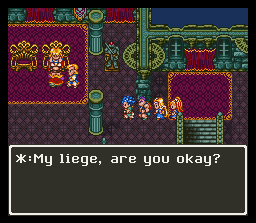 |
 |
The reflection in the Mirror of Ra doesn't show the current King either... |
| Suddenly, the Mirror of Ra flashes and reveals that the King is not the King of Reidock afterall. She collapses and is taken to bed. |  |
 |
The next morning, Soldi questions the woman. She reveals that her name is Shera. The minister seems to remember that name from somewhere... |
| Shera reveals that the King is with Mudo and may actually be Mudo. |  |
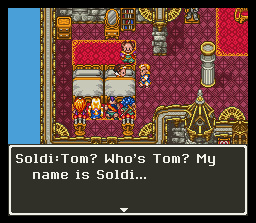 |
Shera asks General Soldi (whom she calls Tom) if he believes her. Soldi is very confused since the name Tom makes him nervous... Shera wants this situation to be cleared up and joins you on your journey to Mudo's Castle. |
| The Minister tells you that the castle is far to the southeast. Make sure you have plenty of Medical Herbs. |  |
 |
On the way to Mudo's Castle, you'll pass through a checkpoint. The soldiers there are dead. A traveling priest is there to save your game if you wish to do so. |
| Mudo's castle is in the extreme southeast across the poison marshes. |  |
The End of Mudo's Reign
|
This dungeon is long and hard. There's no other way to describe it. Get everyone to levels 15 or 16, or you'll find it very difficult to get through the entire dungeon. Once inside, head south and down the stairs. |
|
 |
On the next floor, head south into the next room. |
| You'll enter a room with tunnels to the east, northwest, and southwest. The northwestern tunnel is a dead end, and the eastern tunnel only takes you to a room with a skeleton inside. Take the southwestern tunnel. |  |
 |
First, head west and into the small opening. |
| Head northwest and through the tunnel to the north. Go down the stairs. |  |
 |
Now head south and open the chest for a Nut of Magic. The southwestern exit in the previous room just leads to a dead-end. Return to the previous large area. |
| Now head south along the weaving path to reach a chest with an Iron Helm inside. Now head north and climb down the ladder. |  |
 |
Head west and follow the path around until you've crossed the bridge. |
| First, head north and open the chest for a Sage's Stone. Head back south. |  |
 |
Head west and enter the cavern. |
| Head northeast and through the tunnel. Head south down the stairs to exit. |  |
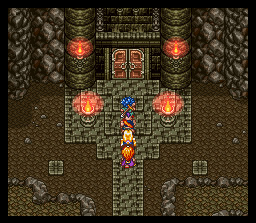 |
Now head north and enter the castle. |
| Once you enter, Shera realizes that Mudo will recognize her so she gives you back the Mirror of Ra. |  |
 |
Now, head down the stairs to the right. |
| Hit both of the switches to open the doors on the previous floor. Now head back upstairs. |  |
 |
Hit the switches on this floor to cause the metal plates to move away. |
| Areas on the floor below will light up. Make sure to hit all the switches. |  |
 |
Now head down and through the door on the left side. |
| This area well be better lit if you hit each of the floor switches. To open that fifth grate, circle around the room and head up the stairs. | 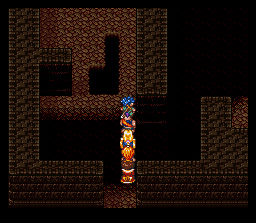 |
 |
While you're down here, make sure to grab the Dancer's Clothes. |
| Hit the 5th and final grate to illuminate the way to Mudo. |  |
 |
Head down two sets of stairs to reach Mudo's chambers. |
| Mudo finds it very amusing that you've come to visit him. | 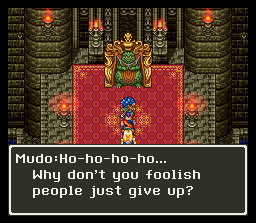 |
 |
Mudo: The first round of combat, the Hero and Barbara should cast Sap to knock Mudo's defense down to 0. Muriel needs to have Healmore in this battle. If Mudo casts Increase, have Barbara counter it with Sap. The Hero and Hassan should do their normal tactics, Muriel should heal, and Barbara should use Medical Herbs or use spells if necessary. If Mudo shouts in the Hero's voice, make sure to change your tactics back to normal the next round. |
| Mudo laughs that you can't defeat him and disappears. |  |
 |
Shera reminds you to use the Mirror of Ra so Mudo can't escape so easily. |
| The Mirror of Ra causes Mudo to reappear and show his true form... |  |
 |
The King of Reidock appears. Shera tells him that he was the demon king Mudo in this world. |
| The King tells you something very startling: the world you are in is not real- it is the dream world of the people of the real world. This fact also explains why you look like the Prince of Reidock. |  |
 |
General Soldi arrives with some soldiers to save the day, but he's a wee bit too late. The King asks Soldi to escort him and the Queen back to the castle. The King tells you to stop by the castle so you can be rewarded. Now leave the Underground Castle and head back to Reidock. |
| Back at Reidock, talk to the minister, and he'll tell you Soldi and the woman (Shera) haven't returned. He advises you to wait. |  |
 |
The next morning, they still haven't returned. The minister asks you to go find them. |
| Hassan is very confused about the recent events and wonders if you've been fooled. |  |
 |
Suddenly, Barbara understands. You need to go to the King's Castle which is Reidock in the Real World, not the Dream World. Now head back to Reidock in the Real World. |
| The only way to get access to Reidock Castle is to tell the guard you have information about the imposter prince. | 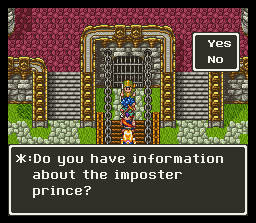 |
 |
One of the guards recognizes you as the imposter. Meepin... The other one tells you that something tragic has happened to General Tom. |
| You're thrown in jail until the King arrives. |  |
 |
The soldier comes back shortly and takes you to the King. He "misunderstood his orders"... wow. |
| The King apologizes for his moronic soldiers and explains what happened. |  |
 |
He King was on a boat to defeat Mudo but the boat was surrounded by light. The King collapsed, and the boat turned around. |
| Just like the picture says. The King is sure the Dream World people are pleased that Mudo is gone. The King has a favor to ask and wants you to follow him outside. | 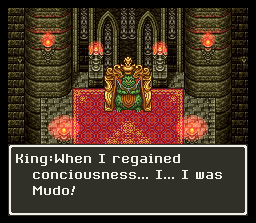 |
 |
The King tells you that the Mudo of this world is on the verge of being able to conquer the entire world. He asks you to defeat Mudo by seeking the Gent Clan's help. They are in the far nothern mountains. The King opens the gate that will allow you to pass to there and gives you a letter. Now travel to Gent. |
| Gent is in the far north. |  |
 |
Head to the northwestern section of the village to the Elder's House. Also, search the village to find a Pointed Hat, a Nut of Magic, a Defense Seed, and a Tunic. |
| Talk to the Elder, and you'll give him the royal letter. Sadly, the Elder cannot give you the boat since it can only be piloted by a member of the Gent Clan. When you try to leave, Chamoro, the grandson of the Elder enters. |  |
 |
Chamoro will hear a divine voice telling him not to let your party leave and to travel with them to Mudo's Island. |
| Chamoro tells the elder to give them the ship, and that he'll pilot it. | 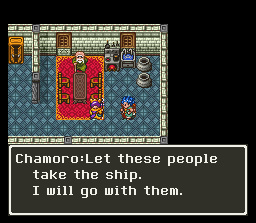 |
 |
Chamoro takes you to the shrine where the Divine Ship is kept. He pilots it, and the ship is lowered into the water. |
| Now for the attack on Mudo... |  |
The Assault on Mudo
|
The ship arrives on Mudo's Island. |
|
 |
Barbara says she'll stay with the boat despite Hassan's protest. Chamoro replaces her in your party. |
| You'll notice that there's another ship on the island. |  |
 |
After exploring it, Hassan will notice no one's there and wonder how the ship got here. |
| Now head into the cave. |  |
 |
Be prepared for a long dungeon. Make sure to get Chamoro to level 13 to learn Vivify. This dungeon is very large and can be confusing. |
| First head southwest and go up the staircase. |  |
 |
Now head north through the tunnel. |
| Open the chest for a Chain Cross. |  |
 |
Head east and go up the stairs. |
| Head east for a chest with a Nut of Life in it. Return back down the stairs. |  |
 |
Now head to the northeastern corner and go down the stairs. |
| Head west through the tunnel and open the chest for a Full Plate. |  |
 |
Now head south and take the southern exit to get a chest with 1150 Gold inside. Now head back into the first room. |
| Head up the staircase that's surrounded by lava. Head up the next staircase too. |  |
 |
On this floor, head west then north through the tunnel. |
| Head east and into the tunnel. However, if you want to fight the Man-Eater Chest, head north and open the chest. |  |
 |
Man-Eater chests can cast Beat which can kill one of your party members. Just have everyone focus their attacks on it. |
| Head all the way east and up the stairs. |  |
 |
Head west then north parallel to the lake. |
| Cross the bridge and open the chest on the left for a Sage's Stone. The chest on the right is a Man-Eater. Head back across the bridge. |  |
 |
Now head north and through the small tunnel. |
| Cross the bridge and head back to the south. |  |
 |
Now head north and up the stairs. |
| Head all the way north and through the cavern. The chest to the right of the stairs going down is a Man-Eater. |  |
 |
Head north and go up the stairs. |
| Head northwest and follow the path to the cavern exit. |  |
 |
You'll reach this small clearing after leaving the cave. Chamoro decides you should rest here tonight. |
| Remember the scenes at the very beginning of the game? Well, you're here again. Chamoro realizes something seems strange after everyone but the Hero has left. |  |
 |
Hassan also realizes this whole area seems familiar. Talk to Muriel. |
| Muriel plays the flute, just like last time. |  |
 |
The dragon suddenly appears and everyone climbs on. |
| Now Mudo awaits... |  |
 |
Once inside, talk to everyone. Chamoro will cast a spell so that you can return here later. When you're done, take the door to the northeast and go up the stairs. |
| Open the chests to get (counter-clockwise) Man-Easter, 1800 Gold, and an Iron Mask. Head back down the stairs and take the northwestern exit. |  |
 |
Follow the path to the northern exit. |
| In the next room, head west and go through the door on the left. |  |
 |
Head north, and you'll find a statue blocking your path. Examine it to fight the Hell Beast. |
| Have the Hero cast Sap on them twice. Hassan should use Berserk while Muriel attacks. Chamoro should heal anyone that takes damage with the Gent Cane. These battles are not difficult. |  |
 |
After defeating the next Hell Beast, a staircase will appear. |
| Go down the stairs, and you'll see a demon behind a locked jail. Your key won't work so you should come back here later. |  |
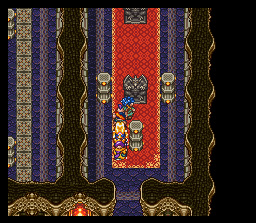 |
Now head back to the eastern path and fight through one more Hell Beast. The 2nd one can be ignored. Head up the stairs. Head up the stairs. |
| On this floor, head south. The pots are all Demon Pots with nothing inside. |  |
 |
Head west then north. Kill the Hell Beast blocking the way as seen in this picture. Head north through the barrier to get a chest with a Fire Claw inside. Head south and go up the stairs. |
| The demon sitting at the chair will recognize you as the people that Mudo sealed in the dream world. Hmm... The demon attacks soon afterwards. The Hell Guard is very easy to beat- just have everyone attack and have Hassan use Berserker. Now head 2 floors back down to the large room. |  |
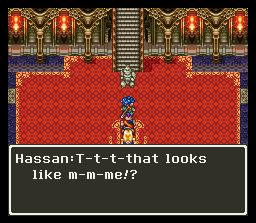 |
Hassan sees a stone stature of himself and is very surprised. |
| When Hassan gets close, his spirit reunites with his real world body. Hassan remembers that he was the son of the carpenter from San Marino. He, Muriel, and you went to defeat Mudo, but all of you were sealed off in the Dream World. Hassan then remembers the skill Spirit Punch. Now head north through the exit. |  |
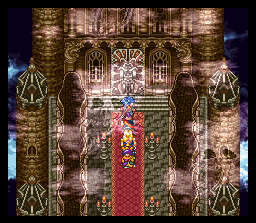 |
Heal up, and, when you're ready, walk through the door. |
| Once inside, just like last time, Mudo lifts you and and brings the party in front of him. |  |
 |
Mudo attempts to permanently banish you to the Dream World... |
| You wake up back in Lifecod, but this time, Tania has the Mirror of Ra. She notices her reflection seems strange. Suddenly, the Mirror brings you back to Mudo's Castle. |  |
 |
Mudo doesn't care whether or not you have the Mirror, he decides to kill you this time. |
| Mudo, Piero x2: Now you finally get to square off against Mudo. Don't kill the Piero's- Mudo only summons more. Have Muriel cast Increase. The Hero should attack Mudo and Hassan should use Spirit Punch. Chamaro and Muriel should heal with Healmore/the Gent Cane. Once Mudo is dead and only one Piero is left. Use the Gent Cane to recharge everyone's HP then kill the Piero. |
 |
 |
Mudo is at a loss for words that he was beaten that easily. |
| This time, Mudo shows his true strength. |  |
 |
Mudo: This battle is probably the hardest in the game. Spirit Punch is no longer an option since it nearly always misses. Have the Hero attack and have Hassan use Berserk. Muriel should start out by casting Increase then she and Chamoro heal the party throughout the battle. |
| The Divine voice comes back and congratulates you for killing Mudo. |  |
 |
The King is very glad you defeated Mudo and gives you a Staff of Thunder. The Queen will tell the Hero that he is definitely the Prince and should go out into the world and explore to find out about himself. Now remember that hole in the Dream World where Dhama used to be? Head there now to reach the revived Dhama Shrine. |
The Dhama Shrine
|
The hole has now been replaced by the Shrine of Dhama. |
|
 |
Inside, the people mention they were in a deep sleep. If you look around, you'll find a Nut of Magic and a Nut of Life. |
| Talk to the man at the altar to change the job classes of your characters. | 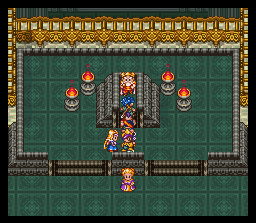 |
 |
If you talk to the old woman that's walking around downstairs, she'll tell you how many more battles you must fight to advance your class. |
|
If you go into the northern room in the first basement, you'll notice torches that are all over the room. As you gain levels in jobs, the torches will shine brighter. By getting to job level 5 or higher, the torch reaches it's highest level. If you can light up all the torches, the bonus dungeon will open up. If you're up to it, you can now get the hidden character Amos. |
 |
Arcbolt's Monster and a Blue Swordsman
|
Head northeast of Mudo's Castle on the ship, and you'll reach Arcbolt. |
|
 |
Upon entering Arcbolt, you'll run into a blue swordsman carrying a coffin. How strange... |
| Read the sign to learn the current situation. | 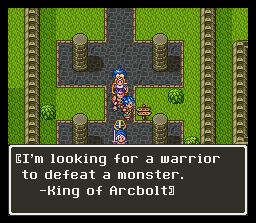 |
 |
Talk to the guards, and they'll let you enter. |
| Stay at the inn and recover then talk to the soldier seen in the picture. He'll challenge you to a fight. |  |
 |
Garcia: Garcia is very easy to defeat. Begin the battle with the Hero casting Sap, and Muriel casting Increase. Have Hassan use the Spirit Punch, and everyone else attack. Whoever has the Gent Cane should use it to heal when necessary. If Amos is in your party, have him use Transform. After defeating Garcia, he'll let you pass. |
| Talk to the soldier blocking the stairs, and he'll tell you that you did a good job and maybe he'll get to fight you. He'll head upstairs and you should too. Now that the castle is free to explore, search it to find Small Medal x2, a Silk Robe, and some Slime Clothes. |  |
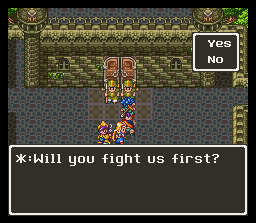 |
2 Guards stand blocking the way to the King's Chamber. If you want to enter, you'll have to get through them first. |
| Scott & Holidy: This battle is not difficult either. Scott is very annoying- kill him first. He'll cast Defense on your party and Bikill on either himself or Holidy. Holidy will only attack. Amos's Transform works wonderfully here. Hassan should use Spirit Punch, and the Hero should attack. Heal with the Gent Cane when necessary. After defeating them, you may see the King. |
 |
 |
The King explains that you've been fighting the guards so he can find the strongest person in the land. They need to kill the monster in the northern tunnels, and all the soldiers that went there died except for Brast. |
| Now you will fight Brast. He asks you to meet him in the Training Room which is in the southwestern corner of the castle. Head there. |  |
 |
Brast introduces himself and asks if you are ready. |
| Brast: Brast is much harder than the other guards, but he isn't too difficult. You must cast Increase- Brast loves to hit the entire party at once. Sap will not work so don't even bother casting it. Have Hassan use Berserk since Spirit Punch will never hit. Amos isn't helpful in this battle since Brast is immune to the Vacuums and the Quake attack. Have Chamoro handy in case some one dies during the battle. |
 |
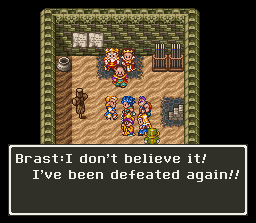 |
After defeating Brast, head to the throne room since the King wishes to give you something. |
| The King offers you the Sword of Thunder if you can defeat the monster inside the Northern Tunnel. But, he wants proof and gives you a coffin to bring the monster back in. |  |
 |
Head north to reach the Northern Tunnel. |
| Head down the stairs then southeast through the workers's area. |  |
 |
Head east until you reach the soldiers. Talk to the soldier, and he'll let you pass. You'll have to kill a Horror Walker and a Fighting Panther before you can enter the cavern. |
| The next area is a large windy path. Continue heading north. You can find a Defense Seed and 580 Gold. |  |
 |
In the next floor, first head northeast then south to reach a chest with a Battleaxe inside it. |
| Now head to the southwestern corner of the cave and head down the stairs. | 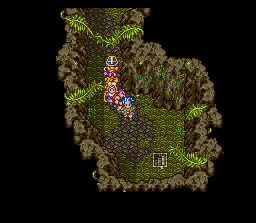 |
 |
On the next floor, head west then head all the way north to reach the monster. |
| If you examine one of the whole eggs, a Hell Viper will pop out and attack you. If you have a dancer, use Entice Dance every round, and the Hell Viper will never get a turn. |  |
 |
At the far end of the cave, you'll see Terry, the blue swordsman, has already made it here before you. |
| Terry crushed many of the monster's eggs, and now the beast wants Terry's head. |  |
 |
Try talking to the monster, and Terry will yell at you to get out of the way. |
| You'll then see a short scene in which Terry brutally defeats the monster with style. |  |
 |
After defeating the monster, Terry leaves, victorious. Doh. Return to Arcbolt. |
| When you get to the castle, Terry gloats about his victory and laughs at you. |  |
 |
Talk to the King, and he'll say how much more powerful Terry will be. Joy. Now head back to the Northern Tunnel. |
Dreams of a Perfect World
|
Talk to the man left in the tunnel, and he'll tell you that the tunnel has been completed. Head through the tunnel and come out on the other side. |
|
 |
Begin heading north after reaching the other side of the tunnel. |
| In the northeastern part of the Northern Lands there are a few houses. Enter them and talk to the residents. |  |
 |
You'll hear about a staircase to the west. Many people have disappeared over in that area... Search the homes to find Fairy Water, a Gold Ring, 7 Gold, a Medical Herb, and a Small Medal. |
| Head west of the houses to find the staircase that was mentioned. Walk up the staircase. |  |
 |
The staircase deposits you back in the Dream World. Head southeast. |
| As you head south, you'll notice another tunnel. Head inside. |  |
 |
Head west then go south. Head west and open the chest to find a Small Medal. Head back onto the main path. |
| Head all the way west to reach the tunnel exit. |  |
 |
On the other side of the tunnel is the desolate village of Calcado. Enter the village. |
| In town, you'll here talk of a floating island that appears on the western penninsula... |  |
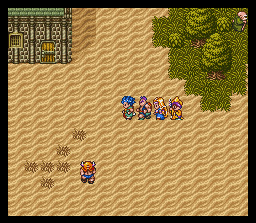 |
The town itself is desolate and dying. The well is dry, the people have lost all hope. All they do is talk about the floating island. Search the town to find Wayfarer's Clothes, Fairy Water, and a Small Medal. |
| The talk of this Land of Happiness seems very suspicious... |  |
 |
According to the nun, the Land of Happiness will appear again tonight during the full moon. |
| Visit the weapon shop on top of the inn. There, you'll meet Mahamed, the traveling fighter. He is the only person in town that doubts a Land of Happiness could truly exist and that something just isn't right. Now once you exit, it will be night time. Leave the village and head to the west. |  |
 |
Head west to the penninsula, and, sure enough, there's the floating island that everyone was talking about. Enter the island. |
| Once at the island, you're welcomed to the trip to the Land of Happiness. Woo. Talk to the captain, and you'll set off. Walk north and enter the building. |  |
 |
Inside the building, you'll meet up with Mahamed fromt he weapon store. He's not sure what to believe any more. |
| Talk to the bartender and accept the 2 glasses he offers. He'll then ask if you would like to rest a bit- accept his offer. |  |
 |
Shortly after nodding off, the island reaches it's destination. |
| You're woken up by none other than demons. Meh... figures. |  |
 |
The demons escort you to "Utopia." Yay! |
| Eh... this isn't Utopia... |  |
 |
Up by the pedistal, Jamiras gives a wonderful speech. It explains why even after Mudo's death, monsters still remain. Mudo wasn't the Demon King after all- he was only a member f the Maou, the Demon Clan. Jamiras has faith that the demons will rule the world. |
| Of course, there must be sacrifices. Can't have a good demon rally without human sacrifices. | 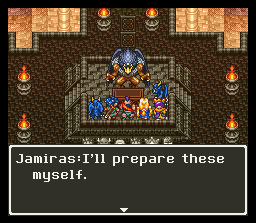 |
 |
Jamiras: Jamiras can be a real pain, especially if you used an emulator and saved right after talking to everyone. Jamiras makes heavy use of Fire spells and is also immune to them. Just like our old pal Mudo, Jamiras gets 2 attacks around and puts them to good use. He can do a swing attack which can do heavy damage to one person, and he also really likes to hit everyone with fire attacks. He's too fast to pull off a Spirit Punch so Hassan will be stuck with Berserk. Berserk can be a very BAD idea in this battle since Jamiras can seriously rack up the damage on the party quickly. Make sure you have the Gent Cane ready for healing and have Increase. |
| After you defeat him, Jamiras will realize that you were the ones that killed Mudo too. |  |
 |
As he dies, he tries to call out to his master but fails. Haw. |
| The petrified people standing in front of the elevated area are now released. Mahamed states that he was right all along. So he came along even though he knew he was going to die? |  |
 |
With the death of Jamiras, the souls of those that were sacrificed are able to return to ever lasting peace. |
| With the seal broken, the Medal King is revived too. His castle will appear where the hole to Torruka once was. | 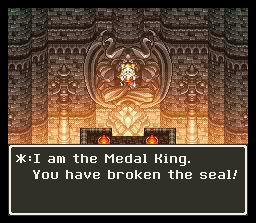 |
 |
Head back to the island and talk to the old man at the uh... helm. He'll have the island begin to sail back to Calcado. Go inside the building and nab the Small Medal. |
| Now with Jamiras gone, who will be the next Maou to replace him? |  |
 |
Talk to the old man, and he'll ask if you would like to rest until you reach Calcado. Accept his offer. |
| He'll wake you up once you arrive and tell you to go talk to the villagers. |  |
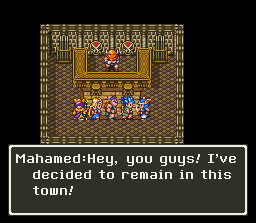 |
Everybody is very happy that everyone who was sacrificed has returned. Mahamed tells you that he's going to remain in town since the people here need his assistance. Now that the island is yours, you have a ship in the Dream World too. |
The Trials of Holstock
|
Now where should you go you might ask? Take your new island-boat-thing southwest of Jamiras's castle, and you'll arrive at this island. |
|
 |
Talk to the old man, and he'll tell you that you need the 4 Legendary Armaments to get to the castle of the gods. It all begins in an island in the southern sea where the stairs descend. Interesting eh? Make sure to nab the Small Medal out of the pot in his house. |
| Now sail south until you reach the island seen in the picture. The island is just north of the huge desert in the center of the Dream World. Head down those stairs. |  |
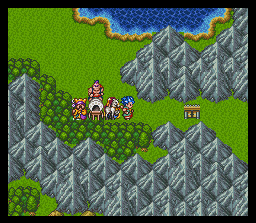 |
Head southeast then east and go through the checkpoint. |
| Talk to the guard to learn of his dream. He was on the way to the Land of Happiness but was saved by adventurers. Heh. Stop by the inn and grab the Small Medal from the pot. Continue on through the check point. |  |
 |
Head south to the small village of Holcotta. |
| Holcotta is a quiet little town. Search around to find Small Medal x2 and a Full Moon Herb. |  |
 |
The boy in the stable mentions how he used to play with Prince Holse alot. |
| You'll learn that Prince Holse needs to go through a ritual baptism, but he keeps running away. After talking to everyone, you're finished here. |  |
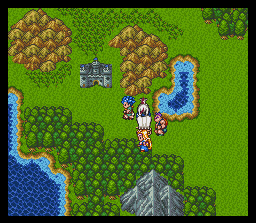 |
Head west to the Castle Holstock. |
| Once inside the castle, talk to the soldiers. The King needs some help with some task. Search the castle to find a Small Medal and an Wisdom Seed. |  |
 |
During your exploration of the castle, you'll probably run into the arrogant Prince Holse. |
| The King is needing some brave adventurers to escort his son to the Baptismal Cave to the south. It's been overrun with monsters, and, of course, not even the best soldiers could fight them off. After you agree, King Holten asks the Minister to go bring Holse in. |  |
 |
As luck would have it, Holse isn't around. |
| Now you have to find Holse in his little hide-and-seek game. |  |
 |
Head to Holse's room first. Talk to the kid in there, and he'll tell you that he hid in a barrel the other day during hide-and-seek, and the Prince was very impressed. |
| Search the barrel on the far right, and Holse will pop out of it. He says he's going to see father. Now head upstairs. | 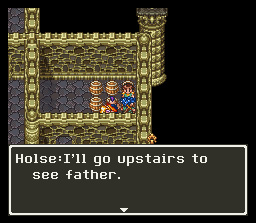 |
 |
The King apologizes for Holse and asks you to take good care of him. 4 soldiers come inside the throne room to see Holse off. Right when you arrive downstairs, Holse says he has to get something and to wait there. Of course, now he's run off. |
| Head downstairs and follow the tunnel to the southern end. Holse will be standing on the ledge. He says that he knows if he runs away he can't be baptized and suceed his father, but if he's killed by monsters, he can't suceed him either. Holse gives in and joins you. |  |
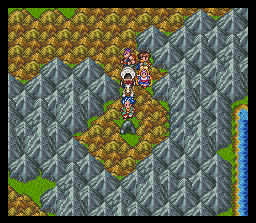 |
Now head south to the Baptismal Cave. |
| Before you can get really anywhere in the cave, Holse turns and flees. Head back to Holcotta to the stables where the Small Medal was. |  |
 |
Once you talk to Holse, he'll rejoin the group. This time, he won't flee again. However, if you go anywhere other than the cave, Holcotta, or Holstock, Holse will flee back to Holstock and will wait for you there. If you die, you can also find him there. Now head back to the Baptismal Cave. |
| Once you're back in the Baptismal Cave, head all the way north and go down the stairs. |  |
 |
On the next floor, head north and then take the northeastern path to get a chest with a Chain Cross inside. Head back south then go take the northwestern path. |
| Since Holse is with you, the demon blocking the way will challenge you to a battle. |  |
 |
First Trial: This battle will be very easy if you have a Level 6 Dancer. If you do, have he/she begin the battle by using Stillness to seal the First Trial's dances. If not, you can use StopSpell to seal it's magic- do NOT do both. If you seal off both it's weak magic ( Blaze, Infernos, Firebal etc) then you'll have to deal with it doing around 80 damage to everyone each round. Use Spirit Punch and regular attacks to make short work of the First Trial. |
| After winning the battle, you'll notice Holse ran over to the tunnel with the treasure chest in it. Proceed over there and talk to him. Holse said he didn't want to get in the way and get hurt so he ran over there. Now exit by walking north then east and having Holse open the previously sealed door. Walk down the stairs. |  |
 |
First, head to the northwestern corner of the cavern to get a chest with a Small Medal inside. |
| Head back south then east. Go north as seen in the picture and cross the bridge. Head east then north to meet up with the Second Trial. |  |
 |
Second Trial: The Second Trial is more annoying than difficult. It has a permanent Magic Reflection Barrier so spells will always hit you if cast. The Second Trial mainly uses Physical Attacks and Wind Slash with the occasional ChargeUp or Hypnosis to put one of your characters to sleep. Spirit Punch works very nicely here. Make sure to heal with Healmore/Gent Cane when needed. |
| After the battle, Holse ran off to the south so head over there and grab him. Holse will apologize for running away and realizes that you truly are strong. He says he won't run away this time, and he means it. Head north with him to open the door then go down the stairs. |  |
 |
On the next floor, first head south for 3 treasure chests that are a Man-Eater, Small Medal, and a Half Plate. Now turn around and head north. |
| Head north to reach the 3rd and final Trial that challenges you to battle. |  |
 |
Third Trial: The Third Trial is another battle that's more annoying than it is difficult. Every round, the Third Trial will cast Defense and then attack you. Later, the attack may be replaced by Reflect. When Reflect is being used, have someone use a very weak spell (Blaze, Infernos, etc) to cancel the Reflection. The next round, the Third Trial will most likely waste time putting the Reflection back up. Spirit Punch misses here so you're stuck with Berserk. |
| After defeating the Third Trial, have Holse open the last door and walk through it. Now the uh... local Baptismal Cave Priest will preform the baptismal ceremony. Holse stands under the waterfall and is baptised. He rejoins the group and asks you to take him home. Now leave the Baptismal Cave and return to Holstock. |  |
 |
When you arrive at Holstock, head up to see the King immediately. Everyone congratulates Holse for completing the trials. He can now take the throne whenever he's ready. Holse says he wishes to learn more before he does that though. |
| A celebration is thrown that night. |  |
 |
The next morning, the King says you can keep any of the treasures you looted from the Baptismal Cave. Talk to him again, and he'll give you the Magic Key. Now put this key to good use and get the Small Medal from the courtyard. Return to Arcbolt and open the door there for a Poison Needle and a Small Medal. |
| Now head southwest of Holstock to this small hut. |  |
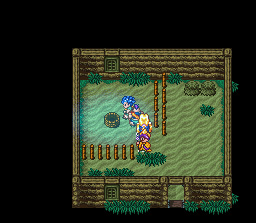 |
Open the hut with the Magic Key and examine the well. Kill the Well Mimic, and you'll be transported to the Dream World. |
Flying Beds and Other Strange Things
|
You'll arrive in the Dream World inside another well. Climb up the rope. |
|
 |
Head far to the southeast to the quaint town of Clear Vale. |
| Clear Vale is known for its Flying Bed. Ok... Search the town to find a Small Medal, a Piece of Cloth, Dancer's Clothes, and Fairy Water. |  |
 |
You'll hear that it seems the Flying Bed came from the empty house in the northeastern corner of town. |
| The door to the house is locked, so you won't be getting anywhere... |  |
 |
Leave town and head west to find another staircase. Head down those stairs. |
| Now head east of the stairwell to reach the real world counterpart of Clear Vale. |  |
 |
Once you arrive at Clear Vale, search the town to find a Small Medal, 50 Gold, and a Strength Seed. |
| Talk to the people around town. You'll learn about the actor Panon that all the children loved. |  |
 |
The other person you'll hear about was the little boy John that died of an illness. Panon promised to get him the Courage Badge from the Wall of Destiny, but Panon never came back... |
| Head to the church to meet John's parents. They're talking to the priest to learn whether or not John was happy. After they leave the church, |  |
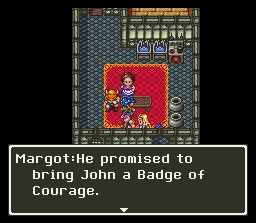 |
John's parents mention that Panon was going to bring some of the Courage Rock back so they could make a Badge of Courage for John, but Panon never returned. Now leave the town. |
| Head northeast to the Wall of Destiny. |  |
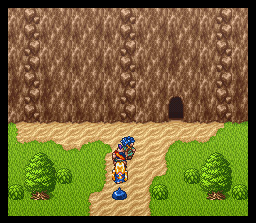 |
Once at the Wall of Destiny, head inside the cave. |
| Inside, there is a nun that will save your game and a Priest who tells you that you'll need the Golden Pickaxe to get very far. Head back outside. |  |
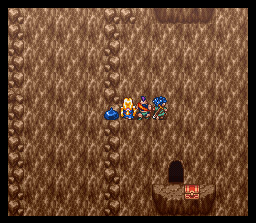 |
First head up the right path and drop off the side to get this chest with 350 Gold inside. The hole inside the cave takes you back down to the cave on the ground. |
| Now head back up the path and drop off onto the one seen in the picture. | 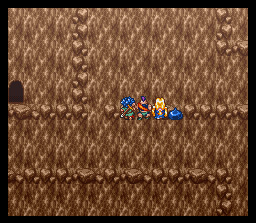 |
 |
Head right to where the Hero is in the picture and drop off the path. |
| You'll land right on this small area in front of this cave. |  |
 |
Head inside to get the Golden Pickaxe then drop back off and head west.. |
| Drop off once again to reach a cavern. Head inside. | 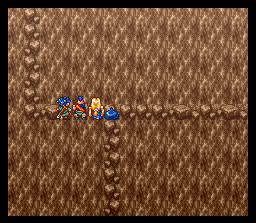 |
 |
Use your new and shiny Golden Pickaxe to hammer down the wall. Open the chest for a Small Medal and jump into the pit. |
| Head up the path on the left this time and grab the chest for a Nut of Life. Take the left path up to the point where you can drop back down on the right path and drop down. |  |
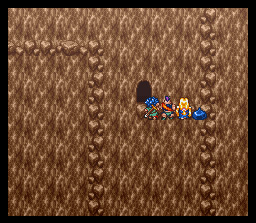 |
Head up and go into this cavern. |
| Once inside, use the Golden Pickaxe and go up the stairs. |  |
 |
Head north and use the Golden Pickaxe to bash through the 2 sets of rocks blocking the path. Head up the stairs. |
| Now head southwest and exit the cavern. |  |
 |
Head east and climb up the wall and go into the cavern. |
| Use the Golden Pickaxe once more then go up the stairs. Head southeast and exit the cavern. |  |
 |
Head east and climb up the path then head back west. Drop down onto the ledge and enter the cavern. |
| Head north and go up the stairs then south to exit the cavern. |  |
 |
Climb up to the summit. |
| At the top, you'll see the huge Rock of Courage. Head up and use the Golden Pickaxe on it to chip off a piece. You'll get the Fragment of Courage. |  |
 |
Return to Clear Vale and talk to Harris. |
| He'll be shocked that you were able to get the Fragment of Courage and that you actually climbed the Wall of Destiny. |  |
 |
Accept his offer to stay the night, and he'll let you sleep in John's room. |
| When you wake up, you'll be in John's bed in the Dream World. The bed will suddenly levitate and head outside the house and into a vortex. |  |
 |
John appears and thanks you for getting him the Fragment of Courage. He lets you use the Flying Bed since he doesn't really need it anymore. |
| The bed flies out of the house, and now you can control it. It can't fly over hills, mountains, or forest though. |  |
Taking Your New Bed for a Spin
|
Now that you have your bed, it's time to look around the Dream World in places you previously couldn't access. Do note, this section is entirely optional, but it is very beneficial to go through. You'll learn some valuable information about some of the legendary equipment. |
|
 |
First fly east of Clear Vale and head to this small cave. |
| The soldier in the cave is looking for Sufida's Shield. What he says is very important: First go north then go east. North at the first intersection, west to the next, then south. The soldier has no clue where any of this could be though and is thinking about giving up. Memorize this conversation so you can recall it later. |  |
 |
Before leaving, check the grave on the right for a Small Medal and the grave on the left for a Medical Herb. |
| Leave the cavern, and see if you can't follow the guys directions... If you do, you'll reach this well. Head inside. |  |
 |
Head east once inside the well, and you'll run into this guy. If you're playing with the patch, the dialogue here is messed up. In the Japanese version, he'll tell you that this isn't the place with Sulfida's Shield it in either. However, there are still some treasures in here. |
| Head east and grab the chest for 3700 Gold. Now head south. |  |
 |
Now head west. |
| Once you reach this point, head up the ladder and open the chest for a Small Medal. Now leave the well. |  |
 |
Take the best southeast of the Dhama Shrine to reach this small house. |
| The man there tells you about the well south of Amoru. You're told that the illusion is actually a person. How strange... Grab the Small Medal from the Barrel. |  |
 |
Southwest of the Medal King's Castle is a small hut. Head inside. |
| This hut belongs to a fortune teller. She says that she sees an island nation rising in the southern sea. She belives it's the city of magic, Calberona. The fortune teller is very confused by this vision. | 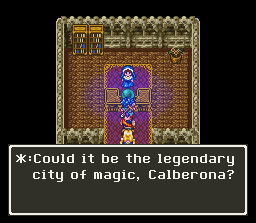 |
 |
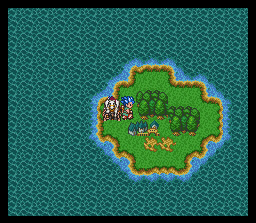
In the western area of the world, you'll come across this small island. Head inside to find a Small Medal in a barrel. There's a chest behind a locked door, but your key can't open it. |
| On the southwestern island, you can find this small hut. |  |
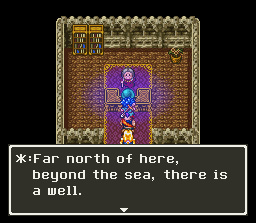 |
It's another fortune teller. She'll tell you there is a doorway to another world in a well to the far north. |
| Also on the southwestern island is a small church. Head there next. | 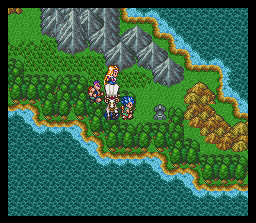 |
 |
In the church, the nun will tell you about a king that lived on this land once. He fought a great demon. His castle suddenly fell to ruin though for unknown reasons. The legendary Orgo's Armor was there too. Check the drawers for a Defense Seed and a Small Medal. |
| Head northeast of Lifecod to reach this house. |  |
 |
Inside, examine the well to be transported to the Real World. |
| Exit the small shrine, and you'll find yourself in the northernmost area of the world. Becareful here- the monsters are very strong. |  |
 |
Head southeast to Zaxon Village. |
| Welcome to the middle of nowhere. Search the town to find a Defense Seed, a Small Medal, a Beauty Plant, and a Wisdom Seed. |  |
 |
The main talk around town is the disappearance of the blacksmith Ende. He made amazing armor which was sold. However, no one has seen him for a long time. |
| The village has no priest, but a traveling nun has stayed here to tell stories to cheer the villagers up. The stories don't translate well at all so don't worry if they make no sense. They were supposed to be puns in Japanese. Once you're finished here, head back to the Dream World. |  |
An Illusion of Love
|
Take the Flying Bed south of Amoru to this well. Enter the well. |
|
 |
At the bottom of the well is a house. Head inside. |
| The man tells you that at the bottom of the well is Foam Castle which is known for it's Princess in the mirror. Leave the house and examine the well. You'll have to fight a Well Mimic. After defeating it, you'll be transported to the Real World. |  |
 |
Head southeast to Foan Castle. |
| At Foan Castle, you'll hear about the Princess that's trapped in the mirror. Search the castle to find two Small Medals, Nut of Magic, 150 Gold, and a Beauty Plant. |  |
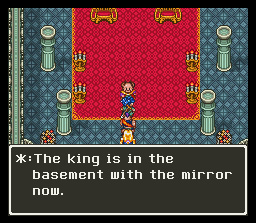 |
Go upstairs to the King's chambers. The minister will tell you that he's down in the basement with the mirror and will have the soldier move so that you can see him. |
| Head down to the basement and try to enter the center door. You'll hear the King's voice on the other side. He tries talking to the Princess. |  |
 |
The King will leave and ask who you are. He won't let you see the Princess though and states if you have other businnes to come see him upstairs. |
| Talk to the King, and he'll ask you to continue on your travels. Talk to him again, and he'll ask you if you've heard about the Mirror of Ra. Talk to him yet AGAIN to show him the Mirror. He'll have you come with him downstairs. |  |
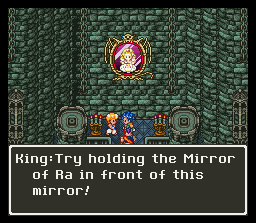 |
The King will ask you to use the Mirror of Ra. |
| When you use the Mirror of Ra, nothing happens. The reflection shows a demon laughing at you... |  |
 |
Head back upstairs and talk to the King. He'll mention a story about a prince and princess falling in love, but the magician Miralgo interfered. |
| There's supposed to be a tower north of the castle, but there's nothing. Leave the castle. The minister says to cast Identify to open the door of the tower. |  |
 |
Head north of Foan Castle to reach this well. Head inside. |
| Inside the well, talk to the old man. He'll tell you that there used to be a tower where the well is now. He dreams about the tower whichs is now in an ocean of sand. Check the chest of drawers for a Small Medal before leaving. Now head to the Dream World. By this point in the game, everyone on my team (except for recruited monsters whom I rotated out except for Slalin... ph34r the slime) had mastered 2 jobs and were working on their 3rd. If you've leveled up as much as I have, I -HIGHLY- recommend having a level 3 Sage for Bikill and a level 6 Superstar for the Hustle Dance. These two skills will making the upcoming boss fight much easier. |  |
 |
If you've checked the Dream World Map before, you'll have a good idea where you're heading- the vast desert in the center of the map. Head there and go inside the tower. |
| The door is locked. As was said, cast Identify to open the door then head inside. |  |
 |
Now that you're inside, head up the southwestern staircase. |
| Head south and begin walking on the outside of the tower. Follow the path and re-enter when you can then head north and up the stairs. |  |
 |
Head west ignoring the spiraling stairs at first. Walk north then down the stairs. |
| Open the chests on this floor to get a Small Medal and 1300 Gold. Now head back upstairs and climb the spiral staircase. |  |
 |
At the top of the staircase, head in the doorway. |
| Head northeast and climb the set of stairs. |  |
 |
Now, heal up before entering the house to face Miralgo. |
| Once inside, grab the Sage's Stone from the pot then talk to Miralgo. He's very surprised that you're here and know his name. |  |
 |
He explains that he sealed the Princess Erika in the mirror since she refused to be his bride. He doesn't like uninvited guests either. Pity. |
| Miralgo: Miralgo follows the obsessive compulsive "Must have Barrier up at all times" syndrome. Whenever he puts it up, cast Blaze or some other weak spell to knock it down. Generally he'll put it back up again the next round. Bikill really comes in handy here if you have it- as does PowerUp finally. Group that with Spirit Punch and Bikill to do tremendous damage. Miralgo will summon Lamp Mages to help him out. If the Lamp Mages are doing alot of damage to you, then dispatch them. Otherwise, ignore them and focus on Miralgo. Magic is very risky to use on Miralgo- I don't recommend it unless you're confident you can hit him without it reflecting back at you. |
 |
 |
Of course, Miralgo is shocked that he's lost. With his death, he releases Erika. Now return to Foan Castle in the Real World. |
| Once at Foan, talk to the King. He'll realize what needs to be done to free Princess Erika. |  |
 |
The King will take you back down to the mirror. |
| He'll chant something in Japanese... I've heard the loose translation is "Speak the name of the one you love." |  |
 |
The Princess will thank Foan and you for freeing her. Foan asks to if she will marry him, and the two walk off together. Aw... now head back upstairs and talk to the couple. |
| Talk to King Foan, and he'll give you the Watergate Key. Now you can continue on with your exploration. |  |
 |
Erika will tell you that Miralgo killed the man she loved long ago. Foan is the reincarnation of this man. She apologizes that she can't give you anything. |
More Relationship Problems
|
Now that you have your shiny new Watergate Key, head to that old Watergate. It's east of Foan. You'll be able to pass right through it now. |
|
 |
Your next stop is Pescani, so head to that island far to the southwest. Pescani is on the northeastern island in the archipalego. |
| Upon entering Pescani, you'll be asked if you came here searching for mermaids. Answer no, and the man will apologize and leave. You can search the town to find a Small Medal, Boxer Shorts, a Defense Seed, a Full Moon Herb, 60 Gold, and 7 Gold. |  |
 |
Talk to the villagers to learn that Rob was the fisherman that approached you. He's in love, but you can't find the exact details... |
| You'll also learn that Pescani is suffering because all the fish in the sea are being eaten by monsters. Talk to everyone around town then head to the Fish Shop. |  |
 |
The Fishmonger will mutter that he's been waiting too long then leave. |
| Follow him back to Rob's house. |  |
 |
The Fishmonger tells Rob he can't keep waiting and then leave. Talk to Rob then leave the house. |
| Before you get very far, Rob also leaves the house. Follow him but make sure not to keep too close. |  |
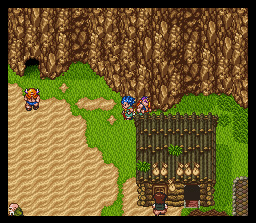 |
Rob will head to the cave in the northwestern part of town. Head inside too. |
| Slowly follow Rob from a distance. He'll exit the cave to the northeast. If at any point while you're following him, Rob notices you, he'll get mad then leave. Talk to the Fishmonger to restart the entire process. |  |
 |
Rob will slowly slink around in this section of the cave just to make sure no one is following him. Walk slowly and hide behind the walls. He'll exit the cave in the northern section. |
| In the next section, you'll see Rob walk up and hit a hidden switch in the wall which will open a door. He'll leave through the door, and it will close behind him. | 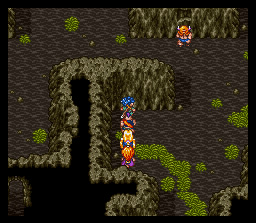 |
 |
Head up and examine where the switch was to hit it. Follow Rob through the exit. |
| Rob and a mermaid will both be startled by your entrance. |  |
 |
When Rob asks if you saw anything, answer no as in No, I saw something... He'll be very upset. |
| He begs you not to tell anyone about the mermaid Denae. |  |
 |
Rob will ask you to keep quiet about Denae. Tell him you will. |
| Denae will go off to swim for a while, and Rob will mention it's obvious she wants to go back to her friends. She was seperated during a storm and saved Rob's life, but she can't get back to her friends because of the monsters. Rob wishes he knew an honest man that had a strong ship. You'll mention that you have one, but Rob wants to see the ship first. Exit the cave and head back to the ship. |  |
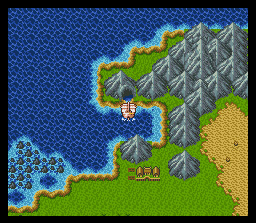 |
Take the ship north and into the cave. |
| Pilot the ship around the rocks and into the cave. |  |
 |
Rob will be surprised that the amazing ship you have is actually your boat. |
| Rob will then ask you to escort Denae home. Accept the offer. Denae is very confused and upset since she loves Rob and doesn't want to leave him. |  |
 |
Rob tells Denae he only wants the best for her and tells you not to fail him in escorting Denae home. Head back near Mudo's Castle. |
| Head east of Mudo's Castle to reach this rock formation. Head into it to find the mermaids. |  |
 |
Upon seeing your ship, all the mermaids flee underwater. |
| Denae shouts out before Dina submerges. |  |
 |
Dina expalins that the mermaids searched everywhere for Denae but feared she had either been abducted by humans or eaten by sea monsters. |
| Denae explains that not all humans are bad... especially not Rob or you. Dina gives you the Mermaid Harp as thanks. This harp will allow your ship to submerge underwater. At this point, the linearity of the game begins to fade. Now you can take most of the following quests in any order. But first, we have to have fun with our new toy. |  |
Deep Sea Diving 101
|
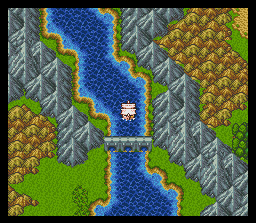
Whenever you're on the ship, play the Mermaid Harp to begin submerging. |
|
 |
Let's head north of the Mermaid Village for now to this castle. |
| Head south and dock. |  |
 |
On either side are guards guarding some chests. If you're feeling brave and/or foolish, you can challenge them. |
|
Killer Machine x2: |
 |
 |
South of Gent, you'll find this small cave. |
| Inside is the temple of the naming god. You can rename any of your characters here. |  |
 |
Head west of the Mermaid Village area to reach this castle. Head inside. |
| Inside, you'll encounter Rubiss, the guardian of the world. She was the voice that called out to you in Lifecod and at Mudo's Castle. She also made the flute which called the dragon at Mudo's Castle. |  |
 |
She'll tell you that she senses a much stronger power than Mudo that continues to threaten the world. |
| Remember the bridge that led you to the Dream-Seeing Cave? Dive under and and submerge. Follow the river along, and you'll run into this well on a small island. Head inside the well. |  |
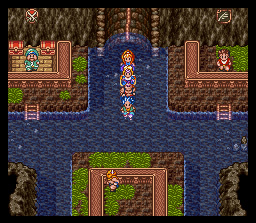 |
You'll discover this very nice shop that sells VERY good items. However, everything is exceedingly expensive. Grab the Small Medal in here too. |
| West of Clear Vale, you'll find this small island with a well on it. Head inside the well. |  |
 |
You'll meet the Stylish Smith. For a price, he'll improve certain pieces of equipment to increase their style. Style will become very important soon. |
| Head northeast of the Stylish Smith to reach this home. |  |
 |
Inside, the old lady will tell you she was from Calberona, the city of magic. She explains the island was destroyed in an accident once they discovered the magic spell Madante. Grab the Poison Needle from the pot. |
| Head north of Pescan, and you'll discover this underwater ship. |  |
 |
Once inside, check the barrels in the back to get a Small Medal and an Agility Seed. Then head inside the ship. |
| Head north and down the stairs. |  |
 |
Check the back of the ship to find Thick Armor, Glass Shoes, and the Final Key. Before we revisit all those locked doors, we have a couple more underwater destinations. |
| Head northwest of the Sunken Ship to reach this small home. |  |
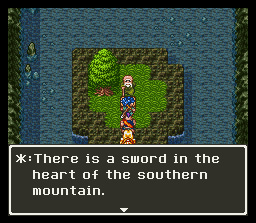 |
Inside, the old man speaks of a sword in the southern mountains. Only the priest Zam can remove the seal, but the old man hasn't spoken to him in 10 years. Grab the Small Medal from here and leave. |
| North of Reidock, you'll find this small underwater cavern. Head inside. |  |
 |
Land on the large are ato get a chest with 530 Gold. Now board the ship and begin following the northern river. |
| Take the path west to find this chest with a Shield of Power inside. |  |
 |
The slime down here will tell you that Poseidon is at the bottom of the sea near Gandino Castle. Grab the Small Medal to the north before leaving. Now we'll use our new key. |
| First head back to the Dream World. Head to Reidock. Open the chests behind the locked door to get a Small Medal and some Boxer Shorts. |  |
 |
Board you Floating Island ship and head into the pub. Go downstairs and unlock the prison to reach these chests. Open them to get a Sage's Stone, Small Medal, and Demon Armor. |
| Head back to the prison island in the Dream World. Open the locked door to reach a chest with a Magma Staff inside. Now head back to the Real World. |  |
 |
Head back to San Marino. Open the chests for a Small Medal and 1500 Gold. |
| Head to Reidock where another Small Medal and a Platinum Shield await. |  |
 |
Back at Mudo's Castle, you'll find the demon in the cell. Unlock the cell, and the demon will tell you that there is some one even more powerful than the Demon King. |
| Now head back to Arcbolt. Get the Small Medal from the dungeon. You'll also see the Battle Rex that Terry defeated in the other cell. |  |
 |
In Holstock, you'll find a Small Medal and a Platinum Mail. |
| Now head west of Amoru. You'll encounter this small shrine. Head inside and go through the well. |  |
 |
You'll arrive in the Dream World. Head southeast to another small shrine. |
| Inside, hit the switch, and the flood gates will open. You now have access to the Slime Arena. |  |
An Underwater Castle and the King of the Sea
|
|
Head undewater and go north of the Gandino Islands (in the southeastern section of the world). You'll find this staircase heading down- sail into it. |
| Head all the way down the 3 flights of stairs. |  |
 |
On the throne is the Sea King Poseidon. |
| He'll tell you about the new sea floor inhabitant, Glacos who is very unpleasant. He'll ask you to kill Glacos for him. Before leaving, search the castle to find Small Medal x2, GiveLife Armband, Silver Tray, and a Staff of Echoing. |  |
 |
Now head underwater and head directly north of the Stylish Smith's abode to reach this cavern. |
| Head north and go through the entrance. |  |
 |
Head north and walk up the bridge. Head across and then walk under, and you'll reach this area with stairs heading to the left and to the right. |
| Take either direction- they'll both take you to the same place. You'll want to get the chests on both sides though to get 270 Gold, a Wisdom Seed, and a Small Medal. Then head to the northern end of the room and go down the stairs. |  |
 |
First, head north and head into this small shrine. |
| Grab the chest for a Beauty Plant then exit. |  |
 |
Head east and go into the small shrine for another chest with a Magical Skirt inside. |
| Head north then east and around the pathway. Head south- the shrine you'll run into has a Mimic inside. Fight that if you want. |  |
 |
Head south and walk down the stairs. Head east and open the chest for a Pink Pearl. Head back to the west and go down the stairs. |
| First, head south and take the path all the way to the next 4-way intersection. |  |
 |
Take the western path all the way then head north and up the stairs. Head up the next set of stairs too. |
| Head south and hit the switch. The water flooding the area will be drained. Go down the stairs and through the door. |  |
 |
Grab the Small Medal in this room then head down those stairs. |
| First, head south and hit the switch to drain the water into the lower room. Now head north and go through the newly drained area and head south. |  |
 |
Hit the switch on the lowest level to drain the room above. Now head up there and go through that drained room. |
| Head up the stairs and open the chest you see to get the Sand Container. |  |
 |
Now head through the room and go south and down the stairs. If you accidentally hit the switch by the room with the chest, you can hit the switch next to the stairs to drain the room. |
| On this floor, the familiar music that was played back when you encountered Mudo returns... Head north. |  |
 |
Aww... he's the Maou is asleep... how cute. Talk to him to wake him up. Of course, we'd want to wake him up to have a fair fight instead of attacking him in his sleep... |
| Yeah, he's rather grouchy this morning. |  |
 |
He'll thunder on that you shouldn't have woken him up since he's a demonlord, oh. Scary. |
| Then he'll ask if you've come to break the seal on Calberona. |  |
 |
If you say yes, Glacos freaks out saying that they knew Madante, and something horrible would happen. Yeah. We all love those Use-All-Your-Mp-In-One-Attack spells. At least Orgo did it right in DW7 recovering his MP after each time he used it... Anyways, if you say no, he'll just decide to kill you since you came this far. Oh, and saying yes also causes him to try to kill you. What'd you expect? |
| Glacos: Glacos is really a pushover. Start the battle with the general Increase, and cast Bikill on your heavy hitters. Using the PowerUp-Bikill-Spirit Punch trick, you'll watch as Glacos quickly gets pounded into oblivion. Hassan was doing around 700 damage for me each time he did it. He even did a nice clean 810 at one point. If he happens to do a fair amount of damage to you, use Hustle to recover yourself. The only way Glacos ever really poses a threat to your party is through SnowStorm which can do a fair amount of damage. Hustle completely recovers yourself from it. Beating Glacos nets you the Spear of Glacos. |
 |
 |
After beating Glacos, he mutters about the seal. He then glows brightly and disappears. Aw. |
| With Glacos dead, the souls of the people of Calberona are freed. |  |
 |
The screen shifts to the gaping hole in the sea in the Dream World. |
| Calberona reappears and fills the hole. Before we head there, let's visit Poseidon again to see what he has to say. |  |
 |
Poseidon wishes to help you find the Shield of Sufida since you've helped him out by defeating Glacos. |
| He'll tell you to go down 3 floors and up 2 to complete a puzzle. |  |
 |
He'll tell you that there are 2 other puzzles guarding the shield, but he isn't sure about the other 2. Now for Calberona... |
A Magic Carpet Ride
|
Take your floating island to Calberona in the Dream World. Make sure Barbara is in your party. |
|
 |
You're welcomed to Calberona. Glacos sealed this city away long ago. You'll find Small Medal x2, a Sage's Stone, a Wizard's Ring, and a Nut of Magic. |
| The old man will tell you that Calberona is actually Barbara's home. |  |
 |
When it was sealed off, Babara's magic exploded causing Calberona to disappear, and she was sent far away. |
| The people in the town want Babara to replace the elder of Calberona. Barbara is left speechless. |  |
 |
You'll see a copy of yourself float up and enter one of the buildings... how strange. |
| Even the kids here use magic easily. |  |
 |
Head down the stairs in the northeastern section of the town to find the clone of you. |
| He'll mention he used the spell Mimic to pull it off. He'll also mention that Bubole predicted Barbara's return. |  |
 |
Head down the first well and go down the well inside the well (uhh... kay) to get a chest with a Wizard's Ring inside. |
| The old couple in northwestern house are asleep. The old man mutters Bubole's name. |  |
 |
A bard can be found in the very northern part of town- he'll tell you about the Magic Carpet. Last anyone heard, it was inherited by a stylish rich guy. |
| The townspeople also tell you that the elder is very weak, and they are having to use the Sands of Time to keep her alive. |  |
 |
Go to the Elder's house. |
| You'll notice if you try to go through the door, you'll be send back in time to when you first entered. |  |
 |
If you examine the ground, you'll notice the Sands of Time are sprinkled in front of the entrance. |
| Have Barbara used the Sand Container to gather the Sands of Time so you can enter the room. |  |
 |
Bubole is very glad to finally see Barbara, but Bubole is dying. |
| Bubole tells you about the spell Madante. |  |
 |
She'll then transfer her power along with Madante to Barbara. |
| Bubole will then die. Now head back to the northwestern house. |  |
 |
The Calbe's will be awake now. Mr. Calbe tells you how he used his powers to make magical items. |
| He even made a magical carpet... and now it's in the hands of a rich, stylish person. Head back to the Real World. |  |
 |
In the northwestern section of the world, you'll find the Best Dresser contest. Head there. You'll need to win the Best Dresser contest 3 times. Details on that are found here. After obtaining the Beautiful Carpet, return to Calberona in the Dream World. |
| Mr. Calbe will tell you that the carpet ran out of energy long ago. Suddenly, he'll notice that you have the carpet, and he'll re-energize it. |  |
 |
The carpet now functions perfectly! It has the same restrictions as the Flying Bed, but you can use it in the Real World. Head back to the Real World now. At this point, it's time to find all the legendary equipment. You can search for them in any order, but I recommend following it in the way I present them. |
The Armor of Orgo
|
First, head to the southwestern-most island to reach this castle. Head inside. |
|
 |
The whole place is completely ruined. The man at the top of the ruined castle mentions a great treasure was supposed to be here. |
| Head back to the bottom to find this well. Examine it. |  |
 |
You'll arrive at the castle in the Dream World. A soldier will notice you. |
| He'll lead you back into the castle. |  |
 |
No one is allowed to leave the castle until the important ceremony that's being held is over. You can find some items around the castle including an Agility Seed, a Beauty Plant, and a Small Medal. |
| Talk to the people of the castle to learn the disturbing news that the king is summoning a very powerful monster. |  |
 |
The monster is even more powerful than the Demon King. The King is going to attempt to summon it. Sounds like a great idea already huh? |
| The King is going to use the obscenely strong monster to kill the Demon King. Wow. Obviously they think that summoning an immensely strong and EVIL monster that can destroy anything including them easily and trying to force it to do their bidding and the monster will be very happy to do it. The thought that summoned evil demons never do what they're told and destroy stuff including those who summoned them never crossed their minds even once. |  |
 |
The King will immediately begin the preparations once you head upstairs. |
| In the adjacent room, you'll see the Armor of Orgo. Too bad you can't just grab it and run off. |  |
 |
The Princess is worried that her father might not be able to control the monster. Heh. |
| The Queen just says that if the monster is fed then it'll be ok. Fed with what? Your souls? |  |
 |
In the very top of the castle, you'll find the only sane and reasonable person here that knows what the king is trying to do will fail miserably. Why he's still here then is anyone's guess. |
| The soldier guarding the ceremonial room won't let you in unless you brought the offering. Say no and go down to the kitchen. |  |
 |
Talk to the cook and accept her offer to take the Ceremonial Offering up to the room for her. Head back upstairs. |
| Take the Ceremonial Offer back upstairs, and the soldier will put it in place. |  |
 |
Head back downstairs, and the King will be informed. |
| Head back upstairs to begin the ceremony. |  |
 |
The King will begin chanting to summon forth the evil monster of great power. |
| You can already tell he's not happy. |  |
 |
After the King attempts to give his request, the monster gets very unhappy. |
| He begins frying people. Never would have guessed the summoned evil and powerful monster would have turned homicidal like that... |  |
 |
After frying the King and the soldiers, the monster says he exists to kill. Don't worry, you haven't seen the last of this guy. |
| Goriki and the General come up and see the destruction. Goriki reminds the General that the armor must be saved. |  |
 |
As you head back downstairs with the General and Goriki, you get to see more of the carnage that the demon caused. The general will grab the Armor of Orgo. |
| The general will say he'll hide the armor in the underground warehouse. |  |
 |
The general removes the floorboards and heads down to the warehouse and seals the way behind him. |
| You'll then be led outside the castle along with the rest of the survivors. |  |
 |
Heading outside returns you to the Dream World. Now head back up onto the castle. |
| Head to where the training room was and use the Golden Pickaxe in the corner to reveal the staircase. |  |
 |
Head inside and examine the coverstone to find another staircase. |
| In the northern section of the underground caverns, you'll find the Armor of Orgo. Grab it and head back upstairs. Go back in the well. | 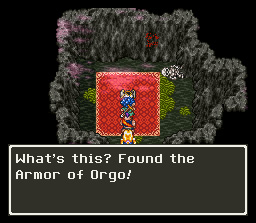 |
 |
You'll notice that Grace Castle is once again full of life. In fact, the whole scene is about to take place again! You don't have to go through it though- we're only here for the treasure. Head to the training room and use your Golden Pickaxe in the corner to reveal the stairs. |
| Head downstairs to find the 3 chests. Open them for a Small Medal, Aeolus's Shield, and a Strength Seed. |  |
The Shield of Sufida
|
Now head to the southeastern island to the city of Gandino. |
|
 |
The castle town of Gandino is very interesting. There has been a recent change of kings. There used to be an organized crime ring, but the new king doesn't allow it. Search the town to find Small Medal x6, Wayfarer's Clothes, Beauty Plant x2, 70 Gold, Agility Seed, Wizard's Ring, Wisdom Seed, Fairy Water, Nut of Life, and a Silver Bracelet. |
| In the church, you'll find an old man that prays for his daughter. He is very upset he was in the Gindoro. After praying, he'll leave. |  |
 |
The Gindoro used to have a strong influence in the country. They were very cruel to all the people. |
| In the large house in the eastern section of town, you'll find the old man asking for his girl back. |  |
 |
You'll learn he gave up the girl as payment. After talking for a while, he'll leave. In case you haven't realized, this place is the Gindoro Crime Ring. However, it no long operates. |
| The man in bed mentions he got a scar 10 years ago on his arm and was nearly killed. |  |
 |
The old man that's asleep downstairs mutters something about Gandino and the Dark Emporer... hmm. |
| In the well, you'll find a man that has been hiding frm the Gindoro for a long time. |  |
 |
Back in the old man's house, he'll mutter Muri... in his sleep. Could it be Muriel? |
| It was rumored that the last king gave the Shield of Sufida to the Gindoro, but the rumor doesn't seem to be true. |  |
 |
Most people believe that the shield is in a deep cave somewhere. The cave is said to be at the end of a river. |
| The old man in the jail mentions a mysterious girl with a flute that spoke about finding her brother. She escaped long ago. |  |
 |
You can move the stone by the old man to reveal a staircase. This path must have been what the girl used to escape. |
| The scholar in the castle will tell you some more directions for the shield: From the gargoyle statue go south, head along the left hand wall at the T-Intersection, and search the first corner. |  |
 |
Talk to the King, he'll ask if peace has returned. Say no, and he'll tell you to find the legendary shield. |
| At the bottom of the tower, you'll find the old Empress. |  |
 |
She is very insane and tells you that the old King is on a journey, and she is currently in charge of the country. She warns you about a monster in the dungeon (the Pott). Now leave Gandino. |
| If you haven't figured out where our destination is yet, it's the cavern directly east of Amoru. |  |
 |
Upon arrival, head north. |
| If you try to aimlessly wander through here, you'll never find the way. This floor is a complete maze. Remember the directions the soldier gave you a long time ago? Well, here they are if you've forgotten: go north. At the T-Intersection, turn east. Turn north at the first intersection, take the next intersection to the west, and then continue south to reach the stairs. |  |
 |
There are some other items on the first floor though including a Defense Seed, 1900 Gold, and a Small Medal. |
| After following the directions, you'll end up at this staircase. Head down the stairs. |  |
 |
Head west then south and go through the exit. |
| First head all the way south and through the exit to get a chest with a Swordedge Armor inside. Return to the previous room and head east. Take the northern exit to reach the center of the floor. |  |
 |
To the north, you'll find the Gargoyle statue that the scholar mentioned. |
| Follow his directions and search the ground to find some stairs. Head down the stairs. |  |
 |
Now you'll reach an endless loop of stairs. Remember Poseidon's advice? It comes into play now. Head down 3 floors and then head back up 2 floors. |
| Head south through the newly created entrance and head down the stairs. |  |
 |
Now head west and through the entrance. |
| Head south and take the first eastern exit. |  |
 |
You'll reach this chest with a Small Medal inside. Grab it and head back to the staircase. |
| This time, take the eastern path from the staircase. |  |
 |
Head north then all the way west through the exit. |
| Walk up to the chest and open for the Shield of Sufida. Equip it and leave the cavern. |  |
The Sword of Ramias
|
Head to the island west of Pescani to begin your quest to find the Sword of Ramias. Head into this inn first. |
|
 |
Inside the inn, you'll meet people searching for the Sword of Ramias. However, it seems you're 50 years too late. |
| The priest Zam knew how to release the Sword, but he's been missing for 50 years. |  |
 |
He was the only one that knew how to release the sword too. Without his help, it'll be impossible to get. Lovely. Before leaving, grab the Small Medal from the barrels. |
| Now head north to Mt. Snow. |  |
 |
You'll notice that everyone here is frozen! If you've played DW3 before, this scene looks rather familiar. You'll find a Fur Hood and a Small Medal in the town. |
| In the inn basement, you'll find an unfrozen man running the inn. |  |
 |
In the northeastern house, you'll find the only other unfrozen man. He goes on about he can't work in this place. |
| As you try to leave, he warns you about the cave to the northeast. Leave town. |  |
 |
Head northeast to the first cavern. |
| Navigate your way through the slick ice to reach the woman. She'll say you're the first visitors in a long time. |  |
 |
She'll tell you to return to the village to the southwest to find the young man Goran. Leave the cave and head there now. |
| Head back to the home of the unfrozen man. You'll find your favorite blue warrior downstairs trying to get information on the sword. |  |
 |
Talk to the old man after he leaves, and he'll laugh that you're trying to find a young man called Goran. |
| He'll tell you that he is in fact Goran. He'll tell you not to go back to the cave. This of course means head back there. |  |
 |
Once in the cave, the woman will guess that Goran told you everything. |
| Admit Goran didn't tell you anything, and she'll explain that Goran found her long ago after she saved him during a blizzard. He was supposed to keep the cave a secret, but he told everyone so she froze the people in town. |  |
 |
She believes Goran has suffered enough and removes the curse. |
| Then she'll tell you that she is the snow queen Yurina. The curse on Mt. Snow has been removed so head back there. |  |
 |
Back in town, talk to Goran, and he'll see that you met Yurina since the town is unfrozen. He'll babble on about his reckless youth. |
| Head to the church to find Zam. |  |
 |
He'll tell you that the legendary sword is deep within a cave northeast of here- the other cave. |
| However to access the sword, you must know several passwords to break the seal. First say Cold Blaze. Then "By myself I am honest" followed by "The Daughter of a strong man can lift barrels" and finally, "When you eat ice, your nose gets cold." Now leave town. |  |
 |
Now head northeast to the other cave. |
| Head north to reach the seal on the cavern. |  |
 |
Say Cold Blaze and the door will awaken. Now you must repeat the 3 phrases. However, you'll notice none of the choices are what Zam told you. What you're looking for is something close to the meaning. |
| Well, if you don't want to figure it out, here are all the phrases. After saying that, the door will open. Head north through it. |  |
 |
Make your way north through the next room and head down the stairs. |
| On the next floor, first head northeast to get a chest with 1900 Gold in it. Then go down the stairs. |  |
 |
Open the chest down here for a Small Medal then head back upstairs. |
| Walk north across the breakable ice and head down the stairs. |  |
 |
Slide north and go up the stairs. |
| Read the sign, and it will tell you the order which you must hit the switches. Walk north onto the breakable ice and hit the switches in that order. | 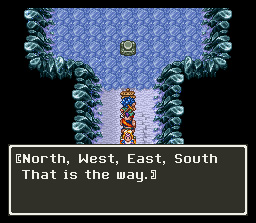 |
 |
After hitting all the switches, the door will open. Head through it. |
| Once you get inside the sword chamber, the blue warrior returns. |  |
 |
He'll grab the sword and wonder if the rusted one is really the Sword of Ramias. |
| He believes the Rusted Sword is nothing compared to his Sword of Thunder. He'll put it back and realize he's come all this way for nothing. |  |
 |
As he leaves, he'll tell you even with the Sword of Ramias, you'll stand no chance against the Demon King. |
| He'll tell you his name is Terry and he travels the world looking for strong swords. If Muriel is in your party, she'll be suprised at the mention of the name Terry, but she won't say anything. |  |
 |
With that, Terry leaves. Head up and claim the Rusted Sword. Now leave the cave and head back to Mt. Snow. |
| Talk to Zam- he can tell you found the Sword of Ramias. |  |
 |
However, when you show it to him, he's surpised that the sword is a complete mess. |
| He'll tell you that in Longadeseo, there are some legendary blacksmiths. Zam will give you the pass and tell you to head there. |  |
Fixing the Rusty Sword
|
South of the Shrine of Dhama, you'll find Longadeseo. Head inside. |
|
 |
Once inside, the guard will question why you're here. The hero will show the pass, and the guard will allow you to enter. Search the town to find Fishnet Stockings, Beauty Plant, Small Medal x2, 2500 Gold, Wisdom Seed x2, Nut of Life, and a Thief's Key. |
| The town of Longadeseo is very seedy. You'll here about Hawk who specializes in information. |  |
 |
Alot of people speak about the legendary blacksmith, but no one has any idea where he's run off to. |
| Some people don't even remember him ever being here. |  |
 |
There is a woman blocking the way into the northeastern house. Remember where she is. |
| More people will talk of Hawk arriving just a few days ago, but no one can seem to find him. |  |
 |
Hawk's house is actually in the well. His wife tells you to check the bar to find him. |
| If you check the bar, you'll notice Hawk isn't there. There are 2 bars- one of them is in the building with the laundry over it. Head in the secret door where the laundry is to enter. |  |
 |
Hawk is on the roof. The girl in front of the stairs will give someone a makeover if you want. This will increase their Style by 5 points. Head up those stairs. |
| Talk to the man on the roof and tell him you need to speak with Hawk. |  |
 |
Hawk will try to find out about the legendary blacksmith. He asks you to give him some time first. |
| Hawk will try to talk to you about the payment plans once you get downstairs. He says he'll charge 50000 Gold for his services. After deciding that's too much, he'll lower it down to 2000 if you can find him in his 3 disguises. |  |
 |
Head to the church. The priest will be talking to a man about Sally. Talk to the priest, and he'll reveal that he's Hawk and run off. |
| Now head to the Theater. In the dressing room, you'll overhear 2 girls talking. One of them says she couldn't convince Sally to work at the theater. |  |
 |
After one of the girls leaves, head inside and talk to the other one who will reveal the she's really Hawk. He'll run off to his last location. |
| Now head behind the bar and talk to the bartender. |  |
 |
Say no to his first 2 questions and yes to his last one to reveal that the bartender is really Hawk. Hawk will tell you to listen in on the conversation the two men are having and report back to him. |
| You'll hear that Colbe the blacksmith worked on the legendary sword but left 10 years ago to find it. |  |
 |
Return to Hawk's house. Pay him the 2000 Gold. Hawk will tell you everything he learned. Sally's blacksmithing skills are said to be better than her father's. She lives in the house to the north, and, if she's not there, she can be found to the temple to the north. |
| Head to her house to the north. You'll notice it's empty. Leave the town. |  |
 |
Head north to the temple. |
| In the temple, you'll find Sally yelling at her father's grave. |  |
 |
Approach her, and she'll notice you have the legendary sword. She accuses you of being the Demon King. |
| After calming down, Sally asks if you were wanting her to fix the sword. Answer yes. She'll say she can't and run back to Longadeseo. Head back there. |  |
 |
Head back to Sally's house and talk to her. She'll be surprised that you returned with the sword. |
| She'll tell you that if you promise to use it for good, she'll reforge it for you. Promise her, and then stand still when she says she wants to look into your eyes. |  |
 |
She'll say that she trusts you. You'll hand over the sword, and Sally will begin to reforge it. It'll take a while so we'll need to get the last piece of equipment while she reforges it... |
The Helm of Cevas and Our Hero's Real Identity
|
We'll begin our quest for both the Helm of Cevas and our Hero's true identity in the very northern regions of the land. South of a large mountain reminiscent of Lifecod, you'll find this small abode. |
|
 |
The soldier at the home will mistake you for the Prince of Reidock. He's mentions a fake prince is in the village in the mountains to the north. |
| Inside the house is an old man that used to be a traveling merchant. He dreams of a city that all merchants can gather at. Hence, Shiena is born in the Dream World. Shiena is south of Lifecod so... Before you leave, grab the Small Medal out of his chest of drawers. This medal makes 80. |  |
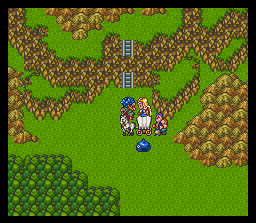 |
Now head north to the mountains. |
| On the mountain, you'll run into Judy from Lifecod in the Dream World. She actually recognizes you. However, things are different here. Rand hates you, mainly because he's jealous that Tania saved you. |  |
 |
Head up the mountain ladders and go into the cave. |
| Head northeast and go up the stairs. |  |
 |
Now head east and up the stairs. |
| Head southeast and make sure to grab the chest to get 880 Gold. |  |
 |
Head west from the cave. Head west past the stairs and head to the cliff and fall down. Open the chest for a Small Medal and then head back to these stairs in the picture. |
| You'll see what appears to be the Hero and Rand talking. Rand makes it clear that the Hero must leave the village. |  |
 |
The Hero tries explaining he doesn't have anywhere else to go. Rand doesn't care and leaves. The Hero leaves a bit after Rand does. Head east and drop down the path and enter the cave. |
| Grab the chests for a Small Medal and a Beauty Plant then drop down the hole. You'll have to reclimb the mountain after reaching the bottom. |  |
 |
Now just head north to exit the mountain. |
| From the mountains, head north to reach Lifecod. | 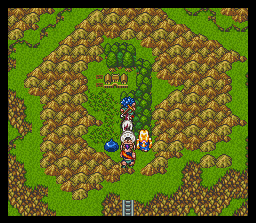 |
 |
Alot of the people in Lifecod just saw you with Rand. Search the town to find 10 Gold, Pot Lid, Defense Seed, Medical Herb, Royal Clothes, Stylish Bandana, and a Small Medal. |
| Rand can be found in the Inn. He'll ask if you came to fight him. No matter what you say, he'll still call you a coward. |  |
 |
Go to Tania's house. She'll call you brother, but then quickly corrects her mistake. She tells you to ignore Rand. In one of the drawers in Tania's house, you'll find some Royal Clothes. Interesting... |
| Head to the Elder's house. He'll comment that your wounds have healed, but your memory is still very bad. He asks you to spend more time with Tania. Head back to Tania's house. |  |
 |
Tania doesn't have too much to say so head back to the Elder's house. |
| Back in the Elder's house, you'll find him talking to the other you. The Elder thinks he's very sick and jumps into the bed. |  |
 |
Talk to the other you, and he'll be stunned to see another him. |
| The fusion process begins, but the other you becomes frightened and runs off before it can be completed. |  |
 |
It seems your alter-ego ran off to the mountain a little while ago. Follow him. |
| You'll find your alter-ego hiding in the caves. Talk to him, and he'll realize what this all means. |  |
 |
He says that you were once one person, but Mudo split you apart. Now you must rejoin, but he's scared to. |
| Before you can rejoin or do much more, a boy comes running in telling you that monsters have attacked the village. Now return to Lifecod. |  |
 |
When you return to Lifecod, you'll find the entire town up in flames. Go around and kill all the monsters. If you need to heal, talk to the priest in the church, and he'll heal you for free. |
| Once you've killed off all the monsters, head over to Tania's house. |  |
 |
You'll find your alter-ego trying to kill the demon. However, he doesn't stand a chance. |
| Your alter-ego will tell Tania that now he remembers everything. He's the Prince of Reidock, and Mudo split his spirit and body while he was searching for a cure for his parents' illness. |  |
 |
He'll ask you to take care of Tania- accept and the fusion process will complete. The Hero will learn Zap. |
| The demon is surprised about what happened and decides to kill you anyways. |  |
 |
Demon General: This battle is really very simple. Have the Hero cast Zap every round for around 90 damage. Use regular attacks with everyone else since all non-electrical magic won't affect the Demon General. He'll die very quickly if you fused since it will only have 400 HP. |
| Tania will be upset that the Hero's alter-ego is gone now. Leave her house. |  |
 |
Come back and talk to her again. She'll ask if it's ok for her to call you brother. Say yes, and she'll cheer up immediately. Now head to the Elder's house. |
| Talk to the Elder. He wants you to leave the village because the monsters came here after you. He says it's your decision though. Well, it's time to leave. Now head back to Reidock. |  |
 |
Back in Reidock, General Franco awaits your return. The King and Queen had hired a fortune teller to predict when you'd return and they were told you would arrive today. Franco then takes you to the castle. |
| The King is very excited that you've returned. He explains how Shera told him that you lost your memory after Mudo defeated you. |  |
 |
Shera notices that you've matured and become much more powerful. |
| Granmaz will visit you that night. She tells you that your dream self has become much more powerful over time. |  |
 |
Granmaz instructs you to explore the castle to begin to recover the rest of your memories. Leave the throne room and begin looking around. After recovering all your memories, head back to the throne room to see the very last one. After you view it, the King will have you stay the night. |
| The next day, the King will ask you if you're still wanting to save the world. Answer yes, and he'll give you the helmet he found on the way to fight Mudo. You'll get none other than the last piece of legendary equipment, the Helm of Cevas. Now head back to Longadeseo. |  |
 |
Back in Longadeseo, Sally just finished the restoration of the Sword of Ramias. She'll present the nice, new, and shiny blade to you. Now to revive Zenithia... |
Reviving Zenithia
|
You've probably noticed that small shrine in the forest to the west of Gandino. Wonder what it's for? |
|
 |
Time to talk to some people. First talk to Hawk. Hawk will tell you that each piece of the legendary equipment acts as a key. How would we see the symbol on each piece of equipment? With Identify of course! |
| The scholar at the shrine to the west of Gandino (not the one with the symbols) tells you another clue about matching the symbols. Now head back to the shrine. | 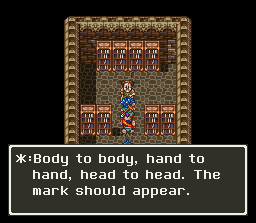 |
 |
At the shrine, take a look at the 4 symbols. Think of them as a diagram of the Hero's body. Identifying each of the legendary pieces of equipment shows what symbols would fit where. In case you're still lost, here's the solution: North- Sun East- Cross South- Heart West- Lightning |
| After putting them all into place, the symbol in the center will begin to glow. Make sure you have all the Legendary equipment equipped. |  |
 |
Suddenly, a floating castle will descend upon the shrine. The defenses will activate, and you must fight them. |
| Hell Cloud: Use the first round of combat to set up the usual spells- MagiWard, Increase, Bikill, etc. Hell Cloud isn't too difficult. It'll use a crushing attack to hit everyone in the party for a little damage. It's other attack is Infermost. If you have MagiWard, you won't take too much damage from Infermost. The Bikill-PowerUp-Spirit Punch trick comes in handy once more here. |
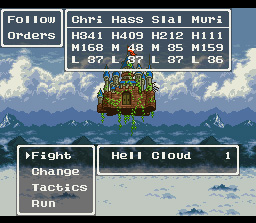 |
 |
Once on board the castle, the demons will run up and attempt to kill you. |
| They won't get very far before their master, Duran, tells them that you are very important guests and that you are to remain unharmed. How thoughtful of Duran! |  |
 |
Explore the castle. You'll find a skeleton in one of the rooms. Talk to it to learn that this is Cloud Castle. King Zenith ruled here until Duran sealed him away. You can also find a Nut of Life and a Leaf of the World Tree in the castle. |
| There is a slime outside of the castle that will tell you that this castle was once part of the Dream World until Duran brought it here. He sealed everyone away too. |  |
 |
In the library, you'll find 2 demons discussing the castle. It seems only the person with the legendary equipment can enter this castle, but there's another human in here too. Strange... |
| Another demon mentions that the last human that came here was only seeking power. Could it be...? |  |
 |
When you're ready for the upcoming battles, head north through the large doors and up the stairs. |
| You'll meet Duran, the ruler of Hell Cloud Castle. Hihihi. He'll be surprised that a human gathered the 4 pieces of legendary equipment before he could. He says you're a threat. Obviously. |  |
 |
He summons some demons to kill you so that he can have a good time watching a battle. |
| Killer Machine & Land Armor: This battle is really pretty easy. Begin with casting Bikill on both the Hero and Hassan (or whoever you plan on doing the Bikill-PowerUp-Spirit Punch trick with). Cast Increase because the Killer Machine gets 2 attacks a round and can quickly do massive amounts of damage. Kill the Killer Machine first then get the Land Armor. The Land Armor is more annoying than it is difficult. It'll frequently defend causing your attacks to do nex to nothing. |
 |
 |
Duran is surprised you were able to defeat his minions so easily. He says the next battle will be much more difficult since your opponent is a human. |
| He calls forth Terry to do battle with you. It seems Terry's quest for power brought him to Duran. |  |
 |
Terry: Terry is really very easy to defeat. Spirit Punch won't work on him since he'll dodge it almost every time so just use physical attacks. I found myself having the Hero, Hassan, and Slalin using physical attacks while Muriel did the Hustle Dance every round. Terry uses mainly Battlemaster skills such as Spinning Sword to do damage. Hustle Dance will heal all the damage you take every round though. |
| Once again, Duran is surprised by your strength. This time, he'll challenge you. Your HP and MP will be refilled before the battle. |  |
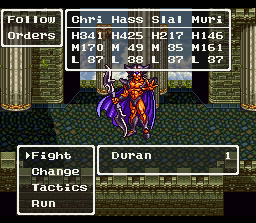 |
Duran: Duran can be a very annoying boss. Like the other Maou, he gets two attacks every round. Duran loves to cast Reflect and will frequently waste his turn to put it back up so dispel it every time you can. Spirit Punch won't work here, but Bikill + PowerUp + a phyisical attack can still be devestating. Make sure to heal every round. Duran also has a tendency to cast Nullify to remove all your support spells so don't be surprised when you have to recast them. |
| Duran is very amazed that you defeated him and is actually rather proud of you. |  |
 |
Duran will tell you that all the other Maou are nothing compared to their leader Deathtamoor. He hopes you get stronger so he can fight you once again once he is reborn. |
| Afterwards, Terry is rather upset that you seem content to leave him there. |  |
 |
Muriel will suddenly stop you. |
| She remembers everything and asks Terry if he does. |  |
 |
Muriel explains that Terry is actually her brother and that she was the girl from Gindorino. Terry will join the party after this. This scene also explains why Terry was so power-hungry- he couldn't save his sister then so he wanted to become the most powerful swordsman in the world to avenge her. |
| After leaving the castle, Zenithia will float back up and fill the hole in the Dream World. Return to the Dream World and head there now. |  |
 |
Now that Zenithia is back in the Dream World, all the people have been revived. Search Zenithia to find Small Medal x2 and a Leaf of the World Tree. |
| You can get the Sap of the World Tree from the boy in one of the rooms of the castle. It will recover everyone's HP completely. You can only have one at a time so when you use up the one he gives you, return to Zenithia to get another. |  |
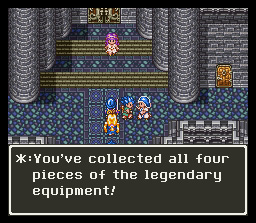 |
Many people are stunned to find that you've collected all of the pieces of the legendary equipment. When you're done talking to people, head to the throne room to talk with King Zenith. |
| King Zenith is glad to see you. He explains that Deathtamoor sealed away all the greatest threats: the Shrine of Dhama which teaches you powerful new skills, the Medal King for his equipment, Calberona because of Madante, and Zenithia because it is linked to the Pegasus Tower. |  |
 |
You'll need the Pegasus to reach the Dark World. King Zenith instructs you to go to the well which links this castle and the Pegasus Tower. |
A Flying Horse and a Tower
|
Talk to the guard in front of the well. He'll move out of the way. Now walk up and examine it to head inside. |
|
 |
Walk in between the pillars then climb back up the rope. |
| You'll be in this small shrine. Leave. |  |
 |
Now you're back in the Real World on the previously inaccessible island. Head north to the Pegasus Tower. |
| Head north and through the door. |  |
 |
First head east into this room. |
| Check the pots here. The lower-left one is a Strength Seed, and the upper-right one is a Pott. |  |
 |
Head down the stairs and talk to the old man. He took care of the Pegasus until Deathtamoor turned him into stone. Now leave the room. |
| Now walk north across the barriers on the floor and up the stairs. |  |
 |
Head west and go down these stairs first. |
| Open the chest for a Small Medal then head back up the stairs. |  |
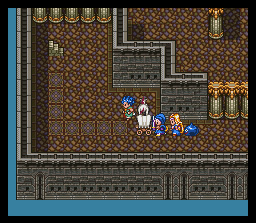 |
Now head along the southeastern path and then head west to reach the staircase. Head upstairs. |
| Head east and nab the chest for a Leaf of the World Tree. |  |
 |
Now head all the way north and up to this pillar. Head left to access the secret room. |
| Inside, you'll find chests that contain a Small Medal, Nut of Life, and a Dragon Killer. |  |
 |
Now head back to the main part and head north through the large entrance. |
| Head up the northwestern stairs in the next section. |  |
 |
Now head all the way east then go up the stairs. |
| On the next floor, make sure to get the chests for a Fire Claw (northern one) and a Mimic (southern one). The exit is to the southwest. |  |
 |
First head east to get the chest with a Strength Seed inside. |
| Now head all the way up the ladder to the top of the tower. |  |
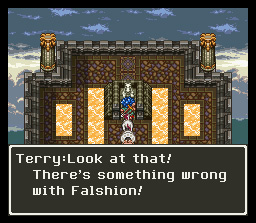 |
Examine the statue and then try to leave. One of your party members will notice that there's something strange about your horse. |
| The familiar reaction occurs again as Falshion is surrounded in light. |  |
 |
However, some demons aren't going to let you unleash the Pegasus and attack. |
| Hologhost, Lamp Demon, Devil Papiyon: First of all, it isn't necessary to be near level 50 for this battle- I was getting a Metal Babble, and it took a while... Take the Hologhost out first to avoid it's Death Dance. The Lamp Demon has the most HP so save it for last. Overall, this battle is very easy compared to the last few you've fought. |
 |
 |
After beating the demons, the Lamp Demon will cry out to Deathtamoor and die. The process will complete. |
| Now, the Pegasus is revived. It'll fly up and then come back down, and you'll receive the Reigns of Pegasus. Now return to Zenethia. |  |
 |
Talk to King Zenith. He'll ask you whether or not you've been able to make the pegasus fly yet. Your answer doesn't matter. He'll tell you that he'll release the powers of the Pegasus as he promised. |
| The King will begin to chant, and the powers of the Pegasus will begin to return. |  |
 |
The King will tell you that the Pegasus can now take you to the Dark World whenever you want by pressing X (the blue button) while flying. |
Darkness and Despair
|
Now return to the Real World. Use the Reigns of Pegasus to take off and head to the Dark World. |
|
 |
Welcome to Deathtamoor's World of Darkness, Doom, and Gloom. |
| Upon casual observation, your Max Hp is now 1 and Max Mp 0. All of your stats are at 0 too. That's probably a bad sign. BUT! There's a town to the northeast, so head there. Note: Until you recover your stats, do NOT use any Statistic boosting items. They won't do anything and will be wasted. |  |
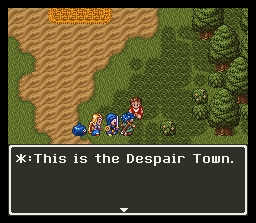 |
Yes, welcome to the Despair Town. Search this little side of hell to find a Small Medal (another is under the central cross in the northern part of town that you cannot reach yet), a Nut of Life, Wing of the Wyvern, and a Defense Seed. |
| The Priest in the inn will tell you that everyone in this world used to live either in the Real World or the Dream World. However, Deathtamoor brings people here to watch them suffer, and he draws his energy from their negativity. |  |
 |
If you head upstairs in the pub, you'll find this demon walking around. He guards this town and asks if you have a problem with that. Answering yes starts a fight with a Killer Jack which might prove rather difficult considering you only have 1 Hp and no Mp. If you're relatively strong though, you should be able to kill him rather easily. |
| Talk to the woman at the map where you see some people resting. She'll ask you to bring hope to the people. |  |
 |
The Priest also wants you to try to, but he's not sure how you can convince the villagers. |
| On the western side of town, you'll find some stairs going down. Head down and talk to the old man who wants to make armor again. The Hero will tell him that he's here on his own free will and to defeat Deathtamoor. The man won't believe him at first but decides to anyways. He tells you that he'll believe you if you bring him his tools from the Real World. The old man hands you his Rusted Pipe and tells you to give that to his wife in Zaxon Village. He'll tell you that his name is Clark Ende, the missing blacksmith. Now leave the town. |  |
 |
You probably heard talk of a hot springs to the west while in the Despair Town. Head west to get there. |
| People feel much stronger here, and no one knows why a comfortable place like this exists in a world so full of despair. Search the dressers for a Piece of Cloth and a Wing of the Wyvern. When you're ready, stand in the line forming to enter the hot springs. |  |
 |
The current will sweep you north and then east. |
| Instead of continuing to follow the current, once you get past the rock, try heading southwest, and you'll fight the current somewhat. Aim for the opening that you'll see and head inside. |  |
 |
Inside the cavern, you'll find a well. Examine it. |
| You'll repair in the Real World. However, all of your stats are still in the same horrible position. Take Pegasus up north to Zaxon Village. |  |
 |
Show the Rusted Pipe to the dog standing in front of the building. It'll recognize it and lead you inside. |
| Ende's wife will realize that Ende has sent you here. |  |
 |
She'll give you Ende's Tools which will cheer Ende right back up once you show them to him. Now leave Zaxon and head back to the Dark World and to Despair Town. |
| Talk to Ende, and he'll ask if those are his tools. Give them back to him, and he'll be much happier. Also, he'll ask if his wife is still alive. Tell him that she is, and he'll be very happy to hear that. |  |
 |
Before you leave, Ende offers to make you a piece of equipment. I strongly suggest getting the Helmet over the others. Once you have decided, he'll ask you to rest. |
| When you wake up the next morning, the equipment piece you wanted will be next to the bed. After grabbing it, leave Ende's home. |  |
 |
Ende's cheerfullness has restores life to the village and you too for that matter. Your Hp, Mp, and stats are fully restored. |
| The villagers also learn how to leave this world whenever they want too. Your work here is done. Note: You should have 90 Small Medals now. |  |
Masarl's Great Treasue
|
Head east then north from Despair Town to reach the aptly named Greed Town. |
|
 |
The lady at the entrance has very good advice- don't trust the locals. Search the town to find a Beauty Plant, a Nut of Life, Armband of Sacrifice, |
| You'll find the great sage's robe in one of the northern houses of Green Town, but the owners aren't willing to part with it. |  |
 |
In Morgan's house, you'll learn that he has some information about treasure but doesn't seem to want to tell you about it just yet. Also, make sure to check out the casino here- it has some very nice items. |
| When you're done with everything else, head to the mine at the back of the town. |  |
 |
This dungeon is really very short. First head all the way to the east and then south for a Strength Seed. |
| Next head to the northeastern corner then head south and down the stairs. |  |
 |
Head west, past the chest which is a Mimic and then head north and up the passage. |
| Head all the way east then south and down the stairs. |  |
 |
Follow the path to reach a chest with a message inside. After reading the message, head back to Greed Town and talk to Morgan. Note: You MUST find this note before you can continue. |
| Morgan will offer to tell you the location of Masarl's treasure for 5000 Gold. Decline his offer both times. Now leave Greed Town. |  |
 |
Head west of Green Town and into the center of this forest. |
| In the forest, you'll find people crowded around the lake. |  |
 |
Talk to the young man on the left and agree that you'd also sell your soul to the Demon King for the treasure. Suddenly, the water in the lake will drain, and everyone will rush in after the treasure. |
| Head down the first ladder. Now: make sure you take the far path- if you go down any of the ladders next to people, someone will die and once you get to the chest, time will reset, and you'll have to do this event over again. |  |
 |
At the bottom, open the treasure chest. |
| The chest is empty, and all the people suddenly realize what they were doing. |  |
 |
The old man states how everyone was blinded by greed and almost killed each other. Everyone leaves back to Greed Town. After they leave, search the chest again to reveal a secret staircase. First though, head back to Greed Town. |
| The owner of the Dragon Robe is very thankful for what you've done for the town and lets you have the robe. | 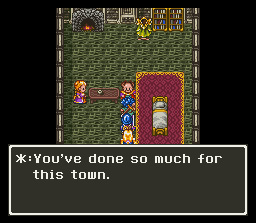 |
 |
Walk up and grab the Dragon Robe. Leave Greed Town and take that hidden passage in the forest to the west. |
Imprisoned
| Head north once in the underground passage. |
|
 |
Head west and grab this chest for a Medical Herb. |
| The exit is up the stairs to the north. |  |
 |
As you head north, stop by the well and talk to the old man to be completely recovered. |
| Your destination is this castle in the northeastern area. | 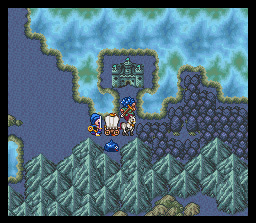 |
 |
Once in the castle, you'll notice this fine and upstanding citizen doesn't like you. He can't let you inside of the prison he's guarding so he decides to send you to hell instead. Fun fun fun. |
| Sorrow Giant: The Sorrow Giant is just plain annoying. It's attacks can do around 200 damage. He can also summon mist to make it so no one can cast spells. If you're leveled absurdly/have a level 14 or so Metal Babble, cast Madante to do him in quickly. Otherwise, attacks like Grand Cross, GigaSpark, and GigaSlash do quite a bit of damage to him. Most spells only do around half or so damage to him so try to stick with physical attacks. |
 |
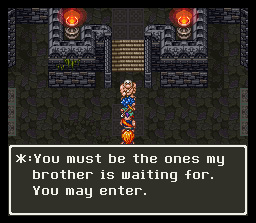 |
After beating the Sorrow Giant, it'll let you pass. If you continue on, you won't be able to leave the prison for a while so I recommend saving before going in. |
| Talk to the second giant, a voice will tell him to let you inside. He'll give you the Prison Key and ask you to defeat Akbar, the ruler of this place. |  |
 |
Once inside, you'll be escorted by the guards. |
| And promptly thrown into the dungeon. |  |
 |
However, you have the Prison Key so you can escape now. Head north over the lava by casting Stepguard (if you have it) and go down the stairs. |
| Grab the Small Medal from the pot and talk to the guard. He'll reveal that he's General Soldi. |  |
 |
After explaining how he got here, he'll give you 4 Soldier's Unfiorms (heh) to help get you through the prison. Use them to switch into the uniforms. Now leave the room. |
| Now head to the southwestern corner and head up the stairs. |  |
 |
Welcome to the uh... Prison Town. Use the Soldier Uniforms again to take them off. Seach around to find a Chain Sickle, an Agility Seed, a Nut of Life, and a Small Medal. |
| You'll also meet a guy researching how to make Seeds of Power. Interesting... Anyways, put on you Soldier Uniforms to leave the Prison Town. |  |
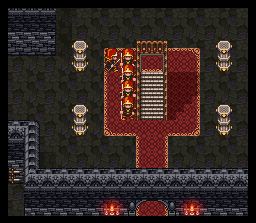 |
The castle has some pretty nice items- search around to find a Nut of Magic, |
| Upstairs, you'll find Dogma. Your soon-to-be worst enemy. | 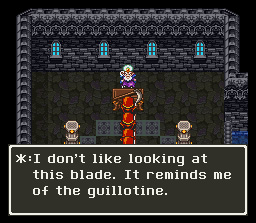 |
 |
Upstairs you'll find Akbar's chamber, but you can't get inside because of the soldier blocking it. Pity. |
| Head east and up the tower. Search the tower floor to find an often missed Small Medal. If you don't get it now, you won't be able to get it later. |  |
 |
Head west of Akbar's chamber and down the stairs to reach these 3 chests. Cast Stepguard if you have it and open them for a Small Medal, 4800 Gold, and a Shield of Ruin. Now head back down to the Prison Town. |
| Talk to Lee in the bar, and you'll tell her that Sister Anna is to marry Akbar tomorrow. |  |
 |
Lee will thank you for the information and ask if you plan to fight Akbar. Tell her that you do. She'll tell you to speak to the shopkeeper. |
| The shopkeeper will tell you to speak to Gon in the lower right corner. |  |
 |
Talk to Gon, and he'll let you pass. |
| The shopkeeper will tell you it's rather futile to try to beat Akbar, but he'll offer you some wine if you don't tell the soldiers about him. He tells you the wine in the right barrel is 'special.' Now try to leave. |  |
 |
As you walk down, 3 soldiers come into the town. They say it's time to execute another prisoner. |
| As he's placed in the guillotine, Gon tells you to do something about it- he can't since he has a wife and kids to take care of. The guards decide that you should join the man in his execution. |  |
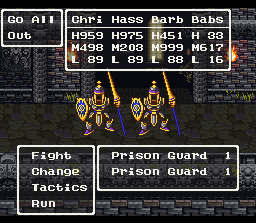 |
Prison Guard x2: This battle is really easy- all the Prison Guards do is attack. Just make sure your HP doesn't fall too low and keep pounding away. |
| After you beat the 2 Prison Guards, the other 3 try to attack you, but suddenly Dogma and Zozogel decide to interrupt and end you. |  |
 |
Dogma & Zozogel: This battle is literally impossible- well, maybe not. If you spend time trying to completely level up a Metalbabble, chances are, you're strong enough to beat them. The trick is to do it in under 7 rounds- on the 7th, Dogma will paralyze the entire party ending the battle. Here's the trick- begin the battle with Barbara and a Metal Babble casting Madante- this will kill Zozogel and should do around 2200 damage to Dogma. Now have the Hero cast Bikill on Hassan and have him use Powerup. Have Hassan do a Powerup-Spirit Punch and have the Hero do the same while Barbara and the Metal Babble attack. If the punch hits, it does nearly 2000 damage. |
|
R0x0r. You'll get 1500 exp for winning. |
 |
 |
Yet somehow, in your brutal beatdown on Zozogel and Dogma, you'll lose. Aw nutbunnies. I'm not dead... |
| You're thrown back in jail, and your uniforms and key are confiscated. Well bah. |  |
 |
However the next morning, the wine has taken it's toll and knocked out most of the guards. Gon and some of the others kill one of the soldiers and take the key and release you. Now head upstairs. |
| Upstairs, you'll meet Tonra of the rebel army. He'll say that your bravery has inspired the rebels to finally revolt. Tonra will ask you to take care of Akbar while they take care of the soldiers. |  |
 |
Tonra will then give you 4 Seeds of Strength and your Prison Key. Now head upstairs to Akbar's chamber. Before heading inside, you'll run into Zozogel again. If you want to fight him, talk to him. |
| Zozogel: The same guy as before. This battle is rather easy- just have a Bikill-PowerUp-Spirit Punch combo, and Zozogel will fall in no time. He does have a tendency to kill Metalbabbles rather easily though. Also, try to conserve your MP. |
 |
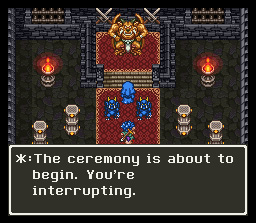 |
Akbar is rather happy to see you here as he can supposedly prove how the 'prophecy' isn't true. He and his guardians will attack. |
| Akbar & Guardian x2: Begin the battle by casting StopSpell on Akbar so he won't be able to revive the Guardians. Take them out as soon as possible. Akbar falls really quickly to a Bikill-PowerUp-Spirit Punch combo. |
 |
Masarl's Brother
| After beating Akbar, everyone will be glad that you've saved them. All the soldiers have disappeared too. Now head downstairs to the dungeon. |
|
 |
Head to the backroom and talk to Soldi. |
| Go to Masarl and undo his chains with the Prison Key. After freeing Masarl, you'll learn that he can no longer see and that he actually is Krimut- Masarl's younger brother. Masarl has been taken across the Sea of Nothingness. | 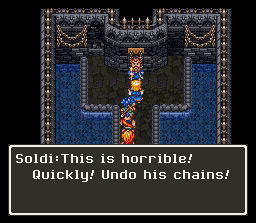 |
 |
Krimut will give you the Orb of Truth and tell you to use it in the Sea of Nothingness to reveal the way. |
| Krimut will then fall asleep. Talk to Soldi, and he'll mention that he knew you weren't an ordinary person from the start. He'll then leave. Head outside the dungeon. |  |
 |
After a night of celebration, Deathtamoor gets rather angry. Obviously someone's upset that he wasn't invited. |
| So Deathtamoor goes and petrifies people and turns the others into dogs and cats. The heros and Krimut are fine though. Go back downstairs and talk to him. | 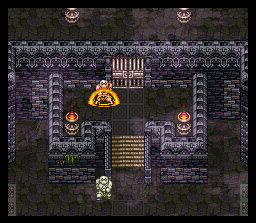 |
 |
Krimut shielded himself from Deathtamoor. As you try to leave, he reminds you that you are the only hope. Now leave this town. |
| Head west and follow the dirt path and use the Orb of Truth at the end. |  |
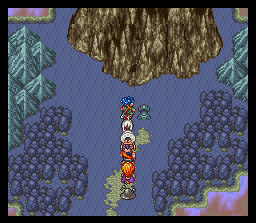 |
You'll arrive on this island. Head north and into the shrine. |
| Inside, you'll see a monster corpse and a staircase. Head on downstairs. |  |
 |
Head north, and you'll see Masarl surrounded by spikes. Talk to him to find out he's resting. |
| Suddenly, you'll enter Masarl's mind. He's having to watch his brother's execution over and over again until he pledges his loyalty to Deathtamoor which he refuses to do. Now leave the shrine. |  |
 |
Tell Krimut you found Masarl, and he'll join you. Now head back to the shrine Masarl is being kept in. |
| Krimut is glad to see his brother and is able to enter his mind to attempt to tell Masarl that he's there. |  |
 |
Masarl begins to give in right when Krimut enters. |
| Needless to say, the demons inside Masarl's head aren't too pleased that you're interfering. |  |
 |
Zuikaku & Shoukaku: Use Sap to lower Shoukaku's defense so his 4000 HP will disappear faster. Zuikaku has a rather high defense. Overall, a nice Bikill-PowerUp-Spirit Punch combo will do in Zuikaku and Shoukaku in no time. Just beware of their attacks that hit the entire party. And don't accidentally go in with 0 MP on your spell casters like I did. |
| Masarl will be freed from his nightmare after you defeat the bumbling demons. Krimut will remove his chains, and they'll kindly have you WALK across the spikes again to talk to them. |  |
 |
Masarl will explain that you are currently below Deathtamoor's castle. He'll tell Krimut it's time for them to combine their powers. |
| By using their powers, Masarl and Krimut are able to destroy the mountain that Deathtamoor's castle rests on, and the castle falls to the ground. |  |
 |
Now it is time to enter the castle... |
The Demon King Himself
| Now head north of the Sorrow Dungeon and enter Deathtamoor's Castle. You're going to want to have your levels in the mid 40's, a mastered Superstar and a mastered Hero. Without Superstar mastered, the last fight will be MUCH more difficult. I recommend also spending time to grab a Lamp Demon- they are well worth it and are the only monster other than a Healer that can learn HealUsAll. Lamp Demons can become absurdly powerful too, so one will greatly help. Make sure to have either Hassan or Terry in your party for some Bikill-PowerUp-Spirit Punch action. You'll be able to access your main party and the people in the wagon throughout the dungeon. |
|
 |
Once inside, head north up the stairs and through the door. |
| Once again, head north and up the stairs. |  |
 |
On the next floor, you'll see these arrows which will move you. Walk north onto the first set, and it'll take you further up. Now, step on the 3 arrows point right. |
| Hit the switch and the moving arrows will disappear. Now head north. |  |
 |
You'll run into this area with the 4 sets of moving arrows and a staircase leading down. Head down the stairs first for a chest with a Small Medal. Take either of the left arrows to continue. |
| Head north and take the arrows facing up. Grab the chest for a Demon Spear and take the arrows leading back down. |  |
 |
If you need to heal, hit the switch to deactivate the arrows. Head north and up the stairs. |
| Walk onto the circle to recover your HP and MP then head back downstairs. Step on the switch again to reactivate the arrows and step on the ones to the upper-right. |  |
 |
Take the stairs up to the next level. |
| The springboards on this level launch you 5 spaces in whatever way they're facing. If you take the lower left path, you'll reach a chest with a mimic. Following the path puts you back on the startign platform. Head north and take the middle springboard to the left. |  |
 |
Take the northern-most left facing springboard to avoid being launched into the pit. |
| Head west then north and take the upper springboard to land on this platform. If you take the springboard facing to the right, you'll be able to nab the Golden Tiara. Work your way back to the platform after getting the Golden Tiara and go down the stairs. |  |
 |
Hit this switch, and the platform will levitate up. Head back upstairs then across the pit via the springboard. Head up the stairs to the north. |
| Head all the way north and through the door to continue. |  |
 |
Take the northern-most door to get out of this area. Make sure to grab the northern chest for a Book of Dragons. |
| This next area is a rather annoying maze. You can't see any of the walls until the lightning strikes. To get through here, follow the following path: head all the way left, all the way north, all left, all south, all left, all north. If you want 3 chests with a Mimic, the 99th Small Medal, and a Princess Robe inside, head all the way right, all north, all right, all south, all right, all south. Return to the junction and this time head all left, all north, all right, north until you can head right, then north, right, down, right, and all north and through the door to exit. If you want the Metal King Sword, head all right, up, and then all left instead of going north through the door. |  |
 |
Follow the path all the way around, and prepare for your final encounter. |
| If you're ready to take on Deathtamoor, head through the door. If you aren't, cast Outside and do whatever you need to then come back here. Once you go in, there's no turning back. |  |
 |
Before we go on in, here's my party setup. |
 |
Head inside the door, and you'll reach this rather chaotic place. Head down a bit, and you'll fall to the path below. Follow it to the left then climb up the ladders. |
| Deathtamoor floats above and gives you a nice little speech. The Demon King is a pink old man eh... |  |
 |
Deathtamoor: Well, here he is. Deathtamoor's attacks are really quite brutal. He can throw the orbs to do a whole lot of damage- 150+. His physical attacks aren't too much really. You'll need to have someone use Hustle or HealUs every round to keep your HP high. You'll NEED a Healer or a Lamp Demon for HealUsAll since the damage can begin to catch up with you rather easily. Try to use Gigaslash since it'll do quite a bit of damage to Deathtamoor. Also, spells won't be overly useful against him since he likes to cast Bounce. Deathtamoor is too fast for Spirit Punch which knocks out the Bikill-PowerUp-Spirit Punch technique. Remember to rotate badly injured characters out of the party so you can keep everyone functioning. |
| After Deathtamoor is defeated, a voice comes out of no where and states that you just beat up an old man. The two orbs begin to draw closer. |  |
 |
Then they merge as Deathtamoor reveals his true form. |
| Deathtamoor: Eh, didn't think it would be that easy did you? You can't shrug Deathtamoor's physical attacks off anymore- they do a whole lot more damage than last time. Cast Increase to launch up your defense. This time, Deathtamoor isn't as agile so the Bikill-PowerUp-Spirit Punch technique will do wonders. I found this battle to be MUCH easier than the last since Spirit Punch will hit. |
 |
 |
Well, good thing Deathtamoor was just playing with us. I was wondering why he was so weak. |
| Now Deathtamoor doesn't need a silly body to kill us, so he ditches it and comes back at you with his ugly mug and his hands. |  |
 |
Deathtamoor, Left Hand, Right Hand: Deathtamoor's Left Hand will revive any fallen body part so take it out first. Your next target is the Right Hand which will revive Deathtamoor if you kill him before the hand. Now Deathtamoor is a whole lot meaner- he uses the strongest magic and physical attacks this time. Bring Barbara in to use Madante which can do a whole lot of good. The Hands can fall to the Bikill-PowerUp-Spirit Punch technique, so you can use those on them if you wish. Deathtamoor can cancel out all the spells you cast too which can become quite annoying. He also is able to use high level breath weapons, so you'll need to be prepared to deal with those too. Deathtamoor has a nasty tendency to put your characters to sleep also. If Barbara's MP is high enough, she can end this battle in one round by casting Madante. (at 999 MP, she can do 3000 damage which kills all the parts) |
| Deathtamoor is stunned that you were able to defeat him. He promptly dies. Now sit back and enjoy the ending. |  |
The Bonus Dungeon
| Things probably didn't seem to be adding up- you only have 99 Small Medals, and Terry found something strange in the ending. What does this mean? Well, if you did an all natural save before killing Deathtamoor, you can now uncover the Bonus Dungeon. See the item Terry saw in the ending? Well that cave is the Amoru Cave in the Dream World. |
|
 |
Head right there, and search where Terry was exploring to find the Book of Babbles which opens up the last job- Metal Babble. |
| This is the class- very nice defense, low HP and Attack. Get the Metal Babble class to level 5 then return to the Dharma Shrine. |  |
 |
If you have every job at at least level 5 between the members of your party, you can break the seal in the torch room in Dharma Shrine. |
| A door will appear in the back of the room. Head inside and go down the stairs. |  |
 |
Welcome to the Bonus Dungeon. The Bonus Dungeon is made up entirely of rooms from previous dungeons and is chock full of the nastiest monsters in the game. In this first room, you'll find the exit in the southwestern corner and a chest with the 100th Small Medal is on the eastern side. |
| Head south then west on the next floor. |  |
 |
Grab the chest for a Strength Seed then head on south. |
| Follow the path and grab the chest for a Defense Seed. Then head back down and west and head down the stairs. |  |
 |
Once on the next floor, head south then take the southeastern path and follow it until you reach a 4-way junction. |
| At the junction, head west, north, then west and follow the path until it leads you to some stairs leading back up. Head up those stairs. |  |
 |
On the next floor, first head east and grab the chest to get Mystic Armor. Head back across the bridge to the west and head north. |
| Now head all the way north and through the cavern exit. |  |
 |
On this floor, just head all the way north and through the large cavern to exit. |
| You'll appear in... Lifecod? |  |
 |
The Elder comes out and thanks you for bringing him the Spirit Crown and says he has to prepare for the ceremony (from way back at the beginning of the game). Something's very wrong here. Search around town to find 4 Gold, Small Medal x2, and an Echoing Hat. |
| This place is a bad mix of the Dream and Real World Lifecods. The Bazaar and Spirit Crown don't exist in the real world, but you were found wounded on the cliff and taken in by Tania like in the Real World. | 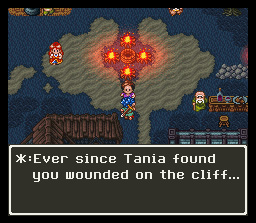 |
 |
Head to your house since you can't really go anywhere else and talk to the woman there. Answer yes. |
| She'll show you the real appearance of this village- that of one populated entirely by monsters! | 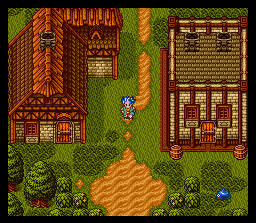 |
 |
You are now in Deathcod. Pleasant place. |
| Talk to the demon upstairs in the pub. It'll tell you that it buried its treasure in Calcado and tell you how to find it. Unless you talk to the demon, you won't have access to the treasure. |  |
 |
Taloon sure has gotten older since Dragon Warrior IV. |
| Yet another Dragon Warrior IV reference. If only they made unique sprites for them too. |  |
 |
In the basement of the elder's house, you'll find Sancho, and the 1st Hero's kids. They're searching for their parents who have been turned to stone and have a staff to return them to normal. That's that for the Dragon Quest V reference. Search the well to leave Deathcod. Also note, you can now cast Return to reach Deathcod so you won't have to go through the 1st half of the dungeon anymore. On another side note, you can buy some Books of Dragons here for 30000 Gold each. A bit steep, but it's worth it. |
| In the next floor, head all the way north and through the cavern. |  |
 |
The next room is just like Mudo's dungeon all over again. If you head all the way north, you'll reach the 2nd part of the room. |
| Heading west then down will get you a chest that's a Mimic. | 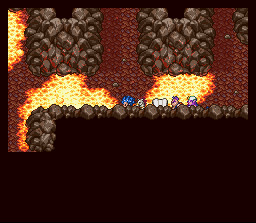 |
 |
Heading all the way north and entering the small room will get you a chest with a Shield of Strength inside. |
| Take any of the stairs except for the one in the northeastern corner up. Walk all the way north then down the stairs. |  |
 |
You'll find this small room. Head to the northern corner. |
| You'll find a Ruby of Power on this tombstone. |  |
 |
To continue on, head to the northeastern corner of the first floor in the second room. Head east and go up the stairs. |
| Head all the way south and go up the stairs. |  |
 |
In the next floor, head north until you reach this junction. Head west. |
| Head north and go through the cavern. |  |
 |
Head north, and you'll reach this junction. First, head east. |
| Head east and search the skeleton for a Small Medal. Head back west to the junction. |  |
 |
Now this time, head north and go up the stairs. |
| Now you'll be in the summoning room from Castle Grace. Before heading through the double doors, head east. |  |
 |
Go through the door to grab the Angel's Leotard. Now head through the double doors. Make sure you're healed up before continuing. |
| Head north and onto the platiform and meditate. |  |
 |
Dark Dream, the one that destroyed Castle Grace will appear. He says that no one controls him and attacks. Your level should be in the low 70's before trying this. |
| Dark Dream: If you want to truly win this battle, you have to do it in less than 20 rounds. Dark Dream can attack up to 3 times a round and with brutal attacks. He can hit everyone for about 200 damage with some of his attacks and up to 300 on a single person. He'll frequently use Grand Cross and Wind Attack to do quite a bit of damage. The trick to this is having the Echoing Hat equipped on your healer so every round you can cast HealUs twice a round. You could also have a Healer or Lamp Demon cast HealUsAll every round. Use the Bikill-PowerUp-Spirit Punch technique to do a whole lot of damage. Bring in anyone with Madante to do a lot of damage quickly. |
 |
 |
After beating him, Drak Dream will be very impressed by your power. He'll offer to do a job for you- one that you'll appreciate. Also, in the new ending, if anyone can tell me if what Terry is doing is of any significance, I'd appreciate it. |
CREDIT:
แนวทางการเล่น
WALKTHROUGH/GUIDES
-
 Dragon Quest 6 [By Zande]
 -
 Dragon Quest 6 [By X`mas]
 -
 Dragon Quest 6 [By rpgclassics.com]
 -
 Dragon Quest 6 [By Decibel per oxide]


